Why the Rebrand?
After proudly serving our customers for over 20 years, we at Turfworld are excited to unveil a fresh new look! Our family-run business has built a reputation for quality and reliability. While our trusty turf roll logo has served us well, it’s time to embrace a modern image that reflects the high-quality, professional service you’ve come to expect from us.
At Turfworld, we’re passionate about producing premium turf that meets the highest standards of quality. Whether you’re laying a lawn for a family garden or a professional project, you can trust that every roll we deliver will exceed your expectations. Our reliable and unmatched delivery service spans the entire UK, making it easier than ever to transform your outdoor spaces.
TW Aggregates
The rebrand also extends to our sister company, TW Aggregates, which now features a matching look to reflect our shared commitment to excellence. From decorative aggregates and sub base materials to fence posts and gravel boards, TW Aggregates offers an extensive range of landscaping essentials. Products are available in bulk bags or loose loads, and our dedicated fleet of rigid, artic, and tipper lorries ensures efficient delivery to your doorstep.
Together, Turfworld and TW Aggregates are here to meet all your garden and landscaping needs. With our refreshed branding, we’re looking to the future while continuing to provide the same trusted quality and service that’s been at the heart of our businesses for over two decades.
Thank you for growing with us – we can’t wait to see what we create together!
How To Remove Mushrooms Off Your Lawn
Mushrooms on lawn causing you frustration and compromising the beauty of your outdoor space? You’re not alone.
Many homeowners grapple with this issue. In this detailed guide on how to get rid of mushrooms on your lawn, we’ll explore effective strategies to tackle this problem head-on.
From identifying the types of mushrooms to understanding the reasons behind their appearance, we’ll leave no stone unturned.
You’ll learn about natural removal methods, chemical control options, and proactive measures to maintain a lush, mushroom-free lawn.
Whether you’re a gardening enthusiast or a homeowner seeking solutions, this guide is your roadmap to a picture-perfect lawn without the intrusion of those unwanted fungi.
Let’s embark on this journey to reclaim your lawn’s pristine allure. Discover the insights and techniques you need to create a mushroom-free haven right in your own garden.
Understanding the Mushroom Problem

Identifying Lawn Mushroom Types
Before we delve into the removal process, it’s essential to identify the types of mushrooms in your lawn.
Not all mushrooms are harmful, and some can even be beneficial. Let’s discuss common varieties and how to differentiate them.
When it comes to lawn mushrooms, there are three primary categories you should be aware of:
1. Saprophytic Mushrooms: These mushrooms feed on decaying organic matter in your soil. While they may not directly harm your lawn, they can be unsightly. Common examples include the classic white button mushroom and the ink cap.
2. Mycorrhizal Mushrooms: These mushrooms form beneficial relationships with certain trees and shrubs. They can actually enhance your lawn’s health by aiding in nutrient absorption. Examples include the beautiful fly agaric and the chanterelle.
3. Parasitic Mushrooms: Parasitic mushrooms, like the lawn blister fungus, can be detrimental to your grass. They directly attack living plants and should be dealt with promptly.
To accurately identify these mushrooms, consider consulting with a local horticultural expert or using field guides specific to your region.
Why Mushrooms Appear on Lawns
Understanding the root causes of mushroom growth is crucial to effective removal.
Several factors contribute to their presence, and addressing these factors is key to keeping your lawn mushroom-free.
1. Moisture Levels: Mushrooms thrive in moist environments. Lawns that are overwatered or have poor drainage are more susceptible to mushroom growth. To combat this, ensure you’re watering your lawn correctly and addressing drainage issues.
2. Soil Composition: Certain soil types are more conducive to mushroom growth. Mushrooms love rich, organic soils. If your lawn soil is too rich in organic matter, consider amending it with sand or other materials to reduce fungal habitat.
3. Organic Matter: Mushrooms feed on decaying organic matter, such as thatch and dead tree roots. Regular dethatching and removal of organic debris can reduce mushroom growth opportunities.
Prevention is Key
Adjusting Lawn Watering Practices
Proper watering techniques are paramount to preventing mushroom growth. Many homeowners inadvertently create the ideal environment for mushrooms by watering too frequently or at the wrong times.
To prevent overwatering, consider these tips:
- Water Deeply and Infrequently: Instead of frequent shallow watering, aim for deep, less frequent watering sessions. This encourages deeper root growth and discourages surface fungi.
- Water in the Morning: Watering in the morning allows the grass to dry throughout the day, reducing moisture levels in the evening when fungi are most active.
- Invest in a Sprinkler System: A properly calibrated sprinkler system can help ensure consistent and efficient watering practices.
By adjusting your watering habits, you can significantly reduce the risk of mushroom growth in your lawn.
Improve Lawn Drainage
Inadequate drainage is a common contributor to mushroom problems. When your lawn retains excess water, it creates an ideal habitat for fungi to flourish.
Here’s how to improve lawn drainage:
- Aerate Your Lawn: Aerating your lawn helps water penetrate deeper into the soil and reduces surface runoff.
- Install Drainage Solutions: Consider installing French drains or other drainage systems in areas prone to pooling water.
- Raise Low Spots: If you have low-lying areas in your lawn, raise them to promote better water runoff.
Proper drainage not only prevents mushrooms but also contributes to a healthier lawn overall.
Reduce Organic Matter
Mushrooms thrive on decaying organic matter, so reducing their food source can be highly effective in preventing their growth.
Here’s how to reduce organic matter:
- Dethatch Your Lawn: Thatch is a layer of dead grass and organic material that can accumulate on your lawn. Use a dethatching rake or machine to remove it.
- Remove Dead Tree Roots: If you have dead tree roots in your lawn, they can serve as a breeding ground for mushrooms. Remove them if possible.
- Rake Up Leaves: Keep your lawn clear of fallen leaves in the fall, as they can become a source of organic matter for mushrooms. By reducing organic matter, you’ll create an environment that’s less hospitable to mushrooms.
Mushrooms on Lawn Natural Removal Methods

Manual Removal
Sometimes, the best way to deal with mushrooms is to get your hands dirty. Manual removal involves physically plucking the mushrooms from your lawn. While it may seem time-consuming, it can be an effective method, especially for small infestations.
To manually remove mushrooms:
- Wear Gloves: Some mushrooms can be toxic or irritating to the skin, so it’s essential to wear gloves when handling them.
- Use a Trowel: A small garden trowel or mushroom knife can be handy for carefully digging out mushrooms, ensuring you remove the entire structure, including the underground mycelium.
- Dispose Properly: After removal, dispose of the mushrooms in a sealed bag or container. Do not compost them, as this can reintroduce spores to your lawn.
- Monitor for Regrowth: Keep an eye on your lawn for any signs of mushroom regrowth and repeat the process as necessary.
Promoting Natural Predators
Nature has its own way of dealing with mushroom growth. Some creatures, such as slugs, snails, and certain insects, feed on mushrooms. By encouraging these natural predators in your lawn, you can help control mushroom populations.
To promote natural predators:
- Create Biodiversity: A diverse lawn ecosystem with a variety of plant species attracts different insects and animals that can help keep mushrooms in check.
- Avoid Chemicals: Pesticides and fungicides can harm these natural predators. Minimise chemical use in your lawn to protect them.
- Provide Shelter: Create habitats like rock piles or log piles where predators can find shelter and make your lawn their home.
Chemical Control Options
Fungicides
For more severe mushroom infestations, you may consider using fungicides as a last resort. Fungicides are chemical compounds formulated to control fungal growth. However, it’s essential to use them responsibly and selectively, as they can have environmental consequences.
- Consult an Expert: Before using fungicides, it’s wise to consult with a local gardening expert or extension service to identify the specific fungus and choose the appropriate fungicide.
- Follow Label Instructions: Always follow the manufacturer’s instructions for application, safety precautions, and disposal of chemicals.
- Limit Use: Use fungicides sparingly and only in the affected areas to minimise their impact on beneficial organisms.
Professional Help
If you’ve tried various methods and the mushroom problem persists or worsens, it may be time to seek professional assistance. Landscaping and lawn care experts have the knowledge and tools to tackle persistent mushroom issues effectively.
When considering professional help:
- Research Local Experts: Look for reputable local landscapers or lawn care services with experience in fungus control.
- Ask for Recommendations: Seek recommendations from friends, neighbours, or gardening communities to find trusted professionals.
- Get Multiple Quotes: Collect quotes from different experts to compare prices and services before making a decision.
Maintaining a Mushroom-Free Lawn

Regular Lawn Care Practices
Prevention and maintenance go hand in hand. Once you’ve rid your lawn of mushrooms, it’s crucial to maintain healthy practices to prevent their return.
- Mow Properly: Regular mowing at the appropriate height for your grass type helps maintain good air circulation and reduces moisture build-up.
- Fertilise Wisely: Avoid excessive nitrogen-rich fertilisers that can encourage fungal growth. Use balanced, slow-release fertilisers instead.
- Overseed as Needed: Patchy or thin lawns are more susceptible to mushrooms. Overseed to keep your lawn thick and resilient.
Vigilance and Consistency
Consistent monitoring and quick action are essential in keeping mushrooms at bay. Make it a routine to inspect your lawn for any signs of fungal growth. Remember that prevention is often more straightforward than cure.
- Regularly Inspect: Walk your lawn regularly, especially during wet seasons, to catch early signs of mushroom growth.
- Prompt Removal: If you spot mushrooms, remove them immediately using manual methods discussed earlier.
- Adjust Lawn Care: Modify your lawn care practices as needed based on the specific conditions of your lawn and local climate.
Mushrooms on Lawn FAQs
Q1: Are all mushrooms harmful to my lawn?
Not all mushrooms are harmful. Some are actually beneficial to your lawn’s health. It’s essential to identify the types before deciding to remove them. Refer to the “Identifying Lawn Mushroom Types” section for more details.
Q2: How often should I water my lawn to prevent mushroom growth?
The frequency of watering depends on various factors like climate and soil type. Generally, aim for deep, infrequent watering rather than frequent shallow watering to discourage mushrooms. For detailed guidance, see the “Adjusting Lawn Watering Practices” section.
Q3: Can I use household products like vinegar to get rid of mushrooms?
While vinegar is a popular DIY remedy, it’s essential to use it cautiously, as it can affect your lawn’s pH balance. It’s better to explore other natural removal methods first. For alternatives, see the “Natural Removal Methods” section.
Q4: What’s the best time of year to tackle mushroom removal?
Fall and spring are ideal seasons for addressing mushroom issues. The moderate temperatures and moisture levels make these times conducive for lawn care. For more information, see the “Maintaining a Mushroom-Free Lawn” section.
Q5: Are fungicides safe for pets and children?
It’s crucial to follow the manufacturer’s instructions and keep pets and children off treated areas until they are deemed safe. Consider safer alternatives if you have concerns about chemical use around your loved ones. For detailed guidance, refer to the “Fungicides” section.
Mushrooms on Lawn Conclusion
In closing, our exploration of mushrooms on lawn and the effective methods to address them has equipped you with the expertise needed to transform your outdoor space.
By understanding the various types of mushrooms, deciphering the factors leading to their appearance, and implementing proven removal techniques, you now possess the tools to create the immaculate, mushroom-free lawn you’ve envisioned.
Maintaining a beautiful lawn extends beyond aesthetics; it’s about cultivating an inviting outdoor retreat for yourself and your loved ones.
With the strategies outlined in this guide, you are fully prepared to restore your lawn’s natural allure.
Now, take action with confidence, bid farewell to unwanted mushrooms, and embrace the journey towards a captivating, mushroom-free lawn.
Your vision of a pristine outdoor space is not only attainable but also well within your grasp. Enjoy the rewards of a garden that’s free from mushrooms, where beauty and tranquility reign supreme.
Mastering Daisy Control: Your Ultimate Guide to a Flawless Lawn
The daisy, an innocent, charming, yet a relentless invader of your meticulously nurtured turf.
We’re diving headfirst into the intriguing conundrum of daisies invading our prized lawns. They’re like uninvited guests to a garden party, and we’re here to address this floral fracas.
We’ve unearthed potent strategies to wrestle back control from the daisy’s grasp. From precision mowing techniques to smart irrigation methods that keep your grass content and daisies at bay, we’re wielding a toolkit brimming with savvy solutions.
It’s time to roll up those sleeves, equip ourselves with knowledge, and bid those daisies a polite yet firm farewell.
Welcome to the ultimate guide to mastering common daisy lawn control and prevention. Let’s dive right in.
Getting to Know Daisies
The Daisy Dilemma: Identifying Common Daisies
A seemingly delicate delight that belies the complexities it introduces to our flourishing landscapes. Before we plunge into the intricacies of management and defence, let’s identify he various types of daisy.
- Bellis Perennis – The Resilient English Daisy Cast your gaze upon Bellis perennis, the English Daisy. Its diminutive size and vibrant petals – a symphony of whites and pinks – may win you over, but make no mistake, it’s a persistent perennial with an unwavering mission to dot your lawns with its presence.
- Leucanthemum Vulgare – The Quintessential Oxeye Daisy In steps Leucanthemum vulgare, the Oxeye Daisy, adorning the fields with its classic charm. The hallmark golden centre encircled by pristine white petals – a true emblem of the countryside. Yet, within your meticulously curated turf, it transforms into a tenacious adversary.
- Tripleurospermum Inodorum – The Deceptive Scentless Mayweed Ah, the Tripleurospermum inodorum, or the Scentless Mayweed, stands as the master of disguise. Often masquerading as a daisy, its white petals and sunny disposition give it away. However, beneath the surface, it’s an imposter worthy of attention.
- Glebionis Segetum – The Intriguing Corn Marigold Glebionis segetum, better known as the Corn Marigold, boasts sunny yellow blossoms that thrive in open fields. Yet, should it venture into your meticulously nurtured lawn, its once-pleasant presence transforms into a head-scratching predicament.
- Erigeron Annuus – The Showy Fleabane Finally, we encounter Erigeron annuus, the Showy Fleabane. With petals of pale purple surrounding a sunny core, it can indeed steal the spotlight. However, as a participant in your turf tapestry, it takes on a role you’d rather not assign.
Common Daisy Lawn Invasion

Understanding the Impact of Daisies on Your Lawn Ecosystem
Daisies, those charming botanical inhabitants, may appear as mere embellishments on your lawn’s canvas, but their influence runs deeper than their petals suggest.
As these resilient invaders stake their claim, they trigger a series of domino effects that reverberate across your carefully cultivated ecosystem.
1. Root Rivals and Below-Ground Brawls: Beneath the surface, a subterranean turf warfare emerges. Daisies vie for essential nutrients and moisture, casting a shadow over the grassroots of your beloved grass varieties. It’s a battle for survival, where the underdogs are not necessarily your grasses.
2. Biodiversity in Flux: The arrival of daisies often tips the scales, altering the intricate biodiversity of your lawn. While daisies bring their own unique charm, they can inadvertently edge out native plants and disrupt the harmonious balance that supports various insects, birds, and microorganisms.
3. The Water-Weed Conundrum: Picture this – your diligent irrigation efforts nurturing both grass and daisies alike. But hold on! Daisies have different water requirements, potentially outcompeting your grasses and leading to uneven growth. The result? A waterlogged war zone, where some thrive while others struggle.
4. Sunlight Scramble: Daisies, with their sun-loving disposition, may snag more than their fair share of sunlight, casting prolonged shadows that can challenge the photosynthesis prowess of your grasses. The result? An uneven distribution of sunlight and, consequently, a patchwork of growth patterns.
5. Wildlife Whims: Wildlife enthusiasts, beware. Daisies can be magnets for certain pollinators, diverting their attention from your grasses’ own floral offerings. While supporting pollinators is crucial, an imbalance may disrupt the pollination dynamic you’ve carefully nurtured.
When Do Daisies Appear?
These delightful flowers, often celebrated for their simplicity, follow a captivating rhythm in their appearance.
So, let’s dive right in and explore the timing and reasons behind the enchanting daisy displays gracing our lawns.
Spring’s Delightful Surprise: As winter relinquishes its hold, daisies seize the opportunity to make their entrance. Spring, with its gradual warming and rejuvenation, sets the stage for the first glimpses of these blooms. Watch for them as temperatures begin to climb, signalling the renewal of life after the colder months.
Summertime Blossoms: The sunny days of summer – a time when daisies truly shine. These floral stars dot our landscapes with their cheerful presence. As the sun extends its stay and the weather warms, daisies burst forth in a riot of colours, creating a picturesque scene that embodies the essence of the season.
Autumn’s Last Hoorah: Just when you thought their show was over, daisies return for an encore as autumn paints the world with its golden hues. These resilient blooms continue to grace our lawns even as temperatures begin to dip. It’s a reminder that nature’s beauty knows no bounds, even as we transition to cooler days.
But what orchestrates this botanical calendar? It’s a symphony of factors, from daylight duration to temperature shifts and microclimates specific to your area.
Control Strategies and Prevention Techniques

Manual Removal of Daisies
It’s time to tackle those persistent floral invaders head-on, armed with methods that put you firmly in control.
Method 1: Hand Pulling
Step into the role of the vigilant gardener as you embark on the age-old dance of hand pulling.
Armed with a trusty pair of gloves, grasp the daisies near the base and gently rock them back and forth, coaxing them from their grassroots grip.
While it’s a labour-intensive endeavour, it offers a direct and satisfying way to restore your lawn’s equilibrium.
Pros:
- Direct Removal: Hand pulling offers immediate and targeted removal of daisies.
- Low Cost: Requires minimal equipment and expense.
- Satisfying: Provides a hands-on approach for a sense of accomplishment.
Cons:
- Labour-Intensive: Can be time-consuming and physically demanding, especially for larger infestations.
- Incomplete Removal: May leave behind broken roots, allowing daisies to regrow.
Method 2: Dethatching
Unleash the power of dethatching to show those daisies who’s boss.
Using a dethatching rake, carefully comb through your lawn, targeting areas where daisies have set their roots.
This method not only tackles daisies but also breathes new life into your grass by allowing it to breathe and grow more vigorously.
Pros:
- Overall Lawn Health: Dethatching benefits the entire lawn by improving aeration and nutrient absorption.
- Selective Removal: Targets not only daisies but also other unwanted thatch.
- Promotes Growth: Encourages healthy grass regrowth after daisy removal.
Cons:
- Equipment Needed: Requires a dethatching rake or machine, which may be an added expense.
- Skill Required: Proper technique is essential to avoid damaging the grass.
Method 3: Trowel
For those who relish precision, the trusty trowel becomes your ally.
With surgical precision, dig around the daisy clumps, easing them out along with their tenacious roots.
It’s a meticulous approach that ensures minimal disruption to surrounding grass and sets the stage for your lawn’s triumphant comeback.
Pros:
- Precision: Trowel removal allows careful extraction of daisies without disturbing surrounding grass.
- Minimal Disruption: Preserves the overall aesthetics of your lawn.
- Root Removal: Ensures complete eradication of daisies and their roots.
Cons:
- Time-Consuming: Trowel removal can be slow and meticulous, especially for larger areas.
- Labour-Intensive: Requires bending and digging, potentially straining your back and muscles.
Method 4: Aerator
Enter the aerator – a heavy-duty tool that not only alleviates soil compaction but also gives daisies a one-way ticket out of your turf.
As the aerator’s hollow tines penetrate the earth, they create pathways for daisy removal, leaving behind aeration channels that benefit your grass.
Pros:
- Dual Benefits: Aeration not only removes daisies but also improves soil compaction and drainage.
- Time-Efficient: Aerator covers larger areas quickly.
- Prevents Regrowth: Aeration disrupts daisy roots and reduces chances of regrowth.
Cons:
- Equipment Needed: Requires an aerator machine, which might not be readily available.
- Surface Disruption: May temporarily leave holes or plugs on your lawn’s surface.
Method 5: The Sod Cutter Solution
In cases of widespread daisy infestations, the sod cutter takes centre stage.
This powerful implement slices through the turf, enabling you to lift and remove sections affected by daisies.
While it’s a more drastic measure, it’s a decisive way to reset your lawn’s canvas for a fresh start.
Pros:
- Complete Removal: Sod cutter provides a thorough and comprehensive removal of daisies and affected turf.
- Fresh Start: Allows for reseeding or replanting with new grass varieties.
- Efficiency: Ideal for extensive infestations or lawn renovations.
Cons:
- Invasive: Sod cutter removes a significant portion of your lawn, resulting in disruption.
- Labour and Equipment: Requires physical effort and access to a sod cutter machine.
- Grass Regrowth: Reseeding or replanting may be needed after removal.
Each of these manual methods comes with its own set of nuances and benefits, allowing you to tailor your approach to your lawn’s unique needs.
Remember, the key lies in persistence and precision.
By employing these methods, you take back control, one daisy at a time, transforming your lawn into a haven that flourishes under your watchful eye.
Chemical Chronicles: Herbicides and Their Role in Daisy Control
We’re delving into the intriguing world of herbicides and uncovering their pivotal role in restoring harmony to our emerald landscapes.
Understanding Herbicides: A Brief Prelude
Before we dive headlong into the specifics, let’s demystify herbicides.
These chemical warriors are meticulously formulated to target and eliminate undesirable vegetation, daisies included.
Now, let’s unfurl the scroll of knowledge and examine the dual-edged sword of herbicides in the quest for daisy control.
Selective Herbicides: The Daisy Whisperers
Enter the realm of selective herbicides – those ingenious concoctions that have mastered the art of discrimination.
These herbicides have an uncanny ability to differentiate between daisies and your cherished grass varieties.
With precision that would make a surgeon envious, they take out the daisies while sparing your grass, maintaining the integrity of your lawn’s aesthetic.
Pros:
- Precision Strike: Selective herbicides target daisies without harming surrounding grass.
- Ease of Use: Application is straightforward, making it accessible to DIY enthusiasts.
- Controlled Impact: Minimal disruption to the overall lawn ecosystem.
Cons:
- Specificity: Some selective herbicides may not effectively combat all daisy species.
- Persistence: Resistant daisies may require repeated applications.
- Environmental Considerations: Proper application is crucial to prevent runoff and non-target impacts.
Non-Selective Herbicides: A Swift Eradication
For those facing widespread daisy infestations, non-selective herbicides emerge as the heavy artillery.
These potent solutions aren’t picky – they eliminate any vegetation they come in contact with, daisies included.
While a more drastic measure, they pave the way for a clean slate, ready for lawn rejuvenation.
Pros:
- Comprehensive Removal: Non-selective herbicides eradicate daisies and other unwanted plants.
- Speedy Action: Rapid results with minimal effort.
- Blank Canvas: Provides a fresh start for reseeding or replanting.
Cons:
- Unintended Consequences: Non-selective herbicides can harm beneficial plants and soil organisms.
- Temporary Disruption: Requires time for affected areas to recover and new growth to establish.
- Precision Required: Careful application is essential to avoid damaging desirable plants.
Before embarking on the chemical crusade, it’s imperative to assess your lawn’s unique needs, as well as your comfort level with herbicide use.
Remember, whether you opt for selective finesse or non-selective vigour, herbicides are tools to be wielded with care and consideration.
Lawn Management Practices to Outshine Daisies

1. The Right Blade Height and Frequency
Think of your lawn as a living tapestry, and the blade height as the delicate balance between art and science.
The sweet spot lies around 2.5 to 3 inches (6.4 to 7.6 cm) – not too tall, not too short.
This height casts a gentle shade on daisies, curbing their sunlight supply without stressing your grass.
It’s a harmony that lets your lawn thrive while discouraging those persistent daisy invaders.
Now, let’s talk about the rhythm of mowing frequency. A consistent schedule is the conductor that orchestrates the symphony of your lawn’s aesthetics.
During active growth periods, aim to mow every 1 to 2 weeks.
By mastering the art of blade height and mowing frequency, you’re sculpting a lawn that defies daisy domination.
2. Watering Wisely to Thwart Daisies
Finding the equilibrium is key. Aim for a deep soak that reaches the root zone, about 6 to 8 inches (15 to 20 cm) beneath the surface.
This ensures your grass gets the hydration it craves, while leaving daisies parched and discouraged.
The morning hours, just before the sun stretches its rays, are your prime window for watering.
This early serenade allows your grass to drink deeply and dry off before evening, reducing the risk of prolonged moisture that can invite daisies and other unwanted guests.
Let’s debunk a common myth – shallow sips aren’t the solution. Frequent, light watering may seem nurturing, but it actually promotes shallow root growth, leaving your grass vulnerable.
Instead, opt for less frequent but deep watering sessions. This encourages your grass to reach down for water, growing stronger and more resilient against daisies’ advances.
Equip yourself with the tools of precision – a rain gauge or a trusty trowel – to gauge moisture levels accurately.
Before reaching for the sprinklers, ensure your lawn truly thirsts for it. Overwatering is not only wasteful but also counterproductive, potentially fostering daisy growth in waterlogged areas.
3. Fertilisation for a Daisy-Resistant Lawn
Imagine your lawn as a living entity, craving sustenance to thrive. Fertilisation is the conductor’s baton, directing a harmonious blend of essential nutrients to nurture your grass.
Nitrogen, phosphorus, and potassium take the lead, each playing a crucial role in fortifying your lawn’s resilience and fostering a robust root system that daisies can’t penetrate.
Spring and fall take centre stage as the prime seasons for fertilisation.
Spring awakening primes your grass for a vibrant growth spurt, while fall provides a final nourishing curtain call before winter’s slumber.
By aligning your fertilisation routine with nature’s cues, you’re setting the stage for daisy-resistant success.
Now, let’s talk dosage. It’s tempting to shower your lawn with excess nutrients, but beware the consequences.
Over-fertilisation not only fuels daisies’ growth but also disrupts the ecological equilibrium of your lawn.
Opt for a controlled approach, following recommended application rates and employing slow-release fertilisers that sustain your grass over time.
Embrace the symphony of organic fertilisers – nature’s own composition of nourishment.
Compost, manure, and other organic amendments enrich your soil and encourage a thriving microbial community beneath the surface.
It’s a holistic approach that not only fortifies your grass but also enhances the overall health of your lawn ecosystem, creating a hostile environment for daisies.
Going Natural: Eco-Friendly Approaches
Natural Alternatives to Combat Daisies
1. Hot Water Blitz
Picture this: a daisy-killing spa day, but for your lawn. Boiling water emerges as a formidable contender in the daisy combat arena. By pouring scalding water over daisy clusters, you’re delivering a heat shock that spells doom for these floral foes. It’s an eco-friendly option that’s as satisfying as it is effective.
2. Vinegar Victory
Enter vinegar – that household staple with a secret talent for daisy destruction. Its acetic acid prowess takes centre stage, wilting daisies and thwarting their growth. Mix vinegar with water, load it into a spray bottle, and embark on your eco-friendly mission to banish daisies.
Remember, though, that vinegar’s acidic nature can affect surrounding plants, so strategic application is key.
3. Boiling Baking Soda Blast
Baking soda, the humble kitchen ingredient, becomes a potent ally in your eco-friendly arsenal. Create a boiling baking soda solution, douse those daisies, and watch as the alkaline onslaught disrupts their equilibrium. It’s a chemical-free approach that sings harmony with the environment while sending daisies packing.
4. Corn Gluten
Ah, corn gluten – nature’s secret weapon against daisies. This organic by-product of corn processing emerges as a pre-emergent herbicide, disrupting daisy seeds’ quest for growth. Sprinkle it across your lawn, and let the corn gluten work its magic, stifling daisies’ ambitions and leaving your grass unscathed.
5. Sunlight Starvation
Embrace the power of darkness to thwart daisies’ dreams of sunlight. Cover daisy-infested areas with cardboard or black plastic, effectively denying them access to the life-giving rays. Over time, this natural light deprivation weakens daisies and paves the way for a grassy resurgence.
Harnessing Mulching to Suppress Daisy Growth
Mulching is nature’s solution to an array of gardening challenges. As we delve into its application, you’ll discover how mulching transcends mere aesthetics, becoming a powerful tool in your arsenal.
Introducing Daisy-Fighting Plants to Your Lawn
Strategic Suppression: Mulching vs. Daisies
Let’s get down to business – how does mulching deter daisies? By creating a physical barrier, mulch obstructs sunlight from reaching daisy seeds, effectively impeding their germination and growth. It’s a natural defence mechanism that plays to your advantage, disrupting daisies’ attempts to take centre stage in your lawn.
Mulch Materials: Unveiling the Choices
Now, let’s explore the diverse cast of characters that compose the mulching ensemble. Organic mulches, such as wood chips, straw, and shredded leaves, not only suppress daisies but also enrich your soil as they decompose. Meanwhile, inorganic mulches like gravel and stones provide a more permanent shield against daisies’ advances.
Mulching Method: The Grand Application
Prepare for a mulching spectacle! Apply a layer of mulch, about 2 to 4 inches (5 to 10 cm) deep, across the soil’s surface, ensuring it covers daisy-prone areas. Keep a comfortable distance from your grass stems to prevent moisture build-up and potential disease.
Remember, moderation is the mantra, as excessive mulching can lead to suffocated soil and unhappy roots.
Mulching Marvels: Beyond Daisy Suppression
The wonders of mulching extend far beyond daisy control. Mulch acts as a moisture regulator, reducing water evaporation and keeping your soil hydrated – a crucial factor in maintaining a lush and resilient lawn. It also helps insulate your grass’ root zone, providing a buffer against temperature extremes.
Creating a Daisy-Tolerant Lawn
Incorporating Flower Beds and Borders
The Flower Bed Symphony: A Dance of Diversity
Imagine a canvas alive with a symphony of colours, textures, and fragrances. Flower beds are the composers of this visual delight, offering a stage for daisies to shine alongside other captivating blooms. By integrating daisies within designated flower beds, you’re channelling their growth while celebrating their charm.
Strategic Positioning: Daisy Zones and Floral Frontiers
Let’s strategise – envision your lawn as a tactical battlefield, with flower beds serving as your allies. Position these beds strategically, bordering your lawn’s periphery or nestled within. By segregating daisies to these designated zones, you’re creating an equilibrium where they coexist without overpowering your pristine turf.
Companion Planting Choreography: Daisies and Allies
Daisies, like charismatic partners, thrive when paired with certain allies. Consider interplanting daisies with taller perennials or ornamental grasses that lend shade and competition. These companions not only add dimension to your flower beds but also outcompete daisies, preventing them from monopolising precious resources.
Edging Elegance: Borders as Guardians
Enter the guardians of your daisy-tolerant realm – borders. These defined edges create a visual boundary between your lawn and flower beds, asserting the territories of each. Mulch or decorative stones form the frontline, discouraging daisies from infiltrating your meticulously crafted floral oases.
Maintenance Mastery: Nurturing the Equilibrium
Nurturing your daisy-tolerant haven demands a symphony of care. Regular maintenance includes deadheading spent daisy blossoms, preventing seed dispersal, and monitoring for any signs of daisy encroachment. With diligence, your flower beds and borders will flourish, showcasing a blend of daisy allure and floral enchantment.
A Controlled Integration for Aesthetic Appeal
Strategic Placement: Daisies as Focal Points
Let’s set the stage – envision daisies as the focal points of your lawn’s grand tapestry. By intentionally placing daisy clusters in well-defined areas, you’re allowing their wild beauty to shine without overwhelming the landscape.
Think corners, edges, or even islands within your turf – these become the canvas for your controlled integration masterpiece.
Varietal Brilliance: Mixing Daisies with Diversity
Daisies, though stars of the show, flourish best in an ensemble cast. Introduce a variety of plant companions that complement their charm while infusing diversity into your lawn’s design.
Tall grasses, vibrant perennials, or even ornamental shrubs create a multi-dimensional tapestry where daisies take centre stage without monopolizing the spotlight.
Visual Pathways: A Guided Tour of Beauty
Now, let’s consider visual pathways – the guided tour your eyes take through your landscape. Strategically integrate daisies along these pathways, allowing them to enchant and surprise as you navigate your outdoor haven.
The controlled presence of daisies becomes a delightful discovery, enhancing the aesthetic journey.
Maintenance Mastery: Cultivating the Balance
Balancing controlled integration demands a touch of horticultural finesse. Regular maintenance involves deadheading spent daisy blossoms to prevent unchecked seed dispersal, ensuring your controlled integration doesn’t morph into a daisy domination.
Pruning and shaping your daisies also play a pivotal role in maintaining the desired aesthetic.
Common Daisy Lawn Control & Prevention Conclusion
And there you have it, fellow gardening enthusiasts, our exploration into the realm of daisy control and landscape mastery reaches its conclusion.
We’ve journeyed through the intricacies of identifying and combatting these persistent invaders, while also embracing eco-friendly approaches that align with the harmony of our natural surroundings.
Remember, gardening is an ongoing adventure, and your lawn is a canvas of endless possibilities.
By incorporating the insights gained here and infusing your own creative touch, you’ll be well on your way to cultivating a landscape that not only withstands daisy invasions but also flourishes with vitality and allure.
9 Common Lawn Problems And How To Fix Them
In this guide, we are going to tackle 9 common lawn problems head-on and uncover the secrets on how to fix these issues, to enable you to have healthy and beautiful turf.
Maintaining your lawn can sometimes be a challenge, with various issues popping up along the way.
We’ll address a range of common lawn problems, from dealing with weeds that seem to pop up out of nowhere to finding solutions for flooding that leaves your grass underwater.
Are you struggling with patchy areas ruining the overall look of your lawn? Don’t worry, we’ll explore ways to care for your lawn and bring back that seamless green carpet.
Is your lawn looking pale and lacklustre, yearning for a revival? We’ve got you covered with tips and tricks to restore its vibrancy.
And if pesky moss and weeds are causing headaches, fear not, as we’ll share methods to regain control.
So get ready to unleash your inner landscape virtuoso, as we embark on a quest to identify common lawn problems and how to fix them.
Let’s dive in!
Common Lawn Problems and How to Fix Them
Lawn Problem #1: Poor Growth in the Shade

Shade is nature’s own cooling canopy, providing respite from the scorching sun. But alas, its nurturing embrace can be a double-edged sword when it comes to our beloved lawns.
If you find yourself wrestling with lacklustre growth in the shadowy corners of your yard, fear not! We’re about to shed some light on this perplexing problem.
Shade-related challenges are like a dance with Mother Nature, where finding the right rhythm is key to nurturing your grass to its full potential.
One of the primary culprits behind poor growth in shaded areas is, you guessed it, a lack of sunlight.
When those sunbeams can’t quite reach your lawn, the grass begins to feel a little left out of the photosynthesis party.
But worry not, for there are ways to outsmart this shady situation!
Types Of Shade
First and foremost, let’s get to know the different types of shade. Not all shade is created equal.
Understanding whether your lawn faces light, moderate, or deep shade is crucial to devising the perfect plan of action.
- Light Shade: In light shade, where sunlight filters through the branches, you may have some luck with certain shade-tolerant grass varieties. Fine fescue and creeping bent grass are two contenders that can handle these gentle shadows with grace.
- Deep Shade: But if you’re dealing with deeper shade, where even grass struggles to thrive, it’s time to explore alternative ground covers or embrace the natural beauty of woodland plants.
Solutions
Shade mitigation techniques are here to save the day. You can strategically prune surrounding trees to allow more sunlight to seep through, creating pockets of radiant lawn amidst the shadows.
Additionally, consider lightening the load of tree roots with aeration, allowing your grass to breathe and grow.
Oh, and let’s not forget about the art of proper watering. Shaded areas tend to retain more moisture, so beware of overwatering, which can suffocate your grass and invite mouldy guests to the party.
Aim for a delicate balance, providing just the right amount of hydration to keep your lawn happy.
So there you have it, intrepid gardeners! With a dash of know-how and a pinch of perseverance, you can conquer the challenge of poor growth in the shade and transform those shadowy patches into vibrant, green sanctuaries.
Lawn Problem #2: Flooding Issues

When mother nature decides to unleash her watery fury upon your once-pristine lawn, it can leave you feeling like you’re navigating an unexpected waterworld adventure.
Fear not, for we’re diving headfirst into the depths of flooding issues to help you reclaim your land from the aquatic invaders.
Picture this: the skies open up, and torrents of rain pour down like a cascading waterfall, transforming your lawn into a temporary pond.
While a little rain is a blessing for thirsty grass, excessive water can wreak havoc on your turf, turning it into a waterlogged mess.
Solutions
The key to combating flooding issues lies in the art of proper drainage.
Let’s begin by identifying the villains behind the waterlogging. Poor drainage is often the chief culprit, causing water to accumulate instead of making a swift exit.
So, it’s time to become a drainage detective and assess the lay of the land. Look out for low-lying areas or depressions where water tends to pool. These are the prime suspects that require immediate attention.
- Gentle Slopes: One of the simplest solutions to tackle flooding woes is to incorporate gentle slopes into your landscape design. By grading the terrain away from your lawn, water will naturally find its way to other areas, sparing your precious turf from the underwater escapades.
- Strategic Landscaping: Don’t underestimate the power of strategic landscaping. Planting trees, shrubs, or bushes around your lawn can act as nature’s sponges, soaking up excess water and reducing flooding risks. It’s like having a green defence system against those pesky floods.
- Gutter System: Let’s not forget about the unsung hero of lawn care – the humble yet mighty gutter system. Ensuring your gutters are clean and free from clogs is a game-changer in directing rainwater away from your lawn. A well-maintained gutter can be the difference between a waterlogged lawn and a well-drained paradise.
For those seeking a more sophisticated solution, consider installing French drains or underground drainage systems. These underground marvels silently whisk water away, leaving your lawn high and dry.
But remember, prevention is always better than cure! Regular lawn aeration promotes healthy root growth and better water absorption, reducing the chances of flooding in the first place.
So there you have it – your flood-fighting arsenal to defend your lawn from the deluge.
Lawn Problem #3: Persistent Patchy Areas

These enigmatic bare spots that seem to play hide-and-seek with our green ambitions can leave us scratching our heads in bewilderment.
But fear not, for we are here to unravel the secrets behind these vexing patches and breathe new life into your turf!
Diagnosis
First things first – diagnosing the cause. These patches can be the result of a variety of culprits, so identifying the true villain is essential.
One of the prime suspects is compacted soil, which hampers grass growth and leaves behind those dreaded bald spots.
The soil’s compaction puts a stranglehold on root development, making it challenging for grass to spread its green wings.
Poor irrigation practices can also be lurking in the shadows, causing some areas to drown while others remain thirsty for hydration.
It’s like a hydration seesaw, and your lawn is caught in the middle.
And let’s not forget about the elusive invaders – pests and diseases.
These sneaky culprits can wreak havoc on your turf, leaving behind scars of their presence in the form of patchy destruction.
Lawn pests like grubs and insects, or diseases like brown patch and dollar spot, can leave your grass feeling like it’s under siege.
Solutions
We have an arsenal of solutions to reclaim your lawn’s uniformity and turn those patches into a distant memory.
- Aeration: Loosening compacted soil through aeration allows your grass roots to breathe and stretch, promoting better nutrient absorption and overall health. It’s like a refreshing spa day for your lawn!
- Fertilisation Regimen: And speaking of nutrients, a well-balanced fertilisation regimen can work wonders in nurturing your grass back to its full potential. Think of it as a gourmet feast for your lawn, delivering the essential nutrients it craves to thrive.
- Overseeding: Let’s not overlook the art of overseeding. Introducing new grass seed to those patchy areas can infuse fresh life into your lawn, filling in the gaps and creating a tapestry of green perfection.
Remember, timing is everything! Addressing patchy areas in the growing season gives your grass the best chance of bouncing back and reclaiming its rightful spot in the lawn ensemble.
So there you have it – your guide to tackling those persistent patchy areas, to maintain healthy grass like a pro!
Lawn Problem #4: Pale and Lacklustre Grass

The quest for a vibrant and exuberant lawn! But what do we find instead? A lacklustre canvas of pale, uninspired grass that leaves us yearning for that lush, green dream.
Fear not, for we hold the keys to unlocking the secrets behind reviving your lawn’s radiance and bringing back its colour crescendo!
Picture this: a lawn that once gleamed with verdant brilliance, now seemingly faded and dull. But worry not, fellow gardeners, for we are about to embark on a journey to restore the lost vibrancy of your turf.
Pale grass is often a tell-tale sign of underlying issues that warrant our attention. The chief suspect? None other than a nutrient deficiency.
When your lawn lacks the essential building blocks for growth, it’s like a symphony without its musicians – a far cry from the harmonious green melody you desire.
Solutions
So, let’s delve into the nutrient realm and unlock the secret behind those lush hues.
- Fertilisation Regimen: Nitrogen, phosphorus, potassium, and iron – these are the elemental superheroes your grass craves. A well-balanced fertilisation regimen, tailored to your lawn’s needs, can be the elixir of life for your fading turf.
- The Sun: But wait, there’s more! The sun’s dance with your lawn plays a significant role in this colour conundrum. If your grass is spending too much time in the shade, its photosynthesis party might be dampened, leaving it yearning for more light.
Pro tip: A little strategic pruning to let the sunshine in can work wonders for your lawn’s colour revival. Just imagine your grass basking in the sun’s loving embrace, soaking up its rays like a rejuvenating spa session!
- Compacted Soil: When your lawn’s soil becomes a tightly knit network, it becomes more challenging for your grass roots to explore and absorb nutrients, resulting in a faded facade. Enter the aerator! This trusty tool will loosen up the soil, providing your grass with room to breathe and grow, like a sigh of relief after a long day.
- Watering: Oh, and don’t forget the power of a good drink! No, we’re not talking about lemonade – it’s all about proper watering. Consistent and deep watering encourages your grass to stretch its roots and dive deep into the soil, sipping up those nutrients like a refreshing drink.
So, there you have it, the secrets to rejuvenating pale and lacklustre grass into a verdant masterpiece.
With the right nutrients, some sunshine love, and a little aeration therapy, your lawn will sing with vibrancy once more.
Lawn Problem #5: Moss and Weed Infestation
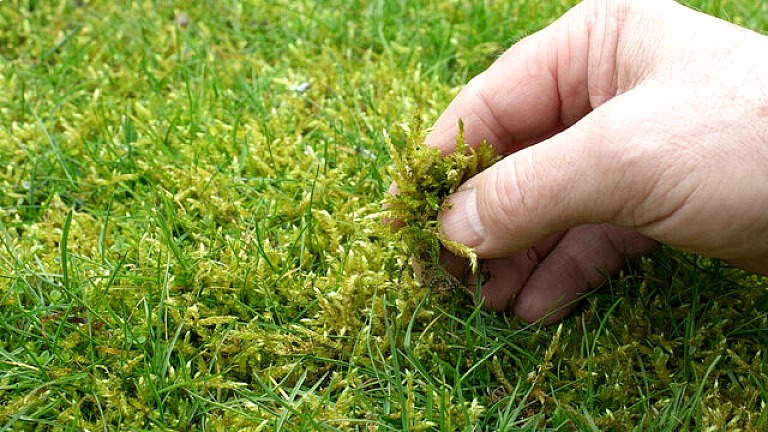
Moss and weeds, like uninvited guests, can crash your lawn party and leave you yearning for a weed-free utopia.
Fear not, for we are armed with the knowledge and tactics to reclaim your turf and restore its verdant glory!
Moss
Let’s address the first formidable foe, moss. This mysterious, velvety green invader thrives in damp and shaded areas, making it a persistent adversary.
But fear not, for there’s a silver lining! Moss is like nature’s messenger, signalling underlying soil and drainage issues that need our attention.
- Drainage & Sunlight: To bid farewell to moss, we must first address its preferred habitats. Improving lawn drainage and increasing sunlight exposure through strategic pruning can be a knockout combo.
- Soil pH Balance: The pH balance of your soil also plays a pivotal role in the moss-elimination dance. Adjusting the soil’s pH to a less acidic environment is like sending an eviction notice to the moss, making it less welcome in your lawn’s territory.
Weeds
Now, let’s set our sights on audacious lawn weed, sprouting like wildfire and stealing your grass’s spotlight. But worry not, for we have a range of strategies to keep those pesky invaders at bay.
Prevention is the name of the game! A thick, healthy lawn serves as a natural defence against lawn weed invasion.
- Regular Mowing: Regular mowing and proper fertilisation promote grass growth, leaving little room for weeds to take root.
- Mulch: And let’s not forget the power of mulch! Applying organic mulch around your flower beds and garden borders is like building a protective wall against weed intrusion. It’s like your lawn’s fortress, defending against the enemy’s advances.
- Hand Weeding: But if the weeds persist, it’s time to don your gloves and engage in some hand-to-weed combat. A little old-fashioned hand weeding can be therapeutic, allowing you to pluck those intruders from the ground and show them who’s boss.
- Herbicides: And for those who prefer a hands-off approach, fear not, for the arsenal of herbicides is at your disposal. Selective herbicides target the weeds while leaving your grass unscathed, like a precision strike against the enemy.
So there you have it – your guide to vanquishing moss and weeds from your lawn and reclaiming its green splendour.
With proper drainage, a pH dance, and a dash of prevention and combat, your lawn will emerge victorious in the battle against the green invaders.
Lawn Problem #6: Dealing with Thatch

Thatch, that mysterious layer of intertwined organic matter, can be both a friend and a foe to your lawn.
But fear not, for we are here to unravel the complexities of thatch and equip you with the knowledge to strike the perfect balance for a healthy, thriving turf.
Thatch is a natural accumulation of dead grass clippings, roots, and stems that form a protective blanket above the soil.
In moderation, it can be beneficial, serving as a shield against temperature fluctuations and conserving moisture. But when this organic layer becomes too thick, it transforms into a villain that wreaks havoc on your lawn.
Prevention
So, how do you strike that perfect balance? Let’s start with prevention!
- Regular Lawn Maintenance: Regular lawn maintenance, such as proper mowing and aeration, plays a pivotal role in keeping thatch in check. Mowing at the right height and frequency prevents excessive grass clippings from piling up, reducing thatch build-up like a pro.
- Aeration: Let’s not forget the power of aeration – a breath of fresh air for your lawn! Aeration pokes tiny holes in the soil, promoting oxygen flow to the grassroots and discouraging thatch accumulation.
Solution
But what if you find yourself facing a thatch conundrum? Fear not, for we have the tools to tackle this tangle.
- Dethatching: Like a gentle comb through your lawn’s hair, removes the excess thatch and frees your grass from its clutches.
- Fertilisation: But wait, there’s more! Don’t forget to feed your lawn’s appetite for the right nutrients. Proper fertilisation encourages microbial activity in the soil, aiding in the decomposition of thatch. It’s like inviting a cleaning crew to declutter your lawn’s hidden corners.
- Topdressing (Compost): Now, here’s a secret weapon: the power of topdressing. Applying a thin layer of compost or topsoil to your lawn enhances microbial activity, promoting thatch decomposition like a natural recycling program. But as always, moderation is key! Avoid excessive topdressing, as too much of a good thing can create new problems.
So there you have it – your guide to dealing with thatch like a turf pro! Embrace the art of prevention, dethatching when needed, and the magic of topdressing to keep thatch at bay.
With these strategies in your toolkit, your lawn will stand tall and thrive, free from the tangles of excessive thatch.
Lawn Problem #7: Pest Management

Welcome to the battleground of lawn defenders! Pests, those pesky intruders, can turn your once-idyllic lawn into a battlefield. But fear not, for we are the guardians of your turf, armed with knowledge and strategies to ward off these unwanted guests.
Picture this: a thriving lawn, a symphony of green, but lurking beneath the surface are pests on a mission to wreak havoc. So, let’s delve into the world of pest management and unveil the tactics to protect your lawn’s serenity.
Pest Identification
First and foremost, let’s identify the enemy! From grubs to insects and critters of all sizes, understanding your opponents is crucial in the battle against pests. Once we know our foes, we can devise targeted approaches for their defeat.
- White Grubs (Scarab Beetle Larvae): These C-shaped, cream-colored larvae feast on grassroots, causing brown patches in your lawn. To identify them, look for irregularly shaped dead patches that can be lifted like a loose carpet due to damaged roots.
- Chinch Bugs: These small, black-bodied insects with white wings prefer hot, dry conditions. Chinch bugs suck sap from grass, causing yellow or brown patches. Look for sunken, straw-coloured areas surrounded by green grass to spot them.
- Sod Webworms: The larvae of lawn moths, these caterpillar-like pests chew on grass blades, leaving behind irregular, brown, or bare patches. You might also notice small, silken tubes or moths flying low over your lawn.
- Armyworms: These hungry caterpillars can devour your grass quickly. They have distinct stripes along their body and move in groups, hence the name “Armyworms.” Keep an eye out for damaged grass blades and their presence during late summer and fall.
- Cutworms: These nocturnal caterpillars sever young seedlings at ground level. You may find seedlings toppled over or partially eaten. Look for them at night or in the early morning.
- Mole Crickets: These burrowing insects have powerful front legs for digging. They feed on grassroots and leave behind raised tunnels and loose soil on the surface.
- Ants: While some ants are beneficial, others can disturb your lawn. Fire ants, in particular, can create unsightly mounds and deliver painful stings.
- Billbugs: Adult billbugs are small weevils that feed on grass blades. Their larvae, known as grubs, feed on grassroots, leading to brown patches.
- Aphids: These tiny, soft-bodied insects suck sap from grass, causing stunted growth and yellowing. Look for clusters of aphids on the grass blades.
- Ticks: Ticks can hide in tall grass and attach themselves to pets or humans, potentially transmitting diseases. Check yourself and your pets after spending time in grassy areas.
Prevention
But here’s the secret to our grub control success: eco-friendly warfare! Gone are the days of harsh chemicals and environmental harm.
Integrated Pest Management (IPM) is our ally, employing a multifaceted strategy that includes prevention, monitoring, and targeted treatments.
Prevention is the first line of defence. It’s like a shield that fortifies your lawn against the enemy’s advances.
Regular lawn maintenance, proper irrigation, and healthy soil are the building blocks of a robust defence system.
Oh, and let’s not overlook the power of biodiversity! Welcoming beneficial insects and wildlife to your lawn creates a natural ecosystem that keeps pest populations in check.
It’s like recruiting allies to patrol your turf.
But wait, there’s more! Vigilance is our watchword. Regular monitoring helps us spot potential pest invasions before they spiral out of control.
Early detection is key, allowing for swift and targeted interventions.
Solutions
Targeted treatments, like a precision strike, focus on specific areas, minimising environmental impact while maximising effectiveness.
And let’s not forget about the power of biological controls! Beneficial nematodes and microbial insecticides are like our secret weapons, taking down pests without harming beneficial organisms.
It’s all about striking the right balance – protecting your lawn while preserving the environment.
We are the guardians of the green, ensuring a harmonious coexistence between your lawn and nature’s diverse inhabitants.
So there you have it – your guide to pest management like a true lawn defender!
Embrace the principles of IPM, prevention, and targeted treatments to safeguard your turf from the relentless pest invasion. With these strategies at your disposal, your lawn will thrive, free from the clutches of unwanted intruders.
Lawn Problem #8: Confronting Diseases

Diseases, like stealthy infiltrators, can cast a shadow on your once-vibrant turf. But fear not, for we are here to unmask these green invaders and equip you with the knowledge to mount a formidable defence.
Picture this: a lush and healthy lawn, a testament to your hard work, but lurking beneath the surface are unseen threats – lawn diseases, ready to unleash their havoc.
So, let’s delve into the realm of lawn diseases and discover the strategies to confront and conquer them.
Identification Of Common Diseases
First and foremost, knowledge is power! Familiarising yourself with common lawn diseases is the first step in combating these sneaky foes.
From dollar spot to brown patch and powdery mildew, each disease has its unique characteristics and vulnerabilities.
Early detection is our secret weapon! Regular monitoring of your lawn’s health allows you to spot the first signs of trouble.
Keep an eagle eye out for discoloration, wilting, or unusual growth patterns – these may be the tell-tale signs of disease presence.
- Brown Patch (Rhizoctonia blight): This fungal disease creates circular, brown patches on your lawn, ranging from a few inches to several feet in diameter. The patches may have a darker ring along the outer edge, giving it a “smoke ring” appearance.
- Dollar Spot: Caused by the fungus Sclerotinia homoeocarpa, this disease forms small, silver-dollar-sized spots on grass blades. The spots may merge to create larger patches, and the affected blades may have distinct tan or bleached lesions.
- Powdery Mildew: This fungal disease creates a powdery white or grey coating on grass blades, often in shaded and humid areas. The affected grass may appear stunted and distorted.
- Fairy Rings: These mysterious circles appear as arcs or rings of dark green or dead grass. Fungal mycelium forms underground, affecting the grass’s ability to take up water, resulting in the distinctive circular patterns.
- Red Thread: This disease presents itself as red or pinkish threads on grass blades. The affected grass turns light tan or bleached in color, and you may notice patches of the disease in your lawn.
- Leaf Spot: Caused by various fungi, leaf spot creates small, oval lesions with dark borders on grass blades. As the disease progresses, the spots may merge, causing larger dead patches.
- Rust: Rust diseases manifest as orange, yellow, or reddish-brown powdery spores on grass blades. Severe infections can lead to thinning and weakening of the turf.
- Pythium Blight (Cottony Blight): This disease appears as irregular, greasy-looking patches of yellowish or brown grass. During moist conditions, you may see white, cottony growth on the grass blades.
- Necrotic Ring Spot: This disease forms circular patches of dead grass with green centres. It often affects cool-season grasses, and the affected patches may increase in size over time.
- Gray Leaf Spot: Common in humid conditions, this disease causes greyish spots with dark borders on grass blades. Severe infections can lead to thinning and weakening of the lawn.
Prevention
But wait, there’s more! Prevention is at the heart of our strategy. Just like a proactive shield, implementing good lawn care practices builds a robust defence against diseases.
- Proper mowing, irrigation, and fertilisation promote a healthy lawn that can resist disease attacks.
- Air circulation is our ally! Pruning trees and shrubs to encourage better airflow minimises conditions conducive to disease development. It’s like letting your lawn breathe freely and ward off potential threats.
Solutions
Now, if the disease decides to test our resolve, we must act swiftly!
Targeted treatments are our precision strikes against these green adversaries.
- Fungicides: Fungicides, when applied strategically, can curtail disease progression and protect your turf. But here’s the secret to our success: moderation and balance. Selective use of fungicides minimises environmental impact while effectively controlling disease outbreaks. It’s like a tactical approach that ensures both your lawn’s health and the well-being of the ecosystem.
- Fertilisation: Let’s not forget about nourishing your lawn’s immune system! Proper fertilisation and soil management promote strong roots and overall vigour, making your grass more resilient to disease pressure.
So there you have it – your guide to confronting lawn diseases like a seasoned defender!
Arm yourself with knowledge, embrace prevention, and be prepared to act decisively if the need arises.
With these strategies in your arsenal, your lawn will stand strong and flourish, free from the grip of menacing diseases.
Lawn Problem #9: Tackling Fungal Issues

Welcome to the fascinating world of fungi, where these mysterious organisms can turn your lawn into a battleground of green warfare!
Imagine a thriving lawn, a lush green carpet, but hidden beneath the surface are fungi, waiting to unleash their spore-filled might.
So, let’s embark on a journey into the realm of fungal issues and discover the strategies to tackle them head-on.
Fungi are opportunistic invaders, often targeting stressed or weakened grass.
But here’s the catch: fungal diseases are diverse, with various culprits causing different symptoms. From fairy rings to rust and leaf spot, each fungus has its unique approach to cause lawn mayhem.
Prevention
Early detection is our secret weapon! Regular inspections of your lawn enable you to spot the initial signs of fungal invasion.
Keep an eye out for discoloured patches, unusual growth patterns, or fuzzy, powdery coatings on grass blades.
Prevention is at the core of our strategy. Just like a shield against fungal assault, adopting good cultural practices builds a robust defence.
- Maintaining a robust and healthy lawn is our first line of defence. Proper watering, mowing, and fertilisation create an environment that’s less hospitable to these unwelcome guests.
- Avoid overwatering and watering in the evening, as these practices create a moisture-rich environment that fungi adore.
- Air circulation plays a crucial role! Prune trees and shrubs to ensure adequate airflow across your lawn, reducing the chances of moisture build-up and fungal proliferation.
Solution
If fungi manage to breach your defences, fear not, for we have the tools for the job.
- Fungicides: Fungicides act as our allies, delivering targeted strikes against fungal intruders. But remember, moderation and precision are key to minimise environmental impact.
- Organic Options: Let’s not overlook the power of organic options! Some fungal issues can be deterred by natural remedies, such as neem oil or compost tea, which create a less favourable environment for the fungi to thrive.
Implementing a proactive approach to lawn care, focusing on a healthy lawn environment, is the ultimate safeguard against fungal infestations.
So there you have it – your guide to tackling fungal issues like a turf whisperer!
Armed with knowledge, prevention, and targeted treatments, you can wage a successful battle against these sneaky invaders.
Your lawn will flourish, and you’ll stand victorious in the fight against fungal foes.
Frequently Asked Questions
How do I know what’s wrong with my lawn?
To uncover the mystery, observe your lawn closely! Look for discoloration, wilting, patchy areas, or unusual growth patterns. Check for pests, weeds, or signs of diseases. A little detective work will reveal the clues to solve the puzzle.
What are the signs of an unhealthy lawn?
An unhealthy lawn shows its distress through faded colour, thinning grass, bare patches, and poor growth. Keep an eye out for pests, weeds, and disease symptoms. Your lawn may be trying to communicate – listen closely!
Should you rake up grass?
Raking grass clippings is not always necessary. Leaving them on the lawn can add nutrients and act as natural mulch. However, if they clump or smother the grass, a light raking can help.
What month should I dethatch my lawn?
Timing is crucial! Dethatch warm-season grasses in late spring or early summer when they’re actively growing. For cool-season grasses, early fall is the ideal time. Strike while the iron is hot – or in this case, while the grass is thriving!
When should you aerate your lawn?
Aerating like a pro! For cool-season grasses, early autumn is perfect, as it allows roots to recover before winter. Warm-season grasses benefit from aeration in late spring when they’re at their peak growth.
Do hedgehogs damage lawns?
Hedgehogs typically don’t cause major damage to lawns. Their foraging might leave small holes, but they also munch on pesky insects. Embrace their presence and let them be your lawn’s little helpers!
Other Guides From Turfworld
Explore these valuable guides for additional insights and practical tips:
Common Lawn Problems Conclusion
In the verdant voyage through the captivating guide of common lawn problems, we’ve explored an array of common lawn problems and their solutions.
From shade-induced poor growth to flooding woes, patchy areas, pale grass, moss and weed infestations, thatch challenges, and confronting diseases, we’ve navigated the landscape like seasoned explorers.
Remember, your lawn is a living canvas that responds to your care, devotion, and understanding.
By embracing the wonders of nature and applying the principles we’ve uncovered, your lawn will thrive, transforming into a captivating masterpiece.
Together, we’ll create a world of lush greenery, where your lawn stands as a testament to your passion and expertise.
How to Measure Your Lawn: A Comprehensive Guide
Whether you’re a seasoned green thumb or just dipping your toes into the world of lawn care, this blog post is your gateway to understanding how to measure your lawn like a pro.
Now, you might be wondering, “Why is measuring my lawn so important?” The answer lies in the intricate dance between vision and execution.
Knowing the exact dimensions of your lawn is the secret ingredient that unlocks the door to endless possibilities.
Think of measuring your lawn as laying the foundation for a symphony of landscaping projects.
Whether you’re planning to install fresh turf, design an enchanting garden, or create an outdoor oasis, accurate measurements are the compass that guides your every move.
In this comprehensive guide, we’ll unravel the mysteries of measuring your lawn, providing you with practical insights and expert advice.
From gathering the necessary tools to documenting your measurements, we’ll leave no stone unturned in our quest for precision.
Let’s get started!
Gathering the Tools

When measuring your lawn, it’s essential to arm yourself with the right tools.
Just like a painter needs brushes and a sculptor requires chisels, a landscaper relies on a few key instruments to achieve precise measurements.
Let’s explore the essential tools you’ll need:
- Measuring Tape: Consider the measuring tape your trusty companion, your loyal sidekick in the quest for accurate measurements. Opt for a quality measuring tape with a durable tape blade and clear, easy-to-read markings.
- Stakes: Sturdy and reliable stakes are indispensable for marking key reference points on your lawn. Choose stakes that are long enough to penetrate the ground firmly, yet visible above the grass for easy identification. Wooden or metal stakes will do the job admirably.
- String or Twine: This humble tool allows us to create straight lines and well-defined boundaries on the lawn. Opt for a strong, taut string that can withstand tension and remain in place throughout the measuring process.
- Marking Spray or Flags: These markers help you remember important measurements, reference points, or areas of interest. Choose brightly coloured marking spray or flags that catch your eye amidst the green expanse.
Preparing Your Lawn
Before taking any measurements, it’s crucial to prepare your lawn for the task at hand.
Let’s explore the essential steps to ensure your lawn is ready for accurate measurements.
- Clearing the Lawn: So, before you grab that measuring tape, take a moment to clear your lawn of any clutter. Remove fallen branches, toys, garden tools, or any other items that may hinder your path. This allows you to navigate freely and measure without obstruction.
- Mowing to an Even Height: By trimming the grass to a consistent level, you create an ideal canvas for precise measurements. So, fire up your trusty lawnmower and give your lawn a neat trim. Aim for a height that suits your preferences while ensuring it remains consistent across the entire area.
How to Measure Your Lawn

How To Measure A Square / Rectangular Lawn
Grab your measuring tape, steady your hands, and let’s dive in!
- Measuring the Length: To begin, stand at one end of your lawn, extend the measuring tape along the length, and anchor it firmly to the ground. Walk to the opposite end of the lawn, holding the tape taut, and read the measurement where it meets the edge. This is your lawn’s length.
- Measuring the Width: With the length secured, it’s time to determine your lawn’s width. Starting from one side, extend the measuring tape perpendicular to the length, ensuring it remains parallel to the opposite side. Once again, walk across the lawn, holding the tape steady, until it meets the edge.
- Calculating the Area: Now that you possess the length and width of your rectangular or square lawn, let’s unlock the key to its area. Multiply the length by the width.
Summary: Length x Width = Lawn Area
How To Measure A Circular Lawn
- Measuring the Radius: To begin, locate the centre point of your circular lawn. From this central point, extend your measuring tape to the outer edge, ensuring it remains taut and straight. The distance from the centre to the outer edge is known as the radius. Take note of this measurement.
- Determining the Area: The formula for calculating the area of a circle involves Multiplying the radius by itself and then by pi (3.142).
Summary: Radius x Radius x 3.142
How To Measure An Irregular Lawn
- Breaking it Down: When faced with an irregularly shaped lawn, the key lies in breaking it down into smaller, more manageable sections. Look closely at the contours and identify simpler shapes within the complexity. These can include rectangles, squares, triangles, or even semi-circles. By deconstructing your irregular lawn, you can measure each section individually, capturing its essence in a series of calculations.
- Measuring the Smaller Sections: Once you have identified the simpler shapes within your irregular lawn, it’s time to measure each section individually. Treat each shape as its own entity, following the specific measurement techniques we’ve explored previously. Measure the lengths, widths, or radii as applicable, and record the dimensions for each section.
- Summing it Up: With the measurements of the individual sections in hand, it’s time to bring them all together. Add up the areas of each section to obtain the total area of your irregular lawn.
Additional Considerations
In this section, we shall delve into the importance of factoring in slopes, inclines, or declines in your lawn, and how to navigate these variations with finesse.
- Measuring Slopes, Inclines, and Declines: To accurately account for slopes, inclines, or declines, it is recommended to measure them separately from the rest of the lawn. Use a measuring tape or an inclinometer to assess the degree of the slope, determining its magnitude and direction. By isolating these measurements, you gain a deeper understanding of the topographical nuances that shape your landscape.
- Planning for Drainage and Leveling: Once armed with the knowledge of your lawn’s topography, you can strategically plan drainage and leveling projects. Proper drainage is crucial to prevent water accumulation and ensure the health of your turf. By understanding the flow of water across slopes and incorporating measures such as swales, French drains, or terracing, you can redirect water away from areas prone to flooding or erosion.
How to Measure Your Lawn Conclusion
Congratulations, you’ve learned essential techniques how to measure your lawn, accounting for landscape features, and calculating the area with precision.
Measuring your lawn is a vital task that forms the foundation for successful landscaping endeavours.
Whether you have a rectangular, circular, or irregular lawn, employing the right tools and techniques ensures precise measurements.
Remember to gather the necessary tools, clear the lawn of obstacles, and embrace the beauty of each unique shape.

How Do I Remove Moss From My Lawn? A Comprehensive Guide
Whether you’re a passionate homeowner or a professional landscaper seeking insights, this blog post is here to answer the popular question – how do I remove moss from my lawn?
Lush, green lawns are the epitome of natural elegance, but the invasion of moss can disrupt the harmony and undermine the grandeur you seek.
Fear not, for within this comprehensive guide, we will delve into the depths of moss-related woes and unravel the secrets to a moss-free lawn.
Moss, that resilient yet pesky non-flowering plant, finds solace in damp, shaded areas, vying for dominance over your precious grass.
It is an opportunist, exploiting unfavourable conditions such as poor drainage, compacted soil, low fertility, excessive shade, or acidic pH levels to establish its velvety-green reign.
But worry not, as this blog post will arm you with the knowledge and tools to combat moss head-on.
Together, we shall unlock the mysteries of moss identification, explore effective removal methods, and uncover the secrets to preventing its triumphant return.
Understanding Moss

To effectively combat moss invasion, it’s essential to grasp the intricate nature of this velvety intruder. Moss, a small non-flowering plant, thrives in areas with ample moisture and shade.
Its resilience is a testament to its ability to adapt and flourish under unfavourable conditions.
What Causes Moss Growth?
When left unchecked, moss can quickly colonise your lawn, outcompeting the grass and creating patches of dense, spongy growth.
Identifying the factors that contribute to moss growth is key to addressing the root causes and preventing its reoccurrence.
Here are a number of reasons that causes moss to grow:
- Shade: Moss thrives in areas with limited sunlight. If your lawn is shaded by trees, buildings, or other structures, it creates a favourable environment for moss to develop.
- Moisture Retention: Excessive moisture retention in the soil can promote moss growth. Poor drainage, overwatering, or areas prone to water runoff can create damp conditions that moss finds ideal.
- Compacted Soil: Compacted soil prevents proper water drainage and restricts air circulation. This can lead to waterlogged areas that are conducive to moss growth.
- Low pH Levels: Moss tends to thrive in acidic soil conditions. If the pH level of your lawn is low, it creates an environment that favours moss development while inhibiting healthy grass growth.
- Nutrient Deficiencies: Imbalances in soil fertility can contribute to moss infestations. Inadequate levels of essential nutrients, particularly nitrogen, can weaken grass and create opportunities for moss to establish itself.
- Poor Lawn Health: Unhealthy or stressed lawns are more susceptible to moss growth. Factors such as inadequate mowing practices, improper watering, lack of aeration, or neglecting proper lawn care routines can contribute to moss problems.
- Poor Air Circulation: Insufficient air movement across the lawn can create stagnant conditions that promote moss growth. This can be caused by dense foliage, nearby structures, or lack of proper lawn ventilation.
- Mowing too short: Cutting the grass too short, also known as scalping, weakens the turf and exposes bare soil. This provides an opportunity for moss to invade and take hold.
Understanding the causes of moss growth in your lawn is crucial for effective prevention and control.
By addressing these underlying factors, you can create an environment that discourages moss while promoting the growth of healthy, lush grass.
Identifying Moss in Your Lawn
To effectively combat moss and restore your lawn’s splendour, it is crucial to develop a discerning eye for identifying its presence.
By recognising the tell-tale signs of moss invasion, you can take swift action to address the issue and prevent further damage.
Moss manifests as a low, velvety, green carpet-like growth that can cover specific patches or spread across the entire lawn, creating a visually unappealing spectacle.
Its texture is distinctively soft, often resembling a cosy blanket on the ground.
Thinning grass and poor grass growth are common indicators that moss has taken hold.
As moss outcompetes the grass for resources, the once lush and vibrant turf begins to fade, losing its vitality and robustness.
Waterlogged areas can also be an ominous sign of moss presence. Excessive moisture accumulation due to poor drainage can create the ideal conditions for moss to flourish.
These waterlogged patches may feel squishy underfoot, hinting at the underlying issue.
Excessive thatch, a layer of dead grass and organic matter that accumulates between the soil and the living grass blades, can provide a conducive environment for moss growth.
Thatch traps moisture, creating a moist microclimate where moss can establish itself and thrive.
By keenly observing these visual cues and interpreting the state of your lawn, you can confidently identify moss infiltration.
This knowledge empowers you to take the necessary steps to address the issue promptly and embark on a journey toward a healthier, more vibrant lawn.
How Do I Remove Moss From My Lawn
1. Test Your Soil

A comprehensive soil test provides valuable insights into the health of your soil and helps identify any imbalances that may be contributing to moss growth.
Soil testing involves assessing the pH level and nutrient composition of your soil.
This information acts as a compass, guiding you towards the appropriate amendments needed to restore balance and discourage moss invasion.
One convenient method is to acquire a soil test kit from a local garden centre or online supplier.
These kits typically come with instructions on how to collect a soil sample and provide information on where to send it for analysis.
- When collecting a soil sample, ensure you obtain a representative sample from different areas of your lawn.
- Use a clean trowel or soil probe to collect soil samples from multiple locations, at a depth of about 4 to 6 inches.
- Mix the samples thoroughly in a clean container, and then transfer a portion of the composite sample into a soil sample bag or container provided by the testing service.
- Once you’ve submitted your soil sample, you can expect to receive a detailed report outlining the soil’s pH level, nutrient content, and any necessary recommendations for amendments.
This valuable information will guide you in tailoring your approach to combating moss effectively. Remember, soil testing is a foundational step in understanding your lawn’s needs.
2. Adjust Soil pH and Fertility
After conducting a soil test and gaining insights into your lawn’s specific needs, the next crucial step in removing moss is adjusting the soil’s pH and fertility.
By addressing these factors, you create an environment that is less conducive to moss growth and more favourable for the health and vigour of your grass.
One key consideration is soil pH. Moss tends to thrive in acidic soil, so raising the pH level can help discourage its growth.
The ideal pH range for most grass species is between 6 and 7.
To raise the pH, you can apply agricultural lime, which is commonly available at garden centres or through agricultural suppliers.
It’s important to follow the recommended application rates based on your soil test results, as excessive lime can have adverse effects on your lawn.
In addition to pH adjustment, optimising soil fertility is essential. Moss often takes advantage of nutrient deficiencies in the soil, outcompeting the grass for vital resources.
Organic fertilisers, such as compost or well-rotted manure, can help improve the soil’s nutrient content and provide a boost to grass growth.
These organic amendments contribute to the long-term health of your lawn and support a stronger defence against moss invasion.
When applying lime or organic fertilisers, it’s crucial to follow the recommended rates and application instructions.
Applying too much can lead to imbalances and potentially harm your lawn. Take care to evenly distribute the amendments across the lawn, ensuring adequate coverage.
Remember that adjusting soil pH and fertility is not a one-time fix but an ongoing process.
Regular soil testing and monitoring will help you maintain the optimal conditions for a thriving lawn, reducing the likelihood of moss regrowth and promoting the vibrancy of your grass.
3. Improve Drainage and Aeration

By addressing these factors, you create an environment that fosters healthy grass growth while discouraging moss from taking hold.
Improve Drainage:
Poor drainage can create waterlogged areas that become breeding grounds for moss. To combat this issue, there are several measures you can take:
- Correct soil compaction: Compacted soil restricts water movement, leading to poor drainage. Aerating your lawn can alleviate compaction by creating small holes that allow water to penetrate the soil more effectively.
- Enhance soil structure: Incorporating organic matter, such as compost or well-rotted manure, into the soil can improve its structure and drainage capacity. This organic amendment helps loosen compacted soil and promotes better water percolation.
- Install drainage solutions: In cases of persistent waterlogging, consider implementing drainage solutions such as French drains, surface grading, or installing a dry well. These methods redirect excess water away from your lawn, reducing the likelihood of moss-friendly conditions.
Enhance Aeration:
Proper aeration plays a crucial role in maintaining a healthy lawn and discouraging moss growth. Here’s how you can enhance aeration:
- Core aeration: Core aeration involves removing small plugs of soil from the lawn, creating channels for air, water, and nutrients to reach the grassroots. This process helps alleviate compaction, promotes root development, and enhances overall lawn health.
- Timing matters: Aerate your lawn when the soil is moist but not overly saturated. Avoid aerating during drought or excessively dry conditions, as it can stress the grass.
- Overseeding: After aerating, take the opportunity to overseed your lawn. This process involves spreading grass seed over the freshly aerated areas, promoting the growth of new, healthy grass and further crowding out moss.
By improving drainage and enhancing aeration, you create an environment that discourages moss growth and encourages a flourishing lawn. Remember to tailor these methods to your lawn’s specific needs, considering factors such as soil type, climate, and existing lawn conditions.
4. Promote Healthy Grass Growth

To banish moss from your lawn once and for all, it’s time to focus on promoting healthy grass growth.
By creating optimal conditions for your grass to thrive, you establish a strong defence against moss invasion and restore the lush, vibrant beauty of your lawn.
- Proper Mowing Practices: Maintaining the correct mowing height is crucial for grass health. Set your mower to the recommended height for your grass species, ensuring you never remove more than one-third of the grass blade in a single mowing session. Regular mowing helps prevent the shade-loving moss from outcompeting the grass and encourages denser growth.
- Adequate Watering: Water your lawn deeply but infrequently. This promotes deeper root growth, making the grass more resilient and less susceptible to moss. Water in the early morning to allow sufficient time for the grass to dry during the day, as constant moisture can create favourable conditions for moss.
- Regular Fertilisation: Proper fertilisation is essential for providing the necessary nutrients for grass growth and discouraging moss. Choose a high-quality, slow-release fertiliser with the appropriate nutrient balance for your grass type. Follow the recommended application rates, considering the results of your soil test, to avoid over-fertilising, which can lead to excessive moss growth.
- Reseeding and Overseeding: Repair bare or thinning areas by reseeding or overseeding. Reseeding involves filling in bare patches with grass seed, while overseeding involves spreading grass seed across the entire lawn to promote denser growth. This helps to outcompete moss and create a thick, healthy turf.
- Weed Control: Weeds can compete with grass for nutrients and space, providing an opportunity for moss to establish itself. Regularly inspect your lawn and address any weed infestations promptly. Utilise appropriate weed control methods, such as targeted herbicides or manual removal, to keep the lawn weed-free and discourage moss from taking hold.
By promoting healthy grass growth through proper mowing, watering, fertilisation, reseeding, overseeding, and weed control, you establish a robust foundation for a moss-free lawn.
5. Physical removal methods

In our battle against moss, we come to an important step: physical removal. While promoting healthy grass growth is crucial, physically removing existing moss can provide immediate relief and create a cleaner canvas for your lawn’s resurgence.
Here are some effective methods for tackling moss head-on:
- Hand Raking: Hand raking is a simple yet effective method for small-scale moss removal. Using a garden rake or a specialised moss rake, gently rake the affected areas to loosen and remove the moss. Take care not to be too aggressive, as excessive raking can damage the grass.
- Power Raking: For larger areas or more severe moss infestations, power raking can be a viable option. Power rakes use rotating blades or wire tines to dethatch and remove moss, thatch, and debris from the lawn. This method requires caution, as excessive power raking can harm the grass. It is best to consult a professional or follow manufacturer guidelines to ensure safe and effective use.
- Scarification: Scarification involves using a specialised machine or manual tools to remove moss, thatch, and debris from the lawn’s surface. This process helps improve air circulation, water penetration, and nutrient absorption for the grass. Similar to power raking, it is advisable to seek professional assistance or refer to equipment instructions to avoid damaging the grass.
- Moss Killing Products: In conjunction with physical removal methods, you may consider using moss killing products to assist in the eradication process. Moss killers are typically available in liquid or granular form and contain ingredients that target and eliminate moss. Follow the product instructions carefully, ensuring proper application and safety precautions.
Remember, physical removal methods are most effective when combined with proper lawn care practices and addressing underlying issues such as soil pH, drainage, and grass health.
Regular monitoring and maintenance are essential to prevent moss reestablishment and maintain a moss-free lawn.
6. Chemical treatments

When dealing with persistent moss infestations, chemical treatments can provide an additional tool in your arsenal.
While it’s important to approach chemical treatments with caution and follow instructions carefully, they can be effective in eradicating moss from your lawn.
Here are some common chemical treatments used for moss removal:
- Moss Control Products: There are various moss control products available in the market, including liquid sprays and granular formulations. These products contain active ingredients specifically designed to target and eliminate moss. When using moss control products, it’s crucial to follow the instructions provided by the manufacturer, including application rates, timing, and safety precautions.
- Iron-Based Products: Iron-based moss control products are a popular choice for moss eradication. These products work by oxidizing the moss, causing it to turn black or brown and eventually die off. Iron-based treatments are typically available in liquid form and can be sprayed directly onto the moss-infested areas. It’s important to note that these products can stain concrete or other hardscapes, so take care to avoid overspray.
- Herbicidal Treatments: In some cases, herbicidal treatments containing active ingredients like glyphosate or carfentrazone can be used to control moss. However, it’s crucial to exercise caution with herbicides, as they can also harm desirable grass species if not applied properly. Follow label instructions carefully, including appropriate timing, rates, and precautions, and consider seeking professional advice for the best approach.
When using chemical treatments, it’s essential to keep in mind that they are most effective when combined with other moss control strategies, such as improving lawn health, promoting healthy grass growth, and addressing underlying issues.
Chemical treatments should be seen as a complementary tool rather than a standalone solution.
Additionally, it’s important to consider the environmental impact of chemical treatments and choose products that are safe for your specific lawn and surrounding areas.
Always read and follow the instructions provided by the manufacturer, and if in doubt, consult with a professional turf specialist who can offer guidance tailored to your lawn’s needs.
Preventing Moss Regrowth
To ensure long-lasting results and prevent moss from returning, it’s crucial to implement preventive measures.
By addressing the underlying causes of moss growth and maintaining a healthy lawn, you can create an environment that discourages moss regrowth.
Let’s explore some effective strategies to prevent moss from making a comeback:
- Optimise Sunlight Exposure: Moss thrives in shady, moist areas, so increasing sunlight exposure to your lawn can help prevent its return. Trim overhanging branches or prune nearby trees and shrubs to allow more sunlight to reach the grass. Additionally, consider thinning out dense foliage or strategically placing reflective materials to redirect sunlight towards shaded areas.
- Proper Lawn Care Practices: Continuing with proper lawn care practices is essential for preventing moss regrowth. Maintain a consistent mowing schedule, ensuring you never remove more than one-third of the grass blade at a time. Follow appropriate watering practices, providing deep but infrequent watering to encourage deep root growth and discourage moss-friendly conditions. Regularly fertilise your lawn with the appropriate nutrients to promote healthy grass growth and resilience.
- Improve Soil Conditions: Moss tends to grow in compacted or acidic soil. Addressing these soil conditions can help prevent moss regrowth. Periodically aerate your lawn to alleviate soil compaction and improve water and nutrient penetration. Conduct a soil test to determine the pH level and adjust it if necessary. If the soil is too acidic, consider applying lime to raise the pH and create a more favourable environment for grass growth.
- Enhance Drainage: Improving drainage is crucial for preventing waterlogged areas that are conducive to moss growth. Ensure proper grading of your lawn to promote water runoff and prevent pooling. Consider installing drainage solutions, such as French drains or dry wells, to redirect excess water away from the lawn. Regularly remove debris and thatch build-up, as they can contribute to poor drainage and moss development.
- Overseeding and Reseeding: Maintaining a thick, healthy lawn is one of the best defences against moss regrowth. Periodically overseed or reseed your lawn to fill in any bare or thinning areas. This helps to crowd out potential moss growth and promote dense grass coverage.
By implementing these preventive measures and consistently practicing good lawn care, you can minimise the chances of moss regrowth and maintain a vibrant, moss-free turf.
How Do I Remove Moss From My Lawn Conclusion
Congratulations! You’ve reached the end of our journey towards a moss-free lawn. By following the steps outlined in this guide, you are well-equipped to tackle moss infestations and maintain a healthy, lush turf.
Remember, maintaining a moss-free lawn requires ongoing care and vigilance. Regular monitoring, timely maintenance, and addressing any underlying issues will help you sustain a beautiful, moss-free landscape.
If you encounter challenges or have specific questions along the way, don’t hesitate to seek guidance from local turf experts such as ourselves here at Turfworld
We can provide tailored advice for your unique circumstances.
Best Cordless Lawn Mower: In-Depth Review and Buyers Guide
Whether you have a small, medium, or large garden, a preference for self-propelled options, limited storage space, or a tight budget, we’ve got you covered.
With an abundance of cordless lawn mowers flooding the market, it can be overwhelming to choose the ideal one that suits your specific needs.
That’s where our expertise comes in. We’ve meticulously curated a selection of the best cordless lawn mowers, considering factors such as key features, setup and storage, handling, mowing performance, value for money, and the pros and cons of each option.
We’ll also provide essential tips on how to choose the best cordless lawn mower, taking into account factors like cutting area, battery charge and run time, ease of use, storage space, and your budget.
So, whether you’re a gardening enthusiast, a homeowner seeking a hassle-free mowing experience, or an eco-conscious individual looking to reduce your carbon footprint, join us as we embark on this journey to find the best cordless lawn mower.
Best Cordless Lawn Mowers At a Glance
Best Cordless Lawn Mower For Small Gardens: Kärcher LMO 18-33
Best Cordless Lawn Mower For Medium Gardens: GTECH CLM50
Best Cordless Lawn Mower For Large Gardens: Husqvarna LC 347iVX
Best Self-Propelled Cordless Lawn Mower: EGO+ LM2021E-SP 50CM SELF-PROPELLED
Best Cordless Lawn Mower For Storage: Flymo EasiStore 340R Li Cordless Rotary Lawn Mower
Best Budget Cordless Lawn Mower: Einhell GE-CM 18/33 X-Change 18V Cordless Lawn Mower
Best Overall Cordless Lawn Mower: Murray 2x18V (36V) Lithium-Ion 37cm Cordless Lawn Mower
Best Cordless Lawn Mowers
Best Cordless Lawn Mower For Small Gardens
Kärcher LMO 18-33
Specifications
Power: 18v
Dimensions: 1251mm (L) x 371mm (W) x 992mm (H)
Deck size: 36cm
Cutting height: 35-65mm
Grass collector: 45L
Weight: 14.2kgs
Avg run time: 40 mins
Rating
Design:
Power:
Performance:
Manoeuvrability:
Features:
Safety:
When it comes to small gardens, finding a cordless lawn mower that strikes the perfect balance between efficiency and maneuverability is paramount.
One exceptional option that fits the bill is the Kärcher LMO 18-33. With its impressive features and compact design, it is tailored to meet the unique needs of small garden owners.
Key Features/Specs:
The Kärcher LMO 18-33 boasts a 33-centimeter cutting width, making it ideal for maneuvering through narrow pathways and tight corners with ease.
Its lightweight construction ensures effortless handling, reducing fatigue during extended mowing sessions.
Powered by an 18-volt lithium-ion battery, this mower offers sufficient runtime to tackle small garden areas without interruption.
Setup and Storage:
Setting up the Kärcher LMO 18-33 is a breeze. With its intuitive assembly process, you can have it up and running in no time.
Its compact size facilitates convenient storage, making it a great option for those with limited space.
Handling:
Designed with user comfort in mind, the Kärcher LMO 18-33 features an ergonomic handle that provides a comfortable grip, allowing for precise control and easy maneuverability.
The lightweight nature of this mower ensures effortless navigation around obstacles and flower beds, resulting in a beautifully even cut.
Mowing:
Equipped with a robust blade system and adjustable cutting height positions, the Kärcher LMO 18-33 delivers precise and tailored results for your small garden.
Whether you prefer a closely cropped lawn or a slightly longer cut, this mower offers flexibility to meet your preferences.
Value for Money:
In terms of value for money, the Kärcher LMO 18-33 shines. It combines affordability with quality craftsmanship, ensuring you get a reliable and efficient cordless mower without breaking the bank.
Its durability and performance make it a worthwhile investment for maintaining a well-groomed small garden.
PROS
✔ Compact and lightweight design for easy maneuverability in small gardens
✔ Effortless setup process for quick assembly
✔ Ergonomic handle for comfortable grip and precise control
✔ Adjustable cutting height positions for tailored results
✔ Efficient and reliable cutting performance
✔ Affordable price point for value-conscious buyers
✔ Convenient storage due to its compact size
✔ Cordless operation provides freedom of movement without the hassle of cords
✔ Environmentally friendly with zero emissions and reduced noise levels
CONS
✔ Limited cutting width suitable only for small garden areas
✔ Not recommended for larger lawns due to its size and capacity
✔ May require more frequent charging for extended mowing sessions
✔ Fewer features compared to higher-end models
✔ May not be suitable for tackling thick or overgrown grass
Best Cordless Lawn Mower For Medium Gardens
GTECH CLM50
Specifications
Power: 48v
Dimensions: 4700mm (L) x 1220mm (W) x 1060mm (H)
Deck size: 42cm
Cutting height: 30-80mm
Grass collector: 50L
Weight: 13.5kgs
Avg run time: 40 mins
Rating
Design:
Power:
Performance:
Manoeuvrability:
Features:
Safety:
When it comes to medium-sized gardens, a cordless lawn mower that offers a perfect blend of power, cutting capacity, and versatility is essential.
One exceptional option that ticks all the boxes is the GTECH CLM50. With its impressive features and reliable performance, it is tailored to meet the unique needs of medium garden owners.
Key Features/Specs:
The GTECH CLM50 boasts a generous 50-centimeter cutting width, making it ideal for efficiently covering larger areas without compromising on precision.
Powered by a high-performance 48-volt lithium-ion battery, this mower provides ample runtime to tackle medium-sized gardens with ease.
Its robust motor ensures consistent cutting power, resulting in a professionally manicured lawn.
Setup and Storage:
Setting up the GTECH CLM50 is a breeze, thanks to its user-friendly design and straightforward assembly process.
Additionally, its collapsible handle and compact storage footprint make it convenient to store, even in limited spaces such as garden sheds or garages.
Handling:
Designed with ergonomics in mind, the GTECH CLM50 features an adjustable and padded handle that ensures a comfortable grip, reducing strain and fatigue during prolonged mowing sessions.
Its maneuverability is enhanced by its balanced weight distribution and smooth-rolling wheels, allowing for effortless navigation around obstacles and uneven terrain.
Mowing:
Equipped with a high-quality cutting blade and adjustable cutting height positions, the GTECH CLM50 delivers precise and tailored results to suit your medium garden’s specific requirements.
Whether you prefer a lush, uniform lawn or a slightly longer cut, this mower provides versatility to achieve your desired grass length.
Value for Money:
In terms of value for money, the GTECH CLM50 stands out. Its combination of superior cutting performance, reliable battery life, and durable construction make it a worthwhile investment for medium garden owners.
With its high-quality components and long-lasting reliability, you can expect years of consistent mowing performance without the need for frequent replacements or repairs.
PROS
✔ Generous 50-centimeter cutting width for efficient coverage in medium-sized gardens
✔ High-performance 48-volt lithium-ion battery provides ample runtime
✔ Powerful motor ensures consistent cutting power for a professionally manicured lawn
✔ User-friendly setup and straightforward assembly process
✔ Adjustable and padded handle for comfortable grip and reduced fatigue
✔ Maneuverable design with balanced weight distribution and smooth-rolling wheels
✔ Versatile cutting height positions for customized grass length
✔ Compact storage footprint, collapsible handle for convenient storage
✔ Durable construction for long-lasting reliability
CONS
✔ May be too large for smaller gardens, more suitable for medium-sized areas
✔ Higher price point compared to entry-level models
✔ Potential need for a higher initial investment
✔ May not be as lightweight as smaller cordless mowers
✔ Limited availability or specific purchasing options depending on the region
Best Cordless Lawn Mower For Large Gardens
Husqvarna LC 347iVX
Specifications
Power: 36v
Dimensions: 14,800mm(L) x 5250mm(W) x 10,800mm(H)
Cutting height: 20-75mm
Grass collector: 55L
Weight: 26kgs
Avg run time: 40 mins (With a BLi300 battery)
Rating
Design:
Power:
Performance:
Manoeuvrability:
Features:
Safety:
When it comes to large gardens, a cordless lawn mower that combines robust power, expansive cutting capacity, and exceptional performance is paramount.
One standout option that checks all the boxes is the Husqvarna LC 347iVX. With its impressive features and cutting-edge technology, it is specifically designed to tackle the challenges of maintaining a large lawn with ease.
Key Features/Specs:
The Husqvarna LC 347iVX boasts a substantial 47-centimeter cutting width, allowing for efficient coverage and reduced mowing time in large garden areas.
Equipped with a high-performance brushless motor and a long-lasting 36-volt lithium-ion battery, this mower delivers sustained power and runtime to effortlessly handle the demands of larger lawns.
Its innovative dual cutting blade system ensures precise and even cutting results, leaving behind a perfectly manicured turf.
Setup and Storage:
Setting up the Husqvarna LC 347iVX is a straightforward process that requires minimal effort.
Its user-friendly design and clear instructions make assembly a breeze.
Additionally, this mower offers convenient storage options, thanks to its foldable handle and compact size, allowing you to make the most of your available space.
Handling:
Designed with user comfort in mind, the Husqvarna LC 347iVX features an adjustable ergonomic handle with a soft-grip surface, providing optimal control and reducing strain during operation.
Its sturdy construction and sturdy wheels enhance stability and maneuverability, enabling smooth navigation across uneven terrain and around obstacles commonly found in large gardens.
Mowing:
The Husqvarna LC 347iVX excels in delivering exceptional mowing performance.
With its dual cutting blades and adjustable cutting height positions, you have the flexibility to achieve the desired lawn height and a uniform finish.
This mower effortlessly handles thick grass, weeds, and challenging terrain, leaving behind a pristine and evenly trimmed lawn.
Value for Money:
In terms of value for money, the Husqvarna LC 347iVX shines. Its top-notch build quality, powerful performance, and long-lasting battery make it a worthy investment for large garden owners.
The durability and reliability of this mower ensure years of dependable service, saving you both time and money in the long run.
PROS
✔ Generous 47-centimeter cutting width for efficient coverage in large gardens
✔ High-performance brushless motor delivers sustained power and cutting performance
✔ Long-lasting 36-volt lithium-ion battery provides ample runtime
✔ Innovative dual cutting blade system ensures precise and even cutting results
✔ User-friendly setup process with clear instructions
✔ Adjustable ergonomic handle with a soft-grip surface for comfortable and controlled operation
✔ Sturdy construction and sturdy wheels enhance stability and maneuverability
✔ Capable of handling thick grass, weeds, and challenging terrain
✔ Foldable handle and compact size for convenient storage
CONS
✔ Larger size may be less suitable for smaller gardens or limited storage spaces
✔ Higher price point compared to entry-level models
✔ Potential need for a higher initial investment
✔ Limited availability or specific purchasing options depending on the region
Best Self-Proppelled Cordless Lawn Mower
EGO+ LM2021E-SP 50CM SELF-PROPELLED
Specifications
Power: 56v
Deck size: 510cm
Cutting height: 25-95mm
Grass collector: 60L
Weight: 28kgs
Run time: Up to 45 minutes with 7.5Ah battery
Rating
Design:
Power:
Performance:
Manoeuvrability:
Features:
Safety:
When it comes to ease of use and effortless mowing, a self-propelled cordless lawn mower is the go-to choice for many homeowners.
Among the top contenders in this category is the EGO+ LM2021E-SP 50CM SELF-PROPELLED mower.
With its advanced features and innovative technology, it offers a seamless and enjoyable mowing experience.
Key Features/Specs:
The EGO+ LM2021E-SP 50CM SELF-PROPELLED stands out with its generous 50-centimeter cutting width, allowing for efficient coverage of larger lawn areas.
This self-propelled mower is powered by a high-performance 56-volt lithium-ion battery, delivering impressive runtime and consistent power to effortlessly handle various grass conditions.
Its self-propulsion feature eliminates the need for pushing, reducing user fatigue and making mowing a breeze.
Setup and Storage:
Setting up the EGO+ LM2021E-SP 50CM SELF-PROPELLED is quick and straightforward.
Its user-friendly design and intuitive assembly process ensure a hassle-free experience.
When it comes to storage, this mower offers convenient solutions with its foldable handle and compact size, allowing you to maximize the use of your available space.
Handling:
Designed with user comfort in mind, the EGO+ LM2021E-SP 50CM SELF-PROPELLED features a comfortable and adjustable handle, providing a customized grip for optimal control and maneuverability.
Its self-propulsion system allows for effortless movement, even on uneven terrain.
With its smooth-rolling wheels and balanced weight distribution, navigating around obstacles becomes a smooth and seamless process.
Mowing:
Equipped with a high-quality cutting blade and adjustable cutting height positions, the EGO+ LM2021E-SP 50CM SELF-PROPELLED delivers precise and tailored results to suit your lawn’s specific needs.
Whether you prefer a close, manicured cut or a slightly longer grass length, this mower provides the versatility to achieve your desired lawn aesthetics.
Its efficient cutting performance ensures a clean and professional finish.
Value for Money:
In terms of value for money, the EGO+ LM2021E-SP 50CM SELF-PROPELLED offers excellent returns on investment.
Its combination of advanced features, reliable battery life, and durable construction make it a worthwhile purchase for homeowners seeking a self-propelled cordless mower.
With its high-quality components and long-lasting reliability, you can expect years of consistent mowing performance without the need for frequent replacements or repairs.
PROS
✔ Generous 50-centimeter cutting width for efficient coverage in larger lawn areas
✔ Self-propelled feature eliminates the need for manual pushing, reducing user fatigue
✔ High-performance 56-volt lithium-ion battery provides impressive runtime and consistent power
✔ User-friendly setup and intuitive assembly process
✔ Comfortable and adjustable handle for optimal control and maneuverability
✔ Smooth-rolling wheels and balanced weight distribution for easy navigation on various terrains
✔ Versatile cutting height positions for customized grass length
✔ Foldable handle and compact size for convenient storage
✔ Durable construction for long-lasting reliability
CONS
✔ Larger size may be less suitable for smaller lawn areas
✔ Higher price point compared to entry-level models
✔ Potential need for a higher initial investment
✔ Limited availability or specific purchasing options depending on the region
Best Cordless Lawn Mower For Storage
Flymo EasiStore 340R Li Cordless Rotary Lawn Mower
Specifications
Power: 40v
Dimensions: 1206mm(L) x 388mm(W) x 950mm(H)
Cutting height: 20-60mm
Grass collector: 35L
Weight: 11.2kgs
Run time: 30 minutes
Rating
Design:
Power:
Performance:
Manoeuvrability:
Features:
Safety:
When it comes to choosing a cordless lawn mower that prioritizes storage convenience without compromising on performance, the Flymo EasiStore 340R Li Cordless Rotary Lawn Mower stands out as a top contender.
Designed with compactness and easy storage in mind, this mower offers a practical solution for homeowners with limited space.
Key Features/Specs:
The Flymo EasiStore 340R Li Cordless Rotary Lawn Mower features a 34-centimeter cutting width, making it suitable for small to medium-sized lawns.
Powered by a reliable lithium-ion battery, it offers cordless freedom and eliminates the need for tangling cables.
With adjustable cutting heights, you can customize the grass length to suit your preferences.
Additionally, the mower boasts a lightweight design, ensuring easy maneuverability and comfortable operation.
Setup and Storage:
Setting up the Flymo EasiStore 340R Li is a straightforward process. The user-friendly assembly instructions make it easy to get the mower up and running quickly.
What truly sets this mower apart is its innovative foldable design. The handles and grass box fold neatly onto the main body, allowing for compact storage in tight spaces such as sheds, garages, or even smaller closets.
This feature is particularly beneficial for homeowners with limited storage options.
Handling:
The Flymo EasiStore 340R Li prioritizes user comfort and convenience during operation.
Its lightweight construction makes it easy to push and maneuver around the lawn. The adjustable handles ensure a comfortable grip, reducing strain on your wrists and arms.
Whether you need to navigate around flower beds or other obstacles, this mower’s compact size and agile handling enable easy maneuvering in tight spaces.
Mowing:
Despite its compact design, the Flymo EasiStore 340R Li delivers efficient cutting performance.
The rotary blade effortlessly trims the grass, providing a clean and neat finish. With adjustable cutting heights, you can achieve the desired grass length for your lawn.
The integrated grass box collects the clippings, reducing the need for post-mowing cleanup.
Value for Money:
The Flymo EasiStore 340R Li Cordless Rotary Lawn Mower offers excellent value for money, particularly for homeowners seeking a mower that excels in storage convenience.
Its affordable price point, combined with its compact design and reliable performance, make it a worthwhile investment.
Additionally, the cordless operation eliminates the hassle of managing cables, providing a seamless mowing experience.
PROS
✔ Compact and foldable design for easy storage in tight spaces
✔ Cordless operation eliminates the hassle of managing cables
✔ Lightweight construction for easy maneuverability and comfortable operation
✔ Adjustable cutting heights to customize grass length
✔ Affordable price point for budget-conscious homeowners
✔ User-friendly setup and assembly process
✔ Efficient cutting performance for small to medium-sized lawns
✔ Integrated grass box reduces post-mowing cleanup
CONS
✔ Smaller cutting width may require more passes for larger lawns
✔ Not ideal for homeowners with expansive yards
✔ Limited availability or specific purchasing options depending on the region
Best Budget Cordless Lawn Mower
Einhell GE-CM 18/33 X-Change 18V Cordless Lawn Mower

Specifications
Power: 18v
Deck size: 33cm
Cutting height: 25-65mm
Grass collector: 30L
Weight: 10.9kgs
Avg run time: 30 mins
Rating
Design:
Power:
Performance:
Manoeuvrability:
Features:
Safety:
When it comes to finding an affordable yet reliable cordless lawn mower, the Einhell GE-CM 18/33 X-Change 18V stands out as a top choice.
Designed with budget-conscious homeowners in mind, this mower offers an excellent combination of affordability, functionality, and performance.
Key Features/Specs:
The Einhell GE-CM 18/33 X-Change 18V features an 18-volt lithium-ion battery, providing cordless convenience and eliminating the need for cumbersome cables.
With a cutting width of 33 centimeters, it is suitable for small to medium-sized lawns. The mower offers adjustable cutting heights, allowing you to achieve the desired grass length.
Additionally, its lightweight construction ensures easy maneuverability and comfortable operation.
Setup and Storage:
Setting up the Einhell GE-CM 18/33 X-Change 18V is a breeze, thanks to its user-friendly assembly process.
The mower comes with clear instructions, enabling you to get started quickly. In terms of storage, its compact design allows for efficient use of space.
Whether you have a small shed or limited storage area, this mower can be conveniently stored without taking up excessive room.
Handling:
The Einhell GE-CM 18/33 X-Change 18V prioritizes user comfort and ease of use during operation.
Its lightweight construction makes it effortless to push and maneuver around the lawn. The adjustable handles ensure a comfortable grip, reducing strain on your wrists and arms.
With this mower, you can navigate around obstacles or tight corners with ease.
Mowing:
Despite its budget-friendly price, the Einhell GE-CM 18/33 X-Change 18V delivers reliable cutting performance.
Its sharp and efficient blades effortlessly trim the grass, providing a neat and even finish. The adjustable cutting heights allow you to customize the grass length to suit your preferences.
Additionally, the integrated grass box collects the clippings, minimizing post-mowing cleanup.
Value for Money:
The Einhell GE-CM 18/33 X-Change 18V offers exceptional value for money, particularly for homeowners on a budget.
Its affordable price point, combined with its reliable performance and functionality, make it an attractive choice.
Despite being a budget model, it does not compromise on essential features and delivers satisfactory results for small to medium-sized lawns.
PROS
✔ Affordable price point, ideal for budget-conscious homeowners
✔ Cordless operation provides freedom of movement without tangling cables
✔ Lightweight construction for easy maneuverability
✔ Adjustable cutting heights to customize grass length
✔ Compact design allows for efficient storage in small spaces
✔ User-friendly setup and assembly process
✔ Reliable cutting performance for small to medium-sized lawns
✔ Integrated grass box reduces post-mowing cleanup
CONS
✔ Smaller cutting width may require more passes for larger lawns
✔ Basic features and may lack advanced functionalities found in higher-end models
✔ Limited availability or specific purchasing options depending on the region
Best Overall Cordless Lawn Mower
Murray 2x18V (36V) Lithium-Ion 37cm Cordless Lawn Mower
Specifications
Power: 18v
Cutting height: 25-75 mm
Grass collector: 50L
Weight: 14kgs
Avg run time: 32 mins
Rating
Design:
Power:
Performance:
Manoeuvrability:
Features:
Safety:
When it comes to the best overall cordless lawn mower, the Murray 2x18V (36V) Lithium-Ion 37cm model stands out as a top choice.
This mower combines impressive performance, durability, and convenience to provide an exceptional mowing experience for homeowners.
Key Features/Specs:
The Murray 2x18V (36V) Lithium-Ion 37cm mower is equipped with two 18-volt lithium-ion batteries, delivering a total of 36 volts of power.
This powerful combination ensures sufficient energy to tackle your lawn effectively. With its 37cm cutting width, the mower covers a substantial area with each pass, ensuring efficient coverage and reducing the time spent on mowing.
Additionally, the adjustable cutting heights allow you to customize the mower’s cutting height to suit your lawn’s specific needs, ensuring a tailored and precise mowing experience.
Setup and Storage:
The Murray 2x18V (36V) Lithium-Ion 37cm mower is designed for easy setup and storage.
Its compact size and foldable handle allow for convenient storage in your garage or shed.
The lightweight construction makes it effortless to maneuver and transport.
Handling:
With its ergonomic design, the Murray 2x18V (36V) Lithium-Ion 37cm mower offers comfortable handling during operation.
The handle is strategically positioned to minimize strain and fatigue, ensuring a pleasant mowing experience.
The mower’s maneuverability is enhanced by its lightweight construction, allowing you to navigate around obstacles and corners with ease.
Mowing:
When it comes to mowing performance, the Murray 2x18V (36V) Lithium-Ion 37cm mower excels.
Its robust motor and sharp blades effortlessly cut through grass, delivering a clean and precise finish.
The adjustable cutting heights provide versatility, allowing you to achieve your desired grass length and maintain a well-groomed lawn.
Value for Money:
The Murray 2x18V (36V) Lithium-Ion 37cm mower offers excellent value for money.
It combines high-performance features, durability, and ease of use at a competitive price point.
With its reliable cutting capabilities and long-lasting battery life, it ensures efficient mowing without compromising on quality.
PROS
✔ Powerful dual 18-volt lithium-ion batteries for a total of 36 volts of cutting power
✔ Wide 37cm cutting width for efficient coverage and reduced mowing time
✔ Adjustable cutting heights to accommodate various lawn types and preferences
✔ Robust motor and sharp blades for exceptional cutting performance
✔ Cordless operation for freedom of movement and convenience
✔ Lightweight and maneuverable design for easy handling
✔ Durable construction for long-lasting performance
✔ Ergonomic handle for comfortable operation
✔ Foldable handle for compact storage
CONS
✔ May not be suitable for very large lawns requiring extended runtime
✔ Replacement batteries may be expensive
✔ Limited availability in certain regions
How To Choose The Best Cordless Lawn Mower
What Are You Cutting?
When it comes to choosing the best cordless lawn mower, considering what you are cutting is an essential factor to ensure optimal performance and satisfaction.
Different types of grass and vegetation require specific features and capabilities in a mower.
Let’s explore some key considerations to help you make an informed decision.
Grass Type:
Start by understanding the type of grass you have in your lawn.
Is it a cool-season grass like Kentucky bluegrass or a warm-season grass like Bermuda grass?
Each grass type has different growth patterns and maintenance requirements.
Consider a mower that is well-suited for your specific grass type to achieve the best cutting results.
Grass Thickness and Height:
Assess the thickness and height of your grass. If you have thick and dense grass, you may need a mower with a more powerful motor and sharp blades to handle the cutting effectively.
Similarly, if your grass tends to grow tall quickly, look for a mower with adjustable cutting heights and sufficient cutting width to tackle the task efficiently.
Lawn Size:
The size of your lawn plays a significant role in determining the ideal cordless mower.
For smaller lawns, a compact and lightweight mower may be sufficient, providing easy maneuverability in tight spaces.
However, for larger lawns, consider a mower with a wider cutting width and longer battery runtime to cover more area without interruptions.
Terrain and Obstacles:
Take note of the terrain and any potential obstacles in your yard.
If you have uneven terrain, slopes, or obstacles like trees, flower beds, or garden borders, opt for a mower with enhanced maneuverability.
For example, a larger rear wheels or adjustable wheel heights, to navigate these challenges effortlessly.
Mulching and Bagging Options:
Determine your preference for grass clippings. If you prefer to leave the clippings on your lawn as natural mulch, choose a mower with mulching capabilities.
Alternatively, if you prefer a neater appearance, select a mower with bagging options to collect the clippings for easy disposal.
Battery Power and Runtime:
Consider the battery power and runtime of the cordless mower.
Look for models with reliable lithium-ion batteries and sufficient runtime to complete your mowing sessions without interruptions.
Longer battery life ensures that you can cover your entire lawn without needing frequent recharging.
Additional Features:
Assess any additional features that may enhance your mowing experience.
This could include adjustable handle height for ergonomic operation, easy-to-use height adjustment mechanisms, or a foldable design for compact storage.
By taking these factors into account, you can narrow down your options and select the best cordless lawn mower that meets your specific cutting needs.
Battery Charge and Run Time
When it comes to choosing the best cordless lawn mower, one crucial factor to consider is the battery charge and run time.
The performance and usability of a cordless mower heavily rely on the battery capacity and how long it can sustain power.
Let’s delve into this aspect and explore some key considerations for selecting the right mower based on battery charge and run time.
Battery Type:
Start by understanding the type of battery used in the cordless mower.
Lithium-ion batteries are widely preferred for their efficiency, long lifespan, and consistent power output.
They provide reliable performance and tend to have shorter charging times compared to other battery types.
Battery Capacity:
Look for a mower with a higher battery capacity, usually measured in ampere-hours (Ah).
A larger battery capacity translates to a longer run time, allowing you to mow more area before the battery needs recharging.
Consider the size of your lawn and choose a mower with a battery capacity that suits your mowing needs.
Run Time:
Assess the estimated run time provided by the manufacturer.
This indicates how long the mower can operate on a single charge.
Keep in mind that the run time can vary based on factors such as grass conditions, cutting height, and terrain.
Select a mower with a run time that aligns with the size of your lawn and the time you usually spend mowing.
Charging Time:
Consider the charging time required to replenish the battery.
A shorter charging time allows you to quickly get back to mowing, minimizing downtime.
Look for mowers with fast-charging capabilities, as this can significantly improve your overall mowing efficiency.
Battery Compatibility:
If you already own other cordless tools from the same brand, check if the mower’s battery is compatible with your existing batteries.
This can be advantageous as it allows you to interchange batteries between different tools, saving you money and providing more flexibility.
Removable/Replaceable Battery:
Some cordless mowers offer the option of removing or replacing the battery.
This feature can be convenient if you have a spare battery to swap in for extended mowing sessions.
It also allows you to replace the battery easily if needed, extending the lifespan of your mower.
Battery Management System:
Consider mowers that incorporate a battery management system.
This system optimizes the usage of power, enhancing efficiency and maximizing the battery life.
It helps prevent overcharging, over-discharging, and overheating, ensuring safe and prolonged battery performance.
Is It Easy To Use?
When considering the best cordless lawn mower for your needs, evaluating the ease of use is a crucial aspect.
A mower that is user-friendly and intuitive can make your mowing experience more enjoyable and efficient.
Let’s explore some key factors to consider when assessing the ease of use for cordless lawn mowers.
Weight and Maneuverability:
One of the primary aspects to evaluate is the weight of the mower.
A lighter mower is easier to maneuver and control, especially when navigating tight corners or uneven terrain.
Consider your physical strength and abilities, as well as the layout of your lawn, when determining the ideal weight for your mower.
Handle Design:
Pay attention to the handle design and ergonomics.
Look for mowers with adjustable or ergonomic handles that provide a comfortable grip and allow you to maintain a natural posture while mowing.
This reduces strain and fatigue, enabling you to mow for longer periods without discomfort.
Height Adjustment:
Check if the mower offers easy and convenient height adjustment options.
Being able to customize the cutting height to suit your preferences and the condition of your lawn is essential.
Look for mowers that offer multiple height settings and effortless adjustment mechanisms.
Start Mechanism:
Evaluate the start mechanism of the mower.
Cordless mowers typically have push-button or key start systems for convenience.
Choose a mower with a start mechanism that is easy to use and reliable, ensuring a hassle-free start every time you mow.
Maneuverability and Navigation:
Consider the maneuverability of the mower, especially if you have a lawn with obstacles like trees, flower beds, or pathways.
Look for features like swivel wheels or rear-wheel drive that enhance maneuverability and allow you to navigate around obstacles with ease.
Grass Clippings Disposal:
Assess how the mower handles grass clippings. Some models offer mulching, bagging, or side discharge options.
Consider your preferences and the maintenance requirements of your lawn when choosing a mower with a grass clippings disposal system that is convenient for you.
Storage Space
When selecting the best cordless lawn mower, considering storage space is an important aspect to ensure a convenient and clutter-free experience.
Proper storage not only protects your investment but also allows for efficient use of available space.
Here are key factors to consider when evaluating storage space for cordless lawn mowers.
Compact Design:
Look for mowers with a compact design that allows for easy storage in limited spaces such as sheds, garages, or utility rooms.
Compact mowers take up less space and can be stored vertically or horizontally, depending on the design and storage options available to you.
Foldable Handle:
Check if the mower has a foldable handle, as this feature significantly reduces its storage footprint.
A foldable handle enables you to collapse the mower’s handle, making it more compact and easier to store.
It is particularly beneficial if you have limited vertical storage space.
Detachable Components:
Consider mowers with detachable components.
Some models allow you to remove the grass catcher bag or even the cutting deck for more compact storage.
Detachable components make the mower more versatile in terms of storage options, as you can separate the larger components and store them separately.
Wall-Mounted Storage:
If floor space is limited, look for mowers that offer wall-mounted storage solutions.
These mowers often come with wall brackets or hooks that allow you to hang the mower securely on a wall, freeing up valuable floor space.
Wall-mounted storage is especially useful in smaller garages or sheds.
Cordless Convenience:
Cordless mowers eliminate the need for long cables and cords, reducing the storage requirements.
With a cordless mower, you don’t have to worry about untangling or managing cables, making storage simpler and less cluttered.
Wheels and Portability:
Consider the portability of the mower. Models with sturdy wheels or integrated handles make it easier to move the mower around, both during mowing and when storing it.
Smooth-rolling wheels ensure effortless transportation and positioning, enhancing the overall convenience of storage.
Protective Covers:
Check if the mower comes with a protective cover or if one is available as an accessory.
A cover safeguards the mower from dust, debris, and weather conditions when stored for extended periods.
It helps maintain the mower’s condition and extends its lifespan.
Price / Budget
When it comes to choosing the best cordless lawn mower, considering the price or budget is an essential factor for many homeowners.
Finding the right balance between quality and affordability is key.
Here are some important points to consider when evaluating the price or budget aspect of cordless lawn mowers.
Set a Realistic Budget:
Before diving into the options, it’s crucial to establish a realistic budget range that aligns with your financial capabilities.
Consider how much you are willing to invest in a cordless mower, keeping in mind that higher-priced models often come with advanced features and superior performance.-
Long-Term Cost Considerations:
When evaluating the price, also consider the long-term cost implications.
Cordless mowers may require battery replacements or maintenance over time.
Assess the cost and availability of spare batteries and accessories associated with the mower.
Additionally, consider the potential energy savings of a cordless mower compared to traditional gas-powered models.
Value for Money:
Instead of solely focusing on the initial price, assess the overall value for money.
A higher-priced mower might offer additional features, durability, or superior performance that justifies the investment in the long run.
Conversely, a lower-priced mower might provide adequate functionality for smaller lawns or less frequent use.
Sales and Discounts:
Keep an eye out for sales, discounts, or promotional offers from reputable retailers or manufacturers.
Timing your purchase strategically can help you secure a quality cordless mower at a more affordable price.
However, ensure that the discounted price does not compromise the essential features or quality you require.
Pros and Cons Of a Cordless Lawn Mower
Pros
Convenience and Maneuverability:
One of the significant advantages of a cordless lawn mower is the freedom of movement it offers.
Without the restrictions of a power cord, you can navigate your lawn easily and mow around obstacles without the hassle of untangling cords or limited reach.
This enhances convenience and makes mowing more efficient.
Environmentally Friendly:
Cordless lawn mowers are generally more environmentally friendly compared to their gas-powered counterparts.
They produce zero emissions, reducing your carbon footprint and contributing to a cleaner and greener environment.
Additionally, they operate quietly, minimizing noise pollution in residential areas.
Lower Maintenance:
Cordless mowers require less maintenance compared to gas-powered models.
There is no need for oil changes, spark plug replacements, or air filter cleanings.
This saves you time, effort, and money on routine maintenance tasks, making cordless mowers a convenient choice for homeowners.
Ease of Starting:
Starting a cordless mower is as simple as pressing a button or pulling a lever.
There are no pull cords or priming required, eliminating the frustration of difficult starts or engine flooding.
This feature makes cordless mowers more user-friendly, especially for individuals who may have physical limitations or struggle with traditional pull-start mowers.
Quiet Operation:
Cordless mowers operate with significantly less noise compared to gas-powered models.
This is beneficial for those living in noise-sensitive neighborhoods or areas where noise restrictions apply.
Quiet operation allows you to mow your lawn without disturbing your family, neighbors, or pets, creating a more peaceful environment.
Cons
Limited Runtime:
Cordless mowers rely on battery power, which means they have a limited runtime before the batteries need recharging.
Depending on the model and battery capacity, the runtime can vary, and larger lawns may require multiple battery charges to complete the mowing task.
It’s essential to consider the battery runtime and ensure it meets your lawn’s size and your mowing requirements.
Battery Charging Time:
Charging the batteries of a cordless mower takes time.
Depending on the charger and battery capacity, it can range from a few hours to overnight.
If you have a large lawn, you may need to plan for breaks to recharge the batteries, which can extend the overall mowing time.
It’s important to factor in the charging time when planning your lawn care routine.
Power Output:
While cordless mowers have improved significantly in recent years, they may not match the raw power of gas-powered mowers, especially for tackling dense or overgrown grass.
If you have a particularly challenging lawn or frequently encounter heavy growth, a cordless mower may not provide the same cutting performance as a gas-powered alternative.
Battery Lifespan:
Over time, the battery performance of cordless mowers can degrade, resulting in reduced runtime or the need for battery replacements.
Battery lifespan varies depending on usage, charging habits, and overall maintenance.
It’s important to consider the long-term cost of battery replacements and ensure that replacement batteries are readily available for your chosen mower model.
Upfront Cost:
Cordless mowers can have a higher upfront cost compared to traditional gas-powered mowers.
This is due to the advanced battery technology and additional features they offer.
While the initial investment may be higher, it’s important to consider the long-term benefits.
This includes lower maintenance costs and the environmental advantages, which can make cordless mowers a worthwhile investment.
F&Q
How long does the battery last on a cordless lawn mower?
When it comes to the battery life of a cordless lawn mower, it can vary depending on several factors.
Generally, cordless mowers offer runtime ranging from 30 minutes to 2 hours.
However, it’s important to note that battery life is influenced by factors such as the mower’s power settings, grass conditions, and the capacity of the battery itself.
Can I replace the battery in a cordless mower?
Absolutely! One of the great advantages of cordless lawn mowers is their battery replaceability.
In most cases, you can easily replace the battery in a cordless mower.
Many manufacturers offer replacement batteries that are specifically designed for their mower models.
When considering battery replacement, it’s important to ensure compatibility with your specific mower model.
Different cordless mowers may have different battery specifications, such as voltage and capacity.
What is the lifespan of a cordless mower’s battery?
The lifespan of a cordless mower’s battery can vary depending on several factors.
Generally, cordless mower batteries are designed to last for several years with proper care and maintenance.
On average, you can expect a cordless mower’s battery to last anywhere from 3 to 5 years.
However, it’s important to note that the actual lifespan can be influenced by factors such as the frequency of use, the size of the lawn being mowed, the type of grass being cut, and the overall battery capacity.
Are cordless lawn mowers as powerful as gas-powered mowers?
Cordless lawn mowers are not as powerful as gas-powered mowers, but they offer sufficient cutting power for most residential lawns.
While gas mowers have traditionally been known for their robust performance, cordless mowers have improved significantly in recent years with advanced batteries and electric motors.
They may not match the raw power of gas mowers, but they provide convenient and environmentally-friendly alternatives for homeowners.
Can a cordless lawn mower handle thick or tall grass?
Cordless lawn mowers are capable of handling thick or tall grass, although their performance may vary depending on the specific model and battery power.
It’s important to choose a mower with sufficient cutting power and consider factors such as cutting width and adjustable cutting heights.
Some cordless mowers are specifically designed to handle challenging grass conditions, featuring powerful motors and sharp blades that can effectively tackle thicker grass.
However, it’s worth noting that excessively thick or overgrown grass may still pose a challenge, and in such cases, it may be necessary to make multiple passes or consider alternative mowing methods.
Do cordless mowers require regular maintenance like gas mowers?
Cordless mowers require regular maintenance, although the specific maintenance tasks may differ from those of gas mowers.
While cordless mowers do not have engines that require oil changes or spark plug replacements, they still require attention to ensure optimal performance.
Common maintenance tasks for cordless mowers include keeping the blades sharp and properly adjusted, cleaning the cutting deck after each use to prevent grass buildup, and checking and cleaning the battery contacts to ensure a good connection.
Additionally, it’s important to follow the manufacturer’s guidelines for battery maintenance, such as proper charging and storage practices.
Can I mow in wet conditions with a cordless mower?
Mowing in wet conditions with a cordless mower is generally not recommended.
While cordless mowers are designed to handle various mowing conditions, including damp grass, it is advisable to avoid mowing when the grass is excessively wet.
Mowing wet grass can lead to several issues, such as clumping, uneven cutting, and potential damage to the mower.
Wet grass tends to be heavier and can clog the mower’s cutting deck, impeding its performance.
Additionally, wet conditions can increase the risk of slipping or falling while operating the mower.
Best Cordless Lawn Mower Conclusion
In summary, cordless lawn mowers offer a convenient and eco-friendly solution for maintaining your lawn.
They provide benefits such as quieter operation, zero emissions, lower maintenance, and enhanced maneuverability.
While they may not match the power of gas mowers and have limitations in certain conditions, cordless mowers can still deliver satisfactory results when used appropriately.
By considering factors like cutting width, battery performance, ease of use, and personal preferences, you can select the right cordless mower for your needs.
Embrace the freedom and efficiency of cordless technology to achieve a well-groomed lawn without the hassle of gas-powered equipment. Happy mowing!
How Often Should I Water My Lawn? [Expert Tips & Advice]
Whether you’re a seasoned lawn care expert or just starting out, one of the most critical components of proper lawn care is watering.
But you may be asking “how often should I water my lawn?”
It’s a question that plagues many homeowners and can be the difference between a lush, green lawn and a dry, patchy one.
In this blog post, we’ll dive into the factors you need to consider when determining watering frequency.
We’ll cover everything from climate and soil type to grass type and growth habits.
We’ll also discuss the signs of under-watering and over-watering, as well as the best practices for watering your lawn.
This includes the best time of day to water, how much water to apply, and different watering techniques and equipment.
Let’s get started on the path to a healthy, green lawn!
How Often Should I Water My Lawn?

One of the most common questions we get asked is, “How often should I water my lawn?”
Unfortunately, the answer isn’t as simple as a one-size-fits-all solution. There are several factors you need to take into consideration when determining watering frequency.
Let’s take a look in more detail below.
Climate and Weather Patterns
One of the most significant factors is the climate and weather patterns in your area.
If you live in a hot and dry climate, your lawn may require more frequent watering than someone who lives in a cooler, more humid climate.
In hot and dry weather, the moisture in the soil evaporates more quickly, leaving your lawn parched and in need of hydration.
On the other hand, if you live in an area with high humidity or frequent rainfall, you may not need to water your lawn as often.
The natural precipitation can provide enough moisture for your lawn to thrive.
To determine the ideal watering frequency for your lawn, it’s important to pay attention to weather patterns and adjust accordingly.
During periods of drought or extreme heat, you may need to water your lawn more frequently to prevent it from drying out.
Conversely, during periods of heavy rainfall, you may need to cut back on watering to avoid over-saturating your lawn.
By taking into account the climate and weather patterns in your area, you can create a customised watering schedule that ensures your lawn receives the right amount of moisture to stay healthy and vibrant.
Soil Type and Moisture Retention
The type of soil you have in your lawn plays a significant role in determining how often you should water it.
The two main soil types are sandy soil and clay soil, and they both have different properties when it comes to water retention.
Sandy soil is much more porous than clay soil, meaning it drains water more quickly and is less likely to retain moisture.
This means that if you have sandy soil in your lawn, you may need to water it more frequently to ensure that it gets enough water to thrive.
On the other hand, if you have clay soil, it is much more compact and dense, and therefore holds onto water for longer periods of time.
This means that if you have clay soil in your lawn, you may not need to water it as often.
To determine the type of soil you have in your lawn, you can perform a simple soil test.
This can be done by digging a small hole in your lawn and examining the soil. If the soil feels gritty and coarse, it is likely sandy soil. If it feels sticky and heavy, it is likely clay soil.
Once you have determined your soil type, you can adjust your watering frequency accordingly.
Sandy soil may require more frequent watering to prevent it from drying out, while clay soil may require less frequent watering to prevent waterlogging.
In addition to soil type, you should also consider the moisture retention of your soil. If your soil is dry and has a hard time retaining moisture, you may need to water your lawn more frequently.
On the other hand, if your soil retains moisture well, you may be able to water less frequently.
Be sure to monitor your soil’s moisture levels and adjust your watering schedule accordingly to ensure that your lawn is getting the proper amount of water it needs to thrive.
Grass Type and Growth Habits
When it comes to watering your lawn, it’s important to take into account the specific type of grass you have and its growth habits.
Some grasses have deeper root systems and are better able to withstand drought conditions, while others have shallow roots and require more frequent watering.
In addition to the type of grass, it’s also important to consider its growth habits. Some grasses have a dense, low-growing habit and require more frequent watering to prevent the soil from drying out.
Other grasses have a more upright growth habit and can tolerate slightly drier conditions.
Overall, it’s important to understand the specific watering needs of your grass type and adjust your watering frequency accordingly.
This will not only help keep your lawn healthy and green, but it will also help conserve water and save you money on your water bill.
Shade and Sun Exposure
When it comes to watering your lawn, shade and sun exposure are also important factors to consider.
If your lawn is heavily shaded, it will require less water than a lawn that is in full sun all day.
This is because shaded areas lose less water to evaporation. On the other hand, if your lawn is in full sun, it will need more water to compensate for the increased rate of evaporation.
It’s also important to note that trees and other objects that cast shade over your lawn can affect how much water it needs.
Trees, in particular, can be a major source of competition for water, and their roots can often absorb water meant for your lawn. This can result in patchy areas that are dry and brown.
When determining how often to water your lawn, take into consideration the amount of shade and sun exposure it receives.
If your lawn is in full sun, it may need more frequent watering than a lawn that is shaded for most of the day.
Be sure to also pay attention to any trees or other objects that may be affecting the amount of water your lawn is receiving.
Slope and Drainage
When it comes to watering your lawn, slope and drainage are important factors to consider.
A lawn with a steep slope or poor drainage will often require more frequent watering than a flat, well-draining lawn.
This is because water runs off more easily on slopes, meaning that it can quickly evaporate or be lost to runoff.
On the other hand, a lawn with poor drainage can become waterlogged, which can cause root rot and other problems.
To determine how often you should water a sloped or poorly draining lawn, it’s important to take into account factors such as soil type, grass type, and weather conditions.
Sandy soils, for example, drain more quickly than clay soils, while warm-season grasses may require less water than cool-season grasses.
Additionally, you may want to consider implementing strategies to improve drainage, such as installing a French drain or adding organic matter to the soil to increase its ability to hold moisture.
It’s also important to note that watering a sloped lawn requires a different approach than watering a flat lawn.
To prevent runoff, it’s best to water slowly and for a longer period of time, allowing the water to soak into the soil gradually.
This can be achieved by using a drip irrigation system, soaker hoses, or by setting your sprinklers to run for shorter periods of time with breaks in between to allow the water to soak in.
Signs of Under-watering and Over-watering
How To Tell If Your Lawn Is Under-Watered

It can be challenging to determine whether your lawn is receiving enough water or not.
In this section, we’ll go over some signs that your lawn may be under-watered and in need of more hydration.
- Brown or yellow patches: When the lawn lacks sufficient water, it may develop brown or yellow patches. These patches can be caused by either overwatering or underwatering, so it’s important to check the soil moisture level before watering.
- Footprints remain visible: Another sign of under-watering is when footprints or tire tracks remain visible for an extended period of time. This means the grass blades are not resilient enough to spring back up after being compressed.
- Curling or rolling grass blades: If the grass blades start to curl or roll up, it may be a sign of dehydration. This is the grass’s way of conserving moisture by reducing the amount of surface area exposed to the sun.
- Stunted growth: Under-watered lawns may also exhibit slow or stunted growth, as the grass is unable to absorb the necessary nutrients from the soil.
- Thatch buildup: Thatch, the layer of dead grass and other organic matter that accumulates on the surface of the soil, can build up more quickly in under-watered lawns. This can prevent water from penetrating the soil and reaching the roots, exacerbating the problem.
- Increased insect and disease activity: When lawns are under-watered, they become more vulnerable to insect infestations and disease. This is because the grass is weaker and less able to defend itself against pests and pathogens.
How To Tell If Your Lawn Is Over-Watered

Over-watering your lawn can be just as damaging as under-watering it. Signs of over-watering include:
- Mushy and waterlogged soil: If the soil feels squishy and muddy underfoot, it may be a sign that it is holding too much water.
- Fungus and mold growth: Over-watered lawns are often plagued by fungus and mold growth. This can present as white or brown patches on the grass.
- Foul odors: Stagnant water in the soil can produce a foul smell that is unpleasant and may be a sign of over-watering.
- Puddles and standing water: If there are puddles or standing water on your lawn, it may be a sign that it is being over-watered.
- Wilting or yellowing grass: While yellowing grass can be a sign of under-watering, it can also be a sign of over-watering. Over-watering can cause the roots of the grass to rot, leading to yellowing or wilting.
It is important to monitor your lawn regularly and adjust your watering schedule accordingly to prevent over-watering.
Best Practices for Watering Your Lawn
Time of Day to Water
When it comes to watering your lawn, the time of day can have a big impact on the health of your grass. Here are some best practices to keep in mind:
- Water in the morning: The best time to water your lawn is in the morning, before the sun gets too high in the sky. This allows the grass to absorb the water it needs before it evaporates in the heat of the day.
- Avoid watering in the afternoon: Watering in the afternoon can actually be counterproductive, as the water can evaporate before it has a chance to be absorbed by the grass. Additionally, wet grass during hot and sunny afternoons can lead to fungus growth.
- Watering at night: While it may seem like watering at night is a good idea to prevent evaporation, it’s generally not recommended. Moisture that lingers on grass overnight can create an ideal breeding ground for fungus and diseases.
- Be mindful of water restrictions: Depending on where you live, there may be restrictions on when you can water your lawn. Check with your local authorities to ensure you’re following any regulations in place.
- Adjust for weather conditions: If it’s particularly hot and dry, you may need to water your lawn more frequently. Conversely, if there’s been a lot of rain, you may not need to water at all. Be mindful of the weather conditions and adjust your watering schedule accordingly.
Overall, watering your lawn in the morning is the best practice. It allows the grass to absorb the water it needs before the sun and heat evaporate it, while also minimising the risk of fungal growth.
Keep in mind any local water restrictions, and adjust your watering schedule as needed based on the weather.
How Much Water to Apply
When it comes to watering your lawn, it’s important to make sure you’re giving it the right amount of water.
Applying too little water can lead to under-watering and a weak, shallow root system, while applying too much water can lead to over-watering and potential damage to your lawn.
To determine how much water your lawn needs, you can use the “inch-per-week” rule. This means that your lawn needs about 1 inch to 1.5 inches of water per week, either from rainfall or irrigation.
It’s important to note that the amount of water your lawn needs can vary based on factors such as temperature, humidity, and soil type.
In general, it’s better to water your lawn deeply and infrequently rather than shallowly and frequently, as this encourages deeper root growth and helps the grass become more resilient to drought conditions.
Frequently Asked Questions About Watering Your Lawn
How Do I Know If My Lawn Needs Watering?
There are several ways to tell if your lawn needs watering, including checking for footprints that stay compressed, observing the color and texture of the grass, and using a soil moisture meter to measure the level of moisture in the soil.
Additionally, if the blades of grass are folded or wilted, it may be a sign that the lawn needs water.
Can I Water My Lawn Too Much?
Yes, it is possible to water your lawn too much. Overwatering can lead to shallow root growth, soil erosion, fungal diseases, and other issues that can damage the health and appearance of your lawn.
It is important to follow best practices for watering and avoid overwatering to maintain a healthy and vibrant lawn.
What If I Don’t Have Access to a Sprinkler System?
If you don’t have access to a sprinkler system, there are still a few ways to water your lawn effectively. You can use a hose with a spray nozzle to apply water evenly across your lawn, or you can use a watering can to target specific areas.
Alternatively, you can look into portable sprinklers or drip irrigation systems that don’t require a permanent installation.
Whatever method you choose, make sure to water deeply and infrequently to encourage deep root growth and promote a healthy lawn.
How Often Should I Water My Lawn Conclusion
In conclusion, proper lawn watering practices are essential to maintaining a healthy and lush lawn.
It is important to understand how much water your lawn needs, when to water, and how to water efficiently.
Over-watering can lead to a host of problems, such as fungus growth, root rot, and insect infestations.
Under-watering can also be detrimental to the health of your lawn, causing it to dry out and turn brown.
By following the best practices for watering your lawn, you can ensure that your lawn receives the right amount of water, at the right time, and in the right way.
This will not only help to keep your lawn looking its best but will also conserve water and reduce your water bill.
Remember to monitor your lawn regularly for signs of over or under-watering, and adjust your watering practices accordingly.
With a little effort and attention, you can achieve a healthy and beautiful lawn.
Other Guides That May Interest You
What is the Best Time of Year to Lay Turf?
A common question often asked after purchasing turf is, “what is the best time of year to lay turf?”
Turf establishment is a complex process that depends on a variety of factors, such as soil conditions, temperature, and moisture levels.
The success of your turf installation project largely depends on when you choose to lay the turf.
In this blog post, we’ll explore the best time of year to lay turf, discussing the pros and cons of each season and providing tips on how to prepare the soil and lay the turf for optimal growth and development.
Whether you’re a homeowner looking to improve your lawn or a landscaper seeking to enhance your clients’ outdoor spaces, this guide will provide you with the insights you need to achieve a beautiful and healthy turf that will thrive for years to come.
So let’s get started!
Best Time of Year to Lay Turf

For optimal results, it’s best to lay turf during mid-autumn. Although it can be successfully laid anytime from mid-autumn to early spring, as long as the soil isn’t excessively wet or frosty. Both spring and autumn are ideal seasons for turf establishment, as they require minimal mowing, allowing the newly laid turf to take root undisturbed for several weeks. This provides an excellent opportunity for the roots to establish themselves, leading to a healthy and thriving turf. However, turf can also be successfully laid in the spring and summer months, provided that proper soil preparation and watering techniques are employed. Winter is generally not an ideal time to lay turf due to the colder temperatures and increased risk of frost damage.
Laying Turf In Spring
While autumn is widely considered the best time of year to lay turf in the United Kingdom, spring can also be a suitable season, provided that certain conditions are met. In particular, the soil must have warmed up sufficiently, and there must be enough moisture available to support the establishment of the turf. Additionally, it’s essential to avoid laying turf during periods of drought, as this can significantly hinder the growth and development of the newly installed turf. One of the advantages of laying turf in the spring is that there is typically more daylight available, which can promote photosynthesis and encourage the growth of the turf. Furthermore, spring temperatures are usually mild, which can help to speed up the turf’s root development and reduce the risk of heat stress. However, one potential downside to laying turf in the spring is that it may require more frequent watering than during other seasons. The warmer temperatures and increased sunlight can cause the soil to dry out quickly, necessitating more frequent watering to keep the turf moist and healthy.
Pros:
- More daylight promotes photosynthesis and can encourage growth.
- Mild temperatures can speed up root development and reduce the risk of heat stress.
- Ideal for those who missed the autumn planting season.
- Can result in a lush, green lawn by summertime.
Cons:
- Soil must be warm enough and moist enough to support the establishment of the turf.
- May require more frequent watering than during other seasons.
- Drought conditions can significantly hinder the growth and development of the newly installed turf.
- Not as optimal as autumn for turf establishment and root development.
Laying Turf In Summer
Summer is generally not the best time of year to lay turf, as the hot and dry conditions can make it challenging for the turf to establish and take root. However, if you must lay turf during the summer months, there are some steps you can take to increase your chances of success.
1. Prepare Soil
One important consideration when laying turf in the summer is to ensure that the soil is adequately prepared. This means removing any weeds, rocks, or other debris and ensuring that the soil is level and free from clumps. It’s also important to ensure that the soil is well-watered before laying the turf, as this will help to ensure that the roots have access to the moisture they need to establish.
2. Watering
Another critical factor to consider when laying turf in the summer is watering.
The turf will need to be watered frequently to ensure that the soil remains moist and that the roots have access to the water they need to establish. This may mean watering the turf multiple times per day, particularly during hot and dry weather. One potential advantage of laying turf in the summer is that there is plenty of daylight available, which can help to promote growth and encourage the turf to establish quickly. However, it’s important to avoid laying turf during particularly hot or sunny periods, as this can cause the grass to dry out and can increase the risk of heat stress.
Pros:
- Plenty of daylight available can promote growth and help the turf establish quickly.
- Summer can be a good time to lay turf if you need to create an instant lawn for an event or occasion.
- Warm temperatures can encourage root growth and help the turf to establish.
Cons:
- Hot and dry conditions can make it challenging for the turf to establish and take root.
- Frequent watering is necessary to ensure the soil remains moist and the roots have access to the water they need.
- Laying turf during particularly hot or sunny periods can increase the risk of heat stress and drying out.
Laying Turf In Autumn
Autumn is one of the best times of year to lay turf in the UK. As temperatures start to cool down, and rainfall becomes more regular, the conditions are ideal for establishing a healthy and robust lawn.
One of the benefits of laying turf in autumn is that the ground is still warm enough for the roots to establish, but not so hot that they dry out. This means the turf can take root and establish itself before the winter sets in, and then start growing strongly again in the spring. Another advantage of laying turf in the autumn is that the weather is generally cooler and wetter, meaning that the turf will require less watering than if it were laid in the summer. This can save you time, effort and money, while still allowing the turf to establish and grow strong roots. However, it is important to make sure that the ground is not waterlogged or frozen before laying turf in the autumn. This can prevent the roots from establishing, and can lead to the turf dying off before it has a chance to establish itself properly. Overall, autumn is a great time to lay turf in the UK, as the conditions are generally ideal for establishing a strong and healthy lawn.
Pros:
- The cooler temperatures in autumn are ideal for establishing healthy roots.
- Regular rainfall means the turf requires less watering than in the summer months.
- The turf can establish itself before the winter sets in and be ready to grow strong in the spring.
- Autumn weather is generally milder, making working outside more comfortable.
- Less competition from weeds and other plants means that the turf is more likely to take root and establish itself.
Cons:
- Ground conditions can become too wet or even frozen in autumn, which can make it difficult to lay turf.
- Turf laid too late in the autumn may not have enough time to establish before the winter months.
- Autumn leaves can fall onto newly laid turf and cause problems with drainage and light.
- There may be a higher demand for turf in the autumn, which can make it more expensive and harder to source.
Laying Turf In Winter
When it comes to laying turf in winter, there are both advantages and disadvantages to consider. On the one hand, the cooler temperatures mean that the turf is less likely to dry out, which can be a problem during the hotter months of the year. However, there are also some potential drawbacks to laying turf in winter. One of the main concerns is the risk of frost and freezing temperatures. If the ground is frozen, it can be difficult to prepare the soil properly and lay the turf. Additionally, if the weather is wet, the ground can become waterlogged and muddy, which can make it difficult to work with. Another consideration is that the grass may take longer to establish itself during the winter months. This is because the cooler temperatures slow down the growth process, which means that the turf may take longer to root and start growing. You may also need to be more careful about walking on the turf during the winter months, as the ground may be softer and more prone to damage. Overall, while it is possible to lay turf during the winter months, it is important to weigh the pros and cons carefully before making a decision. If you do decide to lay turf during the winter, it is important to take extra care with the preparation process to ensure that the turf has the best chance of establishing itself successfully.
Pros:
- Turf suppliers are often less busy in winter, meaning you may be able to get a better deal.
- Laying turf in winter can help the grass establish strong roots before spring, making it more resilient in the long term.
- The cooler temperatures and shorter days mean you’ll need to water your turf less frequently than you would in summer.
- You won’t need to mow your lawn as often in winter, so newly laid turf can be left relatively undisturbed.
Cons:
- Laying turf in winter can be more challenging due to wet, muddy conditions that can make the work more difficult.
- Frost and snow can also make the ground too hard to work with, or prevent the turf from rooting properly.
- If the ground is waterlogged or frozen, it may not be possible to lay turf at all.
- You’ll need to be extra vigilant about watering your newly laid turf, as it’s still important to keep it moist even in colder temperatures.
Laying Turf And Aftercare
Laying turf and aftercare are crucial steps in creating a beautiful and healthy lawn.
Proper installation and maintenance can ensure that your turf remains lush and green for years to come.
Here are some key things to keep in mind when laying turf and caring for it afterward:
- Site Preparation: Proper site preparation is critical to ensuring that your turf has a healthy start. Before laying turf, make sure to clear the area of any debris, rocks, or weeds. Level the area and add a layer of topsoil if necessary.
- Watering: After laying turf, it’s essential to water it immediately and regularly to encourage root growth. Water daily for the first week, and then gradually decrease the frequency. Avoid overwatering, as this can lead to disease and shallow root growth.
- Mowing: Once your turf has established roots, it’s time to start mowing. Set your mower to a high setting, and mow regularly to keep the grass at a consistent height. Avoid cutting more than one-third of the blade length at a time.
- Fertilising: Regular fertilisation can keep your lawn healthy and green. Apply a balanced fertiliser according to the manufacturer’s instructions. Avoid fertilising during hot, dry weather, as this can damage your turf.
- Weed Control: Weeds can quickly take over your lawn if left unchecked. Regularly inspect your lawn for weeds and use appropriate weed control measures, such as hand weeding or herbicides.
- Aeration: Over time, soil can become compacted, making it difficult for water and nutrients to penetrate. Aeration can help to loosen the soil and promote root growth. Aerate your lawn every one to two years, preferably during the growing season.
- Pest Control: Keep an eye out for common lawn pests, such as grubs and chinch bugs. Early detection and treatment can prevent damage to your turf.
Remember, proper care and maintenance are essential to keeping your lawn healthy and vibrant. With a little effort, you can enjoy a beautiful and lush lawn for years to come.
Frequently Asked Questions
Do I need topsoil before laying turf?
Yes, it’s generally recommended to use topsoil before laying turf as it provides a good growing medium for the grass and ensures the roots can establish properly. Topsoil also helps to level out any bumps and dips in the ground, creating a more even surface for the turf to be laid on. It’s important to choose a good quality topsoil that is free from weeds and debris, and to apply it evenly across the area where you will be laying the turf.
When shouldn’t you lay turf?
While you can lay turf throughout the year, there are certain conditions when it’s not recommended. Firstly, avoid laying turf during periods of extreme weather such as heavy rain, frost, or heatwaves. The soil should be moist but not waterlogged or bone dry. It’s also best to avoid laying turf during the winter months when the grass is dormant and won’t establish as well. Additionally, if you have significant groundworks to do, like levelling or extensive soil preparation, it’s best to delay laying the turf until the ground is suitably prepared.
Can you walk on turf straight away?
It’s best to avoid walking on newly laid turf for at least a couple of weeks to allow the roots to establish and the soil to settle. This will help to prevent any damage or unevenness to the turf. After a few weeks, you can gradually start to use the lawn, but it’s still important to be gentle and avoid heavy use until the turf has fully rooted in.
Does turf get ruined in snow?
Snow can have negative effects on turf, but it is not necessarily ruined by it. If the snow is heavy and wet, it can compact the soil and damage the turf’s blades. However, if the snow is light and fluffy, it can provide a protective layer against frost and extreme cold temperatures. It is important to avoid walking on the turf when it is covered in snow, as this can cause further damage. Once the snow has melted, it is advisable to check the turf for any damage and make any necessary repairs.
Best Time of Year to Lay Turf Conclusion
In conclusion, the best time of year to lay turf in the United Kingdom is mid-autumn, but turf can be laid between mid-autumn and early spring, provided that the soil isn’t too wet or frosty. Spring and autumn are both suitable times to lay turf, with spring offering the advantage of faster establishment, but the risk of drought or heat stress in summer. Summer is the least optimal time to lay turf due to the risk of high temperatures and drought stress, but if proper care is taken, it can still be successful. Winter is also not an ideal time to lay turf due to the risk of frost, but it can be done if necessary.
Ultimately, the success of laying turf depends on a number of factors, including soil preparation, watering, and maintenance. By taking the time to properly prepare the soil, choosing the right time of year, and providing adequate care and attention, you can ensure that your new turf becomes a beautiful and healthy lawn that you can enjoy for years to come.
How To Lay Turf: [An Ultimate Guide]
Transforming your lacklustre lawn into a lush green oasis is a wise decision. In this guide we will teach you how to lay turf.
But before you get your hands dirty, it’s crucial to understand that laying turf is not as simple as it may seem.
This guide will walk you through the step-by-step process and share important tips and tricks to ensure your turf laying endeavor is a resounding success.
Whether you’re planning to patch a small area or cover a larger space in your back garden, this comprehensive guide will equip you with the knowledge you need to know how to lay turf like a pro.
From essential preparation steps to the right tools for the job, and crucial aftercare guidance to maintain a healthy lawn, we’ve got you covered.
So let’s dive straight in and unlock the secrets to achieving a flawless, envy-worthy lawn!
The Benefits Of A Lawn
A lawn is more than just a natural and aesthetically pleasing addition to a property. In fact, there are many surprising benefits to having a lawn and turfed areas that can enhance both the appearance and functionality of your outdoor space.
- Cooling Effect: One such benefit is the cooling effect that natural turf can provide. In hot weather, natural turf can stay up to 30 degrees cooler than harder landscaping surfaces, helping to create a more comfortable outdoor environment.
- Air Quality/Oxygen: Another benefit of having a lawn is its ability to improve air quality and produce oxygen. Natural turf has the unique ability to absorb carbon dioxide and release oxygen into the atmosphere. In fact, a healthy lawn measuring 250 square meters can produce enough oxygen for a family of four. Additionally, turf is effective in trapping dust, further contributing to improved air quality.
- Absorbs Water: Turf is also excellent at absorbing rainfall and slowing down the flow of water to prevent flooding, making it a practical addition to any outdoor space. Beyond its functional benefits, a lawn can also have a positive impact on emotional wellness. Studies have shown that natural green spaces, such as lawns, can reduce stress by lowering blood pressure and heart rate, providing a peaceful and calming environment.
- Adds Value: Adding green space, such as turf, to a property can also increase its value, making it a worthwhile investment for homeowners. Finally, it’s worth noting that lawns have a self-cleaning surface through the growing and respiring process, providing a hygienic environment for outdoor activities and relaxation.
- Stress Emotional Wellness: Natural green spaces have been proven to reduce stress by lowering blood pressure and heart rate.
What Time Of Year Is Best To Lay Turf?
The ideal time to lay turf is during early spring or early to mid-autumn when the soil quality is at its best. It’s important to avoid laying turf when the soil is too wet or when there is frost on the ground.
Lawn Planning And Preparation
Before purchasing turf, it’s crucial to plan out the entire process, including taking accurate measurements and ensuring you have all the necessary tools for the job. Let’s delve into the details of lawn measurements to ensure you get the right amount of turf.
Lawn Measurements
Calculating exactly how much turf you will need can prevent you from purchasing too much or too little turf.
Here at Turfworld, our turf is available in 1 SQ meter rolls. Use our turf calculator which will tell you exactly how many rolls you will need to order, based upon your measurements.
How To Measure A Square Or Rectangular Lawn
For square or rectangular lawns, simply measure the length and width in meters, and multiply the two numbers together to calculate the area.
For instance, if the measurements are 12 meters by 12 meters, the area would be 144 square meters (12 x 12 = 144).
Alternatively, you can use our turf calculator, which will provide you with the exact amount of turf to order based on your measurements.
How To Measure A Circular Lawn
Measuring a circular lawn requires determining the radius, which is the straight line from the centre of the circle to the outside.
Multiply this number by pi (3.142) to calculate the area of the circular lawn.
How To Measure An Irregular Lawn
Measuring an irregular lawn can be done by dividing it into smaller squares and circles using the aforementioned methods, and then adding the calculated areas together to obtain the overall area.
In some cases, an educated guess may be necessary for certain areas, and it’s advisable to order 5% more turf than required to account for any discrepancies.
Recommended Tools For Laying Turf
Here is a list of some the required tools needed to successfully lay turf:
- A sharp spade or turf cutting tool
- Wheelbarrow
- Rake
- Garden fork
- Gardening gloves
- Hose pipe
- A sharp knife
- Some scaffolding planks
- Topsoil (if required)
- Weed killer (if required)
How To Remove An Existing Lawn
Ground preparation is a crucial step that requires time and effort, but the end result is a healthy and successful lawn that you can enjoy for years to come.
Laying fresh turf onto an existing lawn is not recommended, as it can hinder proper rooting.
Therefore, if you have an existing lawn, you will need to remove it before laying new turf. There are several methods you can use for this purpose.
Method 1: How To Dig Up A Lawn using A Shovel
- Start by mowing your lawn and setting your mower to the lowest setting.
- Water the lawn thoroughly and wait for a couple of days to allow the soil to soften.
- Use a shovel to cut the turf into long strips, about 4 inches deep.
- Water the area again with a hose.
- Keep an eye on the area over the next couple of weeks and remove any weeds that appear.
Using a sod cutter:
Alternatively, you can use a sod cutter on your lawn. Use the sod cutter to cut sections that are 12 to 18 inches wide.
- Roll up each cut section with the grass side down and relocate it.
- Spread about 2 to 4 inches of compost on the grass-side-down sod.
- Till the soil with a rototiller once the sod has turned brown and dried.
Using a rototiller:
A rototiller is a machine that churns up turf and topsoil to a depth of around 5 to 6 inches.
- Make around two passes on each section of the lawn in an overlapping manner.
- Once completed, spread about an inch of compost and till it into the soil.
Method 2: Solarisation
This technique is particularly effective in regions with warm and sunny weather conditions. Here’s a step-by-step guide to the solarisation process:
- Begin by mowing your lawn, making sure to set your mower to the lowest cutting height.
- Thoroughly water the grass using a hose, ensuring that the entire lawn is evenly moist.
- Cover the entire lawn with plastic sheeting, and use rocks or other weights to anchor the sheeting in place.
- Leave the plastic sheeting in place for a period of four to eight weeks, taking into account that the process may occur more quickly in warmer and sunnier weather.
- After the designated timeframe, carefully remove the plastic sheeting, taking care not to damage the underlying soil.
Pro tip: If you’re attempting solarisation in cooler weather, you can still achieve success by using black plastic sheeting instead of clear plastic. This blocks sunlight and prevents photosynthesis, effectively killing off the existing lawn.
Checking The Depth And Quality Of Your Topsoil
Optimal topsoil depth should ideally range from 100mm to 150mm, and it should be levelled using a rake for an even surface.
If your existing soil needs improvement, a soil improver can be utilised to enhance its quality.
For additional topsoil needs, we recommend our TS1 Top Soil, which is of premium quality and suitable for various landscaping applications.
Levelling The Ground
Ensuring that the ground is level is crucial to achieve the best results with your new turf.
Even though the ground may seem level to the naked eye, there may be hidden uneven areas that require attention.
Here’s a step-by-step guide on how to level the ground effectively:
- Loosen the soil by either digging or rotovating to create a soft and workable surface.
- Remove any debris, such as stones or weeds, to ensure a clean and clear ground.
- Compact the soil by walking over the entire area, avoiding heavy equipment like rollers that may cause over-compaction.
- Fill in any dips or hollows with additional soil to create a smooth and even surface.
- Continuously rake and fine-tune the soil until it is finely leveled and free of any irregularities.
- Water the soil a few days prior to the arrival of your turf to ensure it is adequately moist.
By following these steps diligently, you can create a level and prepared surface for laying turf, ensuring optimal results for your landscaping project.
Ordering Turf
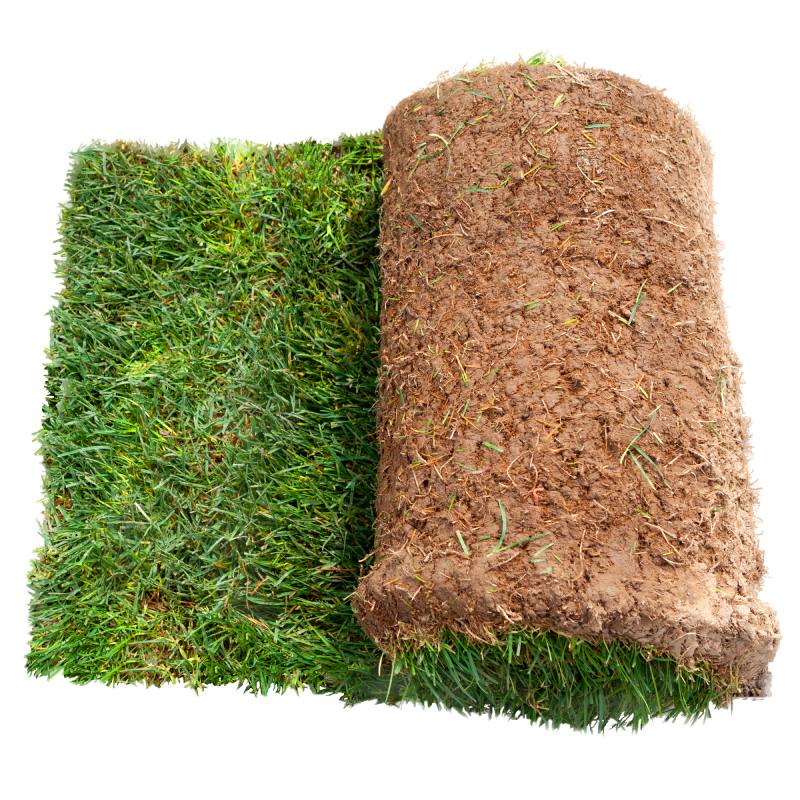
Once you have completed the prepping process, you are now ready to order your turf.
You can order turf Here at Turfworld where we supply high quality turf to both trade businesses and public customers.
Use our turf calculator on the product page to work out exactly how many rolls of turf you will need for your project.
For best results, we always advise to lay the turf as soon as possible, especially during warmer months.
Need extra soil with your turf? Check out our quality Screened Top Soil TS1.
How To Lay Turf: Step-By-Step
Let’s take a look at the step-by-step process on how to correctly lay turf.
Step 1
To begin, it’s best to start laying the turf from a straight edge of your garden, such as a border or a plank. If there isn’t a border, you can leave some excess on the first roll, which can be trimmed later with a long-bladed garden knife.
Gently press the turf into the ground using both hands, ensuring a snug fit. For circular lawns, start from the middle and work your way out, maintaining a smooth and even surface.
Step 2
Continue laying each roll of turf directly after the next, ensuring that the edges are parallel and closely butted up against one another.
Use both hands to prevent any gaps between the rolls, creating a seamless appearance.
Repeat this process until you have finished an entire row, maintaining precision and attention to detail.
Pro Tip: To prevent leaving footprints on your newly laid turf, use a board to stand on while working, ensuring a pristine and professional finish.
Step 3
Now, it’s time to work on the next row of turf, and the key here is to stagger each patch of turf next to the previous row.
By doing so, the middle of the patches should line up with the seams from the previous and next row, creating a visually appealing brickwork design.
This not only ensures a more even coverage but also prevents the turf from drying out, maintaining its health and vitality.
Step 4
Continue the above steps until you have covered the entire area. At this stage, there are two important tasks to be done:
- Perfecting Your Lawn: Take a sharp knife or spade and carefully trim and clean up any excess turf along the edges to achieve a polished and pristine appearance.
- Pack Down The Turf: Use the back of a rake or spade to gently press down on each patch of turf, starting from one corner and going over each row. This helps to establish good contact between the turf and the soil, promoting healthy root growth.
Step 5
Proper watering is crucial for the success of newly laid turf. It’s important to thoroughly water the turf on the same day it is laid to help the roots establish and prevent drying out.
However, be mindful not to overwater, as it can cause the turf to separate from the soil beneath.
The correct approach is to water until it begins to puddle, allowing the water to soak in and be absorbed by the soil below.
Laying Turf To A Curve
If you are laying turf on a circular lawn or to a curve, the process is similar to that of a rectangular or square lawn.
The only difference is that you will need to slightly overlap the patches of turf until they conform to the curve.
Trim any excess turf until you have a clean and seamless curve.
Aftercare: How To Care For Your New Lawn
Caring for your lawn in the weeks following installation is crucial to ensure its successful establishment and long-term health.
Keep Off The Grass
One key aspect of aftercare is to avoid walking on the new turf for approximately 2 to 3 weeks, including keeping pets off the grass.
This allows the roots to firmly establish in the soil without any disruption.
How to test that the turf is rooted:
To test if the turf has rooted properly, gently lift a corner of the turf.
If it lifts easily, it may not have rooted properly, but if it doesn’t move, then the rooting process has been successful.
Watering
Proper watering is also essential for the success of the new lawn. The frequency of watering depends on the time of year and weather conditions.
- The First Week: During the first week, it is recommended to water once per day under normal weather conditions, twice per day during hot weather, or if there’s heavy rain during the day, watering once per day is enough during spring and autumn months.
- Weeks 2 – 3: In weeks 2 to 3, watering around 2 to 3 times a week is sufficient.
- Weeks 4 – 6: In weeks 4 to 6, the frequency can be reduced to 1 to 2 times per week.
- Best Time To Water: The best time to water is in the evening or early morning to ensure that the water is fully absorbed by the soil and not evaporated by the sun.
- Signs Of Dying Turf: If you notice signs of dying turf such as curling or browning, it’s important to water immediately to prevent further damage.
Feeding
Feeding your lawn is a crucial step in maintaining a healthy and vibrant turf. Here are some tips:
- If you used pre-turfing soil or fertiliser, your lawn will typically not need feeding until 6-8 weeks after installation.
- During the growing season, which is typically spring, summer, and autumn, it’s recommended to use a balanced fertiliser on your lawn every four to six weeks. This will provide the necessary nutrients for healthy growth and development.
Mowing
When it comes to mowing your newly laid turf, it’s important to follow proper techniques.
- Before you mow your lawn for the first time, ensure that the turf has fully rooted by gently lifting a corner of the turf. If it lifts easily, it may not have rooted properly yet.
- If your turf has been laid in the summer, it’s generally best to mow your lawn within 1-2 weeks of installation.
- To avoid stressing the grass on the first mow, set your lawn mower to the highest setting and ensure that the blades are sharp.
- During spring, summer, and autumn, it’s important to mow the lawn regularly to maintain an optimal height.
- During winter months, grass growth slows down, so only mow the grass if it’s visibly growing.
- As your lawn becomes fully established, you can gradually reduce the height of the cut to achieve your desired lawn height.
Ready To Order?
Now that you’re well-versed in the correct process of laying turf and caring for your lawn, it’s time to place your order and bring your vision to life!
After removing your existing lawn and thoroughly prepping the area, you can now order your turf with confidence.
It’s crucial to have all the necessary supplies and materials on hand before starting the installation process.
How To Lay Turf Conclusion
In conclusion, with careful planning and preparation, you can easily install a new lawn on your own and enjoy the numerous benefits of having a lush and vibrant turf.
Remember to follow the step-by-step instructions in our comprehensive how-to guide for laying turf, and utilise the aftercare tips to ensure a healthy and thriving lawn in the end.
Your beautiful lawn awaits!