Lawn Thatch: A Comprehensive Guide to Removal and Prevention
Welcome to the fascinating world of lawn thatch—an often overlooked yet crucial aspect of maintaining a beautiful and vibrant lawn.
Together, we’ll uncover the mysteries of lawn thatch, explore the reasons behind its presence, and equip you with effective methods to conquer it.
Prepare to discover the secrets to achieving a lush and healthy lawn that will be the envy of your neighbourhood.
What is Lawn Thatch?

Understanding Thatch Composition
Lawn thatch is a complex mixture of organic matter that accumulates on the surface of your lawn. It consists of living and dead grass shoots, stems, and roots, along with other organic debris.
Over time, these materials build up, forming a layer that lies between the soil and the green grass blades.
Thatch is not inherently harmful; it’s a natural part of the lawn ecosystem. However, problems arise when thatch becomes too thick or compacted.
This can impede the flow of water, air, and nutrients to the grass roots, leading to a range of issues.
Thatch vs. Lawn Debris
It’s crucial to differentiate between thatch and ordinary lawn debris.
- Lawn Debris: Lawn debris includes leaves, twigs, and other organic matter that can accumulate on your lawn’s surface.
- Lawn Thatch: Thatch, on the other hand, is specifically the tightly interwoven layer of organic material that forms beneath the grass.
While debris can be easily removed, thatch requires more specialised attention.
In the following sections, we’ll delve deeper into why thatch can be problematic for your lawn and how to identify it.
Why is Thatch a Problem?
1. Reduced Nutrient Absorption
Thatch can become problematic when it reaches a certain thickness because it limits the movement of essential nutrients to the grass roots. This impediment can result in malnourished grass, leading to poor growth and overall lawn health.
As the thatch layer becomes compacted, it essentially acts as a barrier, preventing fertilisers and nutrients from penetrating the soil and reaching the root zone where they are needed most.
This nutrient deficiency can manifest as pale, unhealthy grass that struggles to thrive.
2. Water Drainage Issues
Excessive thatch can also interfere with proper water drainage. When rainfall or irrigation water cannot penetrate the thatch layer efficiently, it often accumulates on the surface, leading to puddles and runoff.
This not only wastes water but can also create uneven moisture distribution across the lawn.
Some areas may become waterlogged, leading to root rot and other moisture-related problems, while others may remain parched and susceptible to drought stress.
3. Pest and Disease Havens
Thatch provides an ideal environment for pests and diseases to thrive. The moisture-rich layer creates a microclimate conducive to the development of fungi, molds, and harmful insects.
This can lead to infestations and diseases that harm your grass. In particular, fungi like brown patch and dollar spot thrive in the sheltered, humid conditions that thatch can create.
Furthermore, the presence of pests and diseases in the thatch layer can disrupt the health of your lawn, making it more vulnerable to stress factors such as extreme weather conditions. Healthy, well-maintained lawns are better equipped to resist these challenges.
Understanding why thatch is problematic is the first step in effective lawn care. In the next section, we will explore how to identify thatch in your lawn.
Identifying Thatch in Your Lawn
The “Thatch Test”
To determine if your lawn has a thatch issue, you can perform a straightforward test known as the “thatch test.” Here’s how it works:
- Select a representative area of your lawn.
- Take a garden fork or a screwdriver and insert it into the soil.
- Push it downward. If you encounter resistance or the tool doesn’t penetrate easily, you likely have a thatch problem.
When performing this test, it’s important to do it in multiple spots across your lawn to get an accurate assessment of the thatch layer’s thickness. If the tool consistently encounters resistance, it’s a sign that your thatch layer may need attention.
Visual Inspection
Another method to identify thatch is through visual inspection. Follow these steps:
- Select a small section of your turf.
- Gently lift a portion of the grass and examine the layer between the grass blades and the soil.
- If you observe a brownish, spongy material that’s about half an inch to an inch thick, you’ve likely identified the thatch layer.
Visual inspection can provide a clearer indication of the thatch’s thickness and density. Thicker thatch layers are more likely to cause problems and may require removal or management.
Once you’ve identified thatch in your lawn, the next steps involve addressing it. In the upcoming sections, we’ll explore strategies to prevent thatch build-up and methods for removing it.
Preventing Thatch Build-Up

1. Proper Lawn Mowing
Maintaining the right mowing practices can significantly reduce the likelihood of thatch build-up.
One common mistake is cutting the grass too short, a practice known as “scalping.” Scalping can stress the grass and encourage the development of thatch. Instead, aim to follow the one-third rule: never remove more than one-third of the grass blade’s height in a single mowing session.
Taller grass shades the soil, reducing evaporation and the accumulation of debris, which can help prevent thatch formation.
2. Aeration Techniques
Aeration is a crucial practice for preventing thatch build-up. It involves perforating the soil with holes to improve air circulation, water infiltration, and nutrient absorption.
When soil is compacted, it promotes thatch development. Aerate your lawn by using a lawn aerator or aerating shoes, ensuring the holes are evenly spaced across the lawn. This process reduces compaction, encourages root growth, and disrupts thatch formation.
3. Choosing the Right Grass Type
Selecting the appropriate grass type for your region and soil conditions can make a significant difference in thatch prevention. Some grasses are inherently less prone to thatch build-up than others.
Research and choose grass varieties suited to your area to minimise thatch concerns.
By adopting these preventive measures, you can reduce the likelihood of thatch build-up in your lawn and ensure its long-term health.
In the following section, we will explore various methods for removing thatch should it become problematic.
Removing Thatch: DIY Methods
1. Dethatching Rakes
Dethatching rakes are invaluable tools for removing thatch manually. These specialised rakes have sharp tines designed to penetrate the thatch layer and lift it to the surface. When using a dethatching rake, follow these steps:
- Select a dry day for the task to ensure that the thatch is not soggy.
- Mow your lawn to a height slightly lower than usual to expose the thatch layer.
- Using the dethatching rake, work systematically across your lawn, raking in the same direction each time.
- Collect the loosened thatch with a lawn rake or a bagging attachment on your mower.
Dethatching can be physically demanding, especially for larger lawns, but it’s an effective method for tackling moderate thatch issues.
2. Lawn Mower Attachments
Some lawnmowers come equipped with dethatching attachments, such as vertical blades or tines that penetrate the thatch layer while you mow. This can save time and effort, as it combines dethatching with regular lawn maintenance.
When using a dethatching mower attachment, make sure to set it to the appropriate depth to avoid damaging the grass.
3. Manual Removal
For small areas with minimal thatch build-up, manual removal can be a practical option. Use a garden rake or a specialised thatch rake to gently lift and remove the thatch layer.
Take care not to damage the grass beneath as you work. Manual removal is best suited for spot treatments or smaller sections of your lawn.
The method you choose for removing thatch should align with the severity of the issue and the size of your lawn.
In the next section, we’ll explore the advantages of professional thatch removal and the steps involved.
Professional Thatch Removal
When to Hire a Pro
In some cases, thatch build-up may be extensive, or you may prefer to leave the task to experts. If you notice signs of severe thatch, such as a spongy lawn surface, poor water drainage, or consistent problems despite your efforts, it may be time to consider professional thatch removal.
Additionally, if you have a large lawn, professional services can save you significant time and effort.
The Thatch Removal Process
Professional thatch removal typically involves the use of specialised equipment that efficiently removes thatch without harming your grass. Here’s a general overview of the process:
- Assessment: A professional lawn care technician will first assess the severity of the thatch issue and determine the appropriate equipment and approach.
- Equipment Setup: They will set up the necessary equipment, which may include power dethatchers or vertical mowers.
- Thatch Removal: The equipment will be used to cut through the thatch and lift it to the surface. This process can be relatively quick and thorough, especially when compared to manual removal methods.
- Collection: The removed thatch is collected and typically disposed of properly, ensuring it doesn’t reintroduce thatch into your lawn.
- Clean-up: Any debris left on the lawn will be cleaned up, leaving your lawn ready for the next steps in lawn care.
Professional thatch removal is efficient and effective, and it ensures that the thatch issue is properly addressed. Once thatch is removed, it’s important to follow up with lawn renovation to promote healthy growth, which we’ll explore in the next section.
After Thatch Removal: Lawn Renovation
Overseeding
After removing thatch, your lawn may have areas where grass has been thinned out. To promote a full and healthy lawn, consider overseeding.
Overseeding involves spreading grass seeds evenly across your lawn, filling in gaps left by the removal of thatch. It’s a crucial step in rejuvenating your lawn and encouraging denser grass growth.
Before overseeding, ensure that the soil is well-prepared. This may involve raking the soil lightly and providing adequate moisture to help the new grass seedlings establish themselves. Choose a grass seed variety that matches your existing lawn for a seamless blend.
Fertilisation
Following thatch removal and overseeding, it’s essential to fertilise your lawn to provide essential nutrients for recovery and growth. Fertilisers with balanced N-P-K (nitrogen, phosphorus, and potassium) ratios are ideal for most lawn types.
Consult with a local garden centre or lawn care expert to determine the right type and timing of fertiliser for your specific grass variety.
Watering and Maintenance
Proper watering is critical after thatch removal, overseeding, and fertilisation. Keep the soil consistently moist but not waterlogged to support healthy growth.
Frequent, shallow watering can encourage shallow root development, so opt for deep, infrequent watering sessions. Continue to mow your lawn regularly, adhering to the one-third rule, to promote even growth and discourage thatch accumulation.
Now that we’ve covered post-thatch-removal care, let’s delve into strategies for preventing thatch build-up in the first place.
Thatch Prevention Strategies

1. Regular Lawn Care Routine
A consistent lawn care routine is one of the most effective ways to prevent thatch build-up. This routine should include proper mowing, watering, and fertilisation.
Following the one-third rule for mowing and ensuring your lawn receives the right amount of water and nutrients will help maintain a healthy balance in your lawn.
Additionally, avoid over-fertilisation with high-nitrogen fertilisers, as excessive nitrogen can contribute to thatch formation. Consider slow-release fertilisers to provide a steady nutrient supply to your grass without the risk of overfeeding.
2. Soil Testing
Periodically testing your soil is a proactive approach to thatch prevention. Soil tests can reveal imbalances in pH levels and nutrient content. Adjusting the soil’s pH as needed can discourage thatch development.
Most grasses thrive in slightly acidic soils with a pH range of 6 to 7, so consider adding lime to raise pH or sulphur to lower it based on the test results.
3. Adjusting pH Levels
If your soil is too acidic (below pH 6), it may promote thatch formation. Adding lime to the soil can help raise the pH level, making it more favourable for grass growth and less conducive to thatch build-up. Conversely, if your soil is too alkaline (above pH 7), consider adding sulphur to lower the pH.
By maintaining proper soil pH, you create an environment that discourages excessive thatch accumulation.
In the next section, we’ll explore the benefits of having a thatch-free lawn, which can serve as motivation to implement these prevention strategies.
Benefits of a Thatch-Free Lawn
1. Improved Lawn Aesthetics
A lawn free of thatch not only looks more appealing but also feels better underfoot. Thatch-free lawns have a lush and uniform appearance, with grass that appears healthier and greener.
The absence of a thatch layer creates a smooth and even surface that enhances the overall aesthetics of your outdoor space.
2. Enhanced Lawn Health
A thatch-free lawn is a healthier lawn. Without the hindrance of excessive thatch, your grass can access vital nutrients, water, and air more effectively.
This improved nutrient absorption leads to robust and vibrant grass, making your lawn more resilient to environmental stressors such as drought, disease, and pests.
3. Lower Maintenance Costs
Maintaining a thatch-free lawn can translate to lower long-term maintenance costs. Since your grass is healthier and better nourished, it requires fewer inputs like fertilisers, pesticides, and water.
This not only saves you money but also reduces your environmental footprint by minimising the use of chemicals and water resources.
Now that you understand the advantages of a thatch-free lawn, let’s debunk some common myths associated with thatch.
Common Myths About Thatch
Myth #1: Thatch is Harmless
Contrary to this belief, thatch can be detrimental to your lawn’s health and appearance when it becomes excessive.
While a thin layer of thatch can have some benefits, a thick layer impedes nutrient and water flow, leading to an unhealthy lawn.
Myth #2: Removing Thatch Kills the Lawn
While dethatching may temporarily stress your grass, it ultimately leads to a healthier lawn by allowing it to absorb nutrients and water more efficiently. The benefits of removing thatch far outweigh the short-term stress your grass may experience.
By dispelling these myths and understanding the importance of proper thatch management, you can make informed decisions to ensure your lawn’s long-term health and beauty.
FAQs About Lawn Thatch
FAQ #1: Can I use chemicals to remove thatch?
While chemical thatch removers are available, they are not typically recommended as a first resort. These products can be harsh on your lawn and the environment.
Mechanical methods, like dethatching rakes or specialised equipment, are generally preferred for thatch removal. Chemical treatments should be used cautiously and strictly according to the manufacturer’s instructions.
FAQ #2: How often should I dethatch my lawn?
The frequency of dethatching depends on the severity of thatch build-up and your specific grass type. In general, dethatching is typically done every 2-3 years or when you observe thatch to be more than half an inch thick.
Cool-season grasses may require more frequent dethatching compared to warm-season varieties.
FAQ #3: Is it possible to prevent thatch naturally?
Yes, you can take several natural steps to reduce thatch build-up. These include maintaining a proper lawn care routine, aerating the soil, and avoiding over-fertilisation with high-nitrogen fertilisers.
These practices promote healthy grass growth and discourage excessive thatch accumulation.
FAQ #4: Can I compost removed thatch?
While it’s possible to compost thatch, it decomposes slowly due to its dense nature. It’s generally more practical to use removed thatch as mulch in your garden or landscape beds. If you choose to compost it, you may need to shred it and mix it with other compostable materials to aid decomposition.
FAQ #5: Will dethatching damage my grass?
When done correctly, dethatching should not harm your grass. While it may temporarily stress the grass, it ultimately promotes healthier growth by improving nutrient and water absorption. Be sure to follow best practices, such as proper timing and technique, to minimise any potential stress.
Lawn Thatch Conclusion
Understanding and managing lawn thatch is essential for maintaining a lush and thriving lawn.
By following the tips, methods, and information provided in this comprehensive guide, you’re well-equipped to tackle thatch issues, prevent future build-up, and enjoy the benefits of a beautiful, healthy lawn.
Remember that lawn care is an ongoing process, and consistent maintenance is key to long-term success.
How To Seed A Lawn: An Easy Step-By-Step Guide To Success
In this post we will delve into the step-by-step process of how to seed a lawn.
A well-maintained turf enhances the aesthetic appeal of your outdoor space.
It also provides a soft and inviting surface for recreational activities, boosts curb appeal, and contributes to a healthier environment.
If you’re considering seeding a lawn, whether you’re starting from scratch or looking to rejuvenate an existing lawn, this comprehensive guide is here to help you achieve the best results.
We will cover everything from assessing your lawn’s current condition, choosing the right seed, preparing the lawn, seeding techniques, post-seeding care, and ongoing lawn maintenance.
With practical tips, expert guidance, and engaging insights, this guide will equip you with the knowledge and techniques needed to establish or revitalise a vibrant and beautiful lawn.
Let’s dive in and unlock the secrets to achieving a lush, green, and envy-worthy lawn!
Why Seed A Lawn?

Seeding a lawn is an essential step in establishing and maintaining a lush, healthy, and vibrant turf.
The reasons for seeding a lawn are multifold, and understanding the benefits can help you make informed decisions for your turf growing and landscaping endeavours.
- Fill Patches: First and foremost, seeding a lawn helps to fill in bare or thin areas of your turf. Seeding helps to rejuvenate these areas by promoting new grass growth, filling in the gaps, and creating a denser turf that looks aesthetically pleasing and enhances the overall appearance of your lawn.
- Overall Health & Resilience: Furthermore, seeding can also help to improve the overall health and resilience of your lawn. New grass seedlings are typically more adaptable to local climate and soil conditions. They can also establish deeper root systems that make your turf more tolerant to environmental stressors such as drought, heat, and cold.
- Weed Control: Seeding is a proactive approach to weed control. A dense, healthy turf created through proper seeding practices can outcompete weeds, preventing them from establishing and spreading.
Seed Vs Turf
Both options have their merits and drawbacks when it comes to establishing a lush and healthy lawn.
Let’s delve into the advantages and disadvantages of each to help you make an informed decision for your turf and landscaping needs.
Seed:
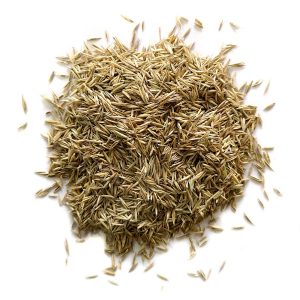
Advantages:
- Seed allows for a wide range of grass species and cultivars to choose from, giving you more flexibility in selecting the type of grass that suits your specific needs and local growing conditions.
- Seed is generally more budget-friendly compared to turf, making it a more economical option, especially for larger lawn areas.
- Seed can adapt to different soil types and conditions, making it a viable option for various landscapes and regions.
- Seeding can be a DIY project, giving you more control over the process and allowing for a rewarding hands-on experience.
- Easy to store.
- Easy to spread.
- Grass seed will keep for several years.
Disadvantages:
- Establishing a lawn from seed requires patience as it takes time for the grass to germinate, establish roots, and fill in the lawn.
- Newly seeded lawns require diligent care, including regular watering, fertilising, and weed control, to ensure successful establishment.
- Seed distribution and germination can be uneven, resulting in patchy or thin areas in the lawn that may require additional seeding or overseeding.
Turf:
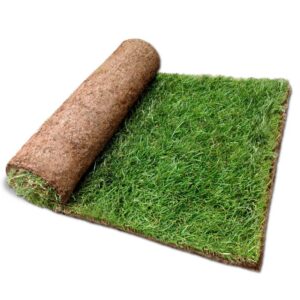
Advantages:
- Turf provides an instant, mature lawn with an established root system, giving you an immediate green space to enjoy.
- Turf is pre-grown and ready to install, saving you the time and effort of waiting for seed to germinate and establish.
- Turf is typically grown in controlled environments, reducing the chances of weeds compared to seeding.
- Turf can provide immediate erosion control on slopes or areas prone to soil erosion.
- Can be done all year round.
Disadvantages:
- Turf is generally more expensive than seed due to the costs associated with growing, harvesting, and transporting mature grass.
- Turf options may be limited to specific grass species or cultivars available from local suppliers.
- Turf installation requires proper preparation, leveling, and care to ensure successful establishment, which may require professional expertise.
- Turf production may have environmental considerations, such as water usage, pesticide usage, and transportation impact.
The Best Time To Seed A Lawn
The best time to seed a lawn depends on various factors, including the type of grass, climate, and local growing conditions.
In general, the optimal time to seed a lawn is during the early autumn or spring when soil temperatures are conducive to seed germination and establishment.
These periods provide a favourable environment for the grass seed to take root and grow vigorously.
However, it’s important to note that the best time to seed a lawn can vary depending on your location and the specific grass species you are planting.
How To Seed A Lawn
Step 1: Assessing Your Lawn

Before you start the exciting journey of seeding your lawn, it’s crucial to assess its current condition.
This initial step sets the foundation for a successful seeding process and helps you identify any underlying issues that may need attention.
First, take a walk around your lawn and keenly observe its overall health. Look out for the following:
- Bare spots
- Thinning areas
- Patches overrun with weeds
Note down any problem areas that require attention. Also, pay attention to the quality of the existing grass, its colour, density, and overall vigour.
Next, consider conducting a soil test. It’s like peering into the hidden world beneath your lawn’s surface.
A soil test provides valuable insights into the nutrient levels, pH, and overall health of your soil.
Assessing your lawn’s condition and conducting a soil test helps you determine the right course of action.
If your lawn has bare spots or thinning areas, overseeding might be the solution.
If the soil test reveals nutrient deficiencies or pH imbalances, you can amend the soil accordingly to create an optimal environment for seed germination.
Step 2: Choosing the Right Seed
Selecting the appropriate seed for your lawn is a critical decision that can greatly impact the success of your seeding endeavor.
With a plethora of options available, it’s essential to make an informed choice based on your specific lawn requirements and local growing conditions.
- Consider your lawn’s usage: Are you looking to establish a lawn in a high-traffic area, or is it a low-maintenance area? Different grass species have varying levels of tolerance to wear and tear, so choose a seed that matches your lawn’s usage patterns.
- Assess your local climate: The climate in your region plays a pivotal role in determining the ideal grass species for your lawn.
- Consider shade tolerance: Does your lawn receive ample sunlight or is it shaded by trees, buildings, or other structures? If your lawn has significant shade, choose a seed blend that includes shade-tolerant grass species.
- Evaluate maintenance requirements: Different grass species have varying maintenance needs. Some require frequent mowing, fertilisation, and watering, while others are more low-maintenance.
- Look for quality seed: Opt for high-quality seed from reputable sources to ensure good germination and establishment. Check the seed label for information on purity, germination rate, and weed content.
By carefully considering these factors, you can choose the right seed that matches your lawn’s requirements and local growing conditions.
Here at Turfworld we have our very own grass seed to help improve colour and performance.

Grass Seed Benefits:
- Hard wearing
- Improves colour
- Fast establishment
- Increased drought tolerance
- Cost effective
Step 3: Preparing the Lawn

Preparing your lawn properly before seeding is crucial for the success of your seeding efforts.
Taking the time to prepare the lawn adequately creates an optimal environment for the newly sown seeds to germinate and establish healthy roots.
Follow these steps to ensure you’re on the right track:
- Remove debris: Start by clearing any debris from the lawn, such as sticks, rocks, leaves, and other objects. This will help create a clean and even surface for seeding.
- Mow the existing grass: Ideally, mow your existing grass to a height of about 1 to 2 inches. This will help the new grass seeds to make good contact with the soil and improve their chances of germination.
- Loosen the soil: Aerating or raking the soil can help break up compacted soil and improve air circulation, water infiltration, and nutrient absorption. This is especially important if your lawn has heavy foot traffic or clayey soil.
- Fix bare spots: If you have any bare spots or areas with thin grass coverage, now is the time to address them. Rake the soil lightly and level the surface, then add topsoil or a quality lawn repair mixture to fill in the bare spots.
- Test and amend the soil: Testing your soil’s pH and nutrient levels can help you determine if any amendments are needed. Based on the results, add lime or sulfur to adjust the pH, and apply appropriate fertilisers or organic matter to provide the necessary nutrients for healthy grass growth.
- Water the lawn: Before seeding, water the lawn thoroughly to ensure the soil is evenly moist but not waterlogged. This will create an ideal environment for seed germination.
Taking the time to properly prepare your lawn before seeding sets the stage for a successful lawn establishment.
It may require some effort, but the results will be worth it.
Step 4: Seeding Techniques

When it comes to seeding your lawn, there are various methods you can use to achieve a lush and healthy turf.
Let’s explore three popular methods: broadcast seeding, overseeding, and spot seeding.
- Broadcast Seeding: This method involves spreading grass seed evenly across the entire lawn using a seed spreader. It’s commonly used for establishing a new lawn or overseeding an existing lawn that has thin or bare areas. Broadcast seeding is a quick and efficient way to cover a large area, but it may result in uneven seed distribution if not done carefully.
- Overseeding: This method is used to improve the density and appearance of an existing lawn by adding additional grass seed over the top. It’s particularly useful for lawns that have thinning areas, bare spots, or are showing signs of wear and tear. Overseeding helps to fill in gaps, improve the overall thickness of the lawn, and enhance its visual appeal.
- Spot Seeding: Spot seeding is ideal for addressing small, isolated areas of bare soil or thin grass coverage. It involves manually spreading grass seed by hand or using a handheld spreader to target specific areas that need attention. Spot seeding is a precise method that allows you to concentrate on problem areas and ensure thorough seed-to-soil contact for optimal germination.
Each seeding method has its own advantages and is suitable for different situations.
How To Calculate The Amount Of Seed Needed
Getting the right amount of seed for your lawn is a crucial step in ensuring successful germination and healthy turf.
Follow these instructions to calculate and apply the appropriate amount of seed for your lawn size:
- Measure Your Lawn: Grab your trusty measuring tape and determine the length and width of your lawn in feet. Multiply these two measurements to calculate the total square footage of your lawn. This will be the key number you need to determine the amount of seed to apply.
- Choose the Recommended Seeding Rate: Different grass species have varying recommended seeding rates, so it’s essential to choose the right one for your lawn. Check the seed package or consult with a local turf expert to determine the appropriate seeding rate for your grass type.
- Calculate the Seed Amount: Multiply the total square footage of your lawn by the recommended seeding rate to determine the amount of seed you’ll need. This calculation ensures that you’re applying the right amount of seed to achieve the desired coverage.
Tips for Achieving Even Seed Distribution
Achieving even seed distribution is crucial for ensuring uniform germination and a healthy, lush lawn.
Follow these expert tips to ensure proper seed distribution and avoid seed waste:
- Use a Seed Spreader: A seed spreader is a handy tool that helps distribute seed evenly across your lawn. There are different types of spreaders, including broadcast spreaders and drop spreaders, each with its own advantages. Choose the one that suits your lawn size and seed type, and adjust the settings according to the recommended seeding rate.
- Follow the Seeding Pattern: When using a seed spreader, follow the recommended seeding pattern to ensure even coverage. Typically, a crisscross pattern is recommended, where you first spread the seed in one direction and then in a perpendicular direction to ensure thorough coverage. Avoid overlapping or leaving gaps, as this can result in uneven germination and patchy areas.
- Be Mindful of Wind and Slopes: Wind and slopes can affect seed distribution, causing seeds to drift or concentrate in certain areas. Choose a calm day for seeding to minimise wind drift, and consider starting from the top of the slope and working your way down to prevent seed concentration in lower areas.
- Avoid Over-Seeding: Over-seeding, or applying too much seed, can result in overcrowding and poor germination. Follow the recommended seeding rate for your specific grass species and lawn size to avoid seed waste and achieve optimal results.
- Water Properly: Watering plays a crucial role in seed germination, and improper watering can lead to uneven results. Water the seeded area lightly and frequently to keep the soil consistently moist but not waterlogged. Avoid heavy watering that can wash away seeds or create puddles.
- Monitor and Adjust: Keep an eye on the seeded area and adjust watering or seeding if needed. If you notice areas with sparse or uneven germination, consider re-seeding those areas to achieve uniform coverage.
Step 5: Post-Seeding Care

Proper post-seeding care is crucial to ensure the success of your newly seeded turf.
Follow these expert tips to provide the optimal care for your lawn after seeding:
- Watering: Watering is essential for seed germination and establishment. Keep the seeded area consistently moist but not waterlogged. Water lightly and frequently to prevent the soil from drying out, which can inhibit seed germination. Avoid heavy watering that can cause runoff or create puddles, as this can wash away the seeds or drown them.
- Timing: Timing is crucial in post-seeding care. Water the seeded area in the early morning or late afternoon to avoid evaporation during the heat of the day. This allows the water to penetrate the soil and reach the seed for optimal germination.
- Mowing: Avoid mowing the newly seeded lawn until the grass reaches a height of about 3-4 inches. When mowing, use a sharp blade and mow at the recommended height for your grass species. Avoid cutting more than one-third of the grass blade at a time, as this can stress the grass and hinder its growth.
- Traffic: Minimise foot traffic and avoid heavy activities on the newly seeded lawn for at least 2-3 weeks after seeding. This allows the grass to establish its root system without being disturbed or damaged.
- Fertilisation: Wait until the newly seeded lawn has been mowed at least 2-3 times before applying fertiliser. Use a slow-release, balanced fertiliser with the right nutrient ratio for your specific grass species. Follow the manufacturer’s instructions for application rates and timing to avoid over-fertilisation, which can burn the grass.
- Weed Control: Keep an eye for weeds in the newly seeded lawn and promptly address them. Avoid using herbicides until the grass has been mowed several times and has established a strong root system. Use selective herbicides that are safe for your grass species and follow the label instructions for application rates and timing.
- Monitoring: Regularly monitor the progress of your newly seeded lawn. Look for signs of germination, such as tiny grass shoots emerging from the soil. Keep an eye for any issues such as uneven germination, pest damage, or disease, and address them promptly to prevent further damage.
Step 6: Lawn Maintenance
Maintaining a lush and healthy lawn requires ongoing care and attention.
After seeding and establishing your turf, it’s important to follow a regular maintenance routine to keep your lawn in top condition.
Here are some expert tips for lawn maintenance:
- Watering: Proper watering is essential for maintaining a healthy lawn. Water deeply and infrequently, allowing the water to penetrate the soil and reach the roots. Watering in the early morning or late afternoon is best, as it reduces evaporation and allows the water to be absorbed by the grass. Avoid overwatering, as it can promote diseases and encourage shallow root growth.
- Mowing: Regular mowing is crucial for maintaining the ideal height and density of your lawn. Set your mower blade to the recommended height for your grass species and avoid cutting more than one-third of the grass blade at a time. Keep your mower blade sharp to ensure clean cuts and prevent tearing of the grass blades. Alternate mowing directions to prevent the grass from leaning in one direction and promote upright growth.
- Fertilisation: Applying fertiliser at the right time and with the right nutrients is essential for a healthy lawn. Use a slow-release, balanced fertiliser with the appropriate nutrient ratio for your grass species. Follow the manufacturer’s instructions for application rates and timing. Avoid over-fertilisation, as it can cause burning of the grass and environmental pollution.
- Weed Control: Regular weed control is necessary to prevent weeds from invading your lawn and competing with the grass for nutrients and sunlight. Use selective herbicides that are safe for your grass species and follow the label instructions for application rates and timing. Hand-pull weeds or use spot treatments for isolated weed infestations.
- Aeration: Aerating your lawn once or twice a year can improve soil compaction and promote healthy root growth. Use a lawn aerator to create small holes in the soil, allowing air, water, and nutrients to penetrate the root zone. This can also help to break up thatch and promote a healthier lawn.
- Overseeding: Over time, lawns can thin out due to wear and tear, diseases, or environmental factors. Overseeding is the process of sowing grass seeds over an existing lawn to fill in bare spots and promote a denser turf. Choose the right grass species for your lawn and follow proper seeding techniques for successful overseeding.
- Pest and Disease Control: Keep an eye for any signs of pest infestation or disease in your lawn, such as yellowing or browning patches, thinning grass, or unusual growth patterns. Promptly address any issues with appropriate pest control methods or disease treatments to prevent further damage to your lawn.
- Autumn Clean-up: Proper autumn clean-up is essential for preparing your lawn for the winter months. Rake up leaves, remove debris, and clean up any lawn furniture or equipment. This prevents suffocation of the grass and promotes healthy winter dormancy.
How To Seed A Lawn Conclusion
Congratulations! You’ve now learned the ins and outs of how to seed a lawn.
From preparing the soil to selecting the right grass species, seeding with precision, and providing proper care and maintenance, each step plays a vital role in the success of your lawn.
By following the expert tips and recommendations provided in this guide, you can ensure that your turf grows healthy, vibrant, and resilient.