
Hello world!
Welcome to WordPress. This is your first post. Edit or delete it, then start writing!
Welcome to WordPress. This is your first post. Edit or delete it, then start writing!
A lush green lawn is often the treasured gem of a home’s exterior, signifying care and aesthetic appeal. Yet, establishing a new lawn can be daunting, demanding careful planning and execution to ensure success. For any homeowner, understanding the nuances of preparing the ground, and following proper sowing techniques is paramount. This blog posts will give you top tips on sowing your grass seed to ensure it thrives.
The world of grass seeds is diverse; choosing between cool-season and warm-season grasses involves considering your specific climate and lawn needs. Equally crucial is preparing the ground meticulously by removing existing vegetation, aerating the soil, and applying a layer of topsoil or compost. These preparatory steps lay the foundation for successful grass sowing and eventual lawn health.
In this guide, we’ll unravel essential tips for efficient lawn establishment, from the sowing process to post-sowing care and specialised lawn creation techniques. Whether you are starting a new or overseeding an existing lawn, understanding timing, maintenance, and specialisd approaches will ensure your lawn thrives.
Turfworld’s Emerald Grass Seed, 1kg bag
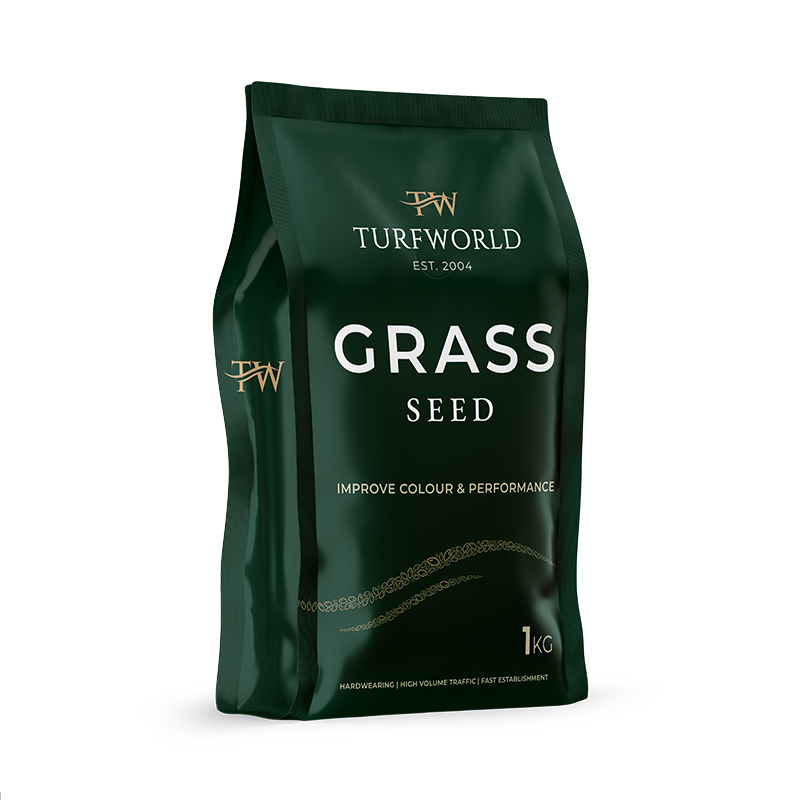
Establishing a lush lawn from seed starts with understanding your local climate. Picking the right grass seed is key to a beautiful lawn. Turfworld’s Emerald Grass Seed is an excellent choice for various conditions. Whether you’re planting in areas with high foot traffic or limited sunlight, this specially blended seed – used in our own turf rolls – performs exceptionally well. The soil temperature and moisture levels also influence successful grass seed germination. Ideal times to plant grass seeds are in spring or autumn when the soil is warm and above 10°C. Choosing the right season to sow depends on your priority. If you want stronger root growth, autumn’s warm soil and cooler air are ideal. For flourishing leaf development, spring is the perfect time. These strategies set the foundation for a healthy lawn.
Establishing a new lawn with grass seed begins with proper soil preparation. This is essential to create a solid foundation for growing a beautiful, healthy lawn. Start by clearing the area of all existing vegetation, such as weeds and roots, to make room for new grass. After clearing, rotovating and aerating the soil improves drainage and provides better soil structure. Adding topsoil, top lawn dressing or compost can enhance soil quality, ensuring the soil remains moist and warm, creating the ideal environment for grass seeds. With careful preparation, you’ll set the stage for healthy grass seedlings to flourish into a lush lawn.
Clearing existing vegetation is the first step in preparing your lawn. Remove all plant material, including dead grass and persistent weeds, to provide a clean slate. Use tools like a garden spade for small areas, or a mechanical turf cutter for larger spaces. This helps eliminate any roots and debris that could interfere with new growth. Systematic weed killers can ensure stubborn weeds don’t return, but be sure to wait 2-3 weeks before proceeding after application. Once cleared, firm the area with your feet or a lawn roller to create a smooth, even surface ready for the next step in lawn care.
Rotovating and aerating the soil ensures a solid base for a healthy lawn. Digging into the soil at least 15cm deep is vital for breaking up compaction. Tools like a garden fork or a mechanical rotavator make the task easier and more efficient. Aerating improves water drainage and nutrient circulation, essential for strong grass growth. By loosening the compact soil, grass roots can penetrate deeply, encouraging robust grass blades. As you rotovate, remember to remove any stones or rubble, which can hinder lawn development. This process prepares the soil for optimal grass seed germination.
Topsoil or compost is crucial in creating a welcoming environment for new grass seeds. Adding a thin layer, up to a quarter of an inch, helps retain moisture and warmth, speeding up seed germination. Compost, especially if used as a top dressing, provides the nutrients necessary for growing new grass. It also helps fill in any dips or uneven spots that might settle over time. Fine compost can act as a mulch to protect and nurture grass seeds, supporting healthy root development. By enhancing soil quality with compost or topsoil, you’re paving the way for a thriving, green lawn.

Establishing a lawn from seed requires proper preparation and execution. Start by preparing the soil to provide a healthy bed for your grass seeds. Keeping the soil moist is vital, so water the area before and after sowing to encourage germination. Spread the grass seeds evenly using either a hand-spreading method for small spaces or a spreader for larger areas. Correctly calculating the seed amount is key. Typically, you need 35 to 50 grams per square meter for new lawns and 15 to 25 grams for overseeding.
Achieving even coverage when sowing grass seeds is crucial for a uniform lawn. Start by dividing your seeds in half, sowing one portion in one direction and the other perpendicularly. This two-directional approach ensures all areas receive an even amount of seeds. Overly thick planting can cause grass plants to fight for space and nutrients, affecting growth. For better accuracy, divide large areas into smaller, manageable sections. This technique allows for more precise seed coverage, enhancing your chance of growing a lush lawn.
Proper seed spacing is key to a healthy lawn. Seeds should be spaced about one-quarter to one-half inch apart to avoid overcrowding. When sown too thickly, grass plants compete with each other, which can stunt growth. Keeping seeds well-spaced also helps prevent weed invasion, as healthy grass growth leaves little room for weeds to settle. Using a lawn roller after sowing presses seeds into the soil, ensuring they stay in place. This step helps avoid seed clusters that can result from watering or rain, promoting a healthy and robust lawn.
Establishing a new lawn from seed requires careful attention during the first few weeks. Once grass seeds are sown, it’s important to water them deeply and consistently. Aim to water daily unless rainfall occurs. After around six weeks, when grass blades are 5-7 cm high, you can mow for the first time. Make sure your mower blades are set high to avoid stressing young grass. Regular fertilisation supports a healthy lawn and can be applied before sowing if the granules dissolve into the soil. Avoid walking on your new lawn during its first season to protect the tender grass seedlings. Scarifying and overseeding once or twice a year will help keep the grass dense and allow better access for nutrients, water, and oxygen. This approach will lead to a beautiful, lush lawn that thrives year after year.
Consistent soil moisture is crucial for grass seed germination. During the early stages, ensure the top inch of soil stays moist to help the seeds sprout. Once germination starts, keep the top 2 inches moist until the lawn reaches a mowing height of about 3 inches. After that, adjust your watering schedule to focus on less frequent but deeper soaking. This change encourages the grass roots to grow deeply, making them stronger. Insufficient soil moisture may prevent seeds from sprouting, particularly in dry conditions. To prepare, consider thoroughly watering the soil the night before this. Consistent moisture helps prevent the invasion of weeds, securing a lush, green lawn from scratch.
An optimal watering schedule is key to establishing a lawn with grass seed. Begin by watering the newly planted grass seed every day, especially if temperatures rise above 17°C. Keep the soil’s top inch consistently moist, even if that means watering several times a day during sunnier conditions. As the grass germinates, shift focus to keeping the top 2 inches moist. Once the grass grows to about 3 inches, reduce watering frequency. Now, water twice a week deeply, targeting soil moistness between 6 to 8 inches. This fosters strong grass roots, supporting a healthy lawn. Once your lawn is established and mature, regular irrigation isn’t needed unless facing prolonged droughts. You can still water your grass seed or new turf in a hosepipe ban for the first 28 days.Please note, these guidelines are advisory and water companies are not obligated to follow them. You can find a comprehensive list of contact details for water providers throughout the UK here: https://www.water.org.uk/customers/find-your-supplier.
Preserving soil moisture and preventing erosion are vital when establishing a lawn. Covering your newly sown grass seeds with a thin layer of soil helps keep moisture in. Pressing seeds gently onto the soil ensures they remain in place, aiding germination. However, avoid burying seeds too deep to ensure all seeds sprout evenly. This care at the soil surface stage is a stepping-stone to growing a vibrant lawn from the start.
Establishing a new lawn with grass seed requires careful attention to timing. The period from late summer to early fall is generally the most favorable for sowing grass seeds. During this time, soil temperatures and moisture levels are optimal for seed germination. Planting during this window minimises the chances of weed invasion, which can be a significant issue with spring seeding if not managed accordingly. It’s crucial to ensure that the soil temperature is at least 10°C to promote successful germination. This helps the young grass seedlings establish themselves quickly and effectively. Keeping the soil consistently moist, but not waterlogged, is essential for supporting the initial growth phase. Monitoring weather conditions beforehand can also protect your efforts from being thwarted by unexpected adverse weather.
Spring and autumn provide ideal conditions for sowing grass seed. In mid-spring, typically from March to April, soil temperatures start to warm up, promoting seed germination. However, it’s vital to complete seeding by late spring to avoid issues with water stress and weed competition. Conversely, early autumn (September to November) offers warm soil retained from the summer, frequent rainfall, and reduced weed growth, creating perfect conditions for young grass roots to establish. Autumn sowing is advantageous as the cooler air temperatures combined with warm soil facilitate robust root development, which supports a resilient and drought-resistant lawn. Watering in spring is more critical due to potential rapid temperature increases, so ensure seeds remain moist but not saturated.
Temperature plays a critical role in the successful germination of grass seeds. The optimal soil temperature for this process is between 10°C and 18°C. If it falls below 10°C, seeds may fail to germinate, while excessive summer heat can hinder their development. During spring, the focus of growth shifts towards leaf development. In contrast, autumn provides optimal conditions for germination due to warmer soil temperatures, fostering strong root growth. Some specialised lawn seeds are designed to germinate at soil temperatures as low as 7°C. Therefore, regularly checking the soil temperature at a depth of 3 cm is important. Ensure daytime temperatures consistently exceed the 8-10°C range to give your new lawn the best start possible.
Creating a new, lush lawn involves several important steps, whether you’re starting from scratch or enhancing an existing lawn. The key to success lies in proper preparation, timing, and ongoing care. Choosing the right type of grass seed for your climate, understanding the best times to sow, and maintaining optimal soil conditions can lead to a healthy, green lawn. A green, beautiful lawn requires attention to detail, from sowing the seeds at the correct rate to ensuring they have the right environmental conditions to thrive.
Starting a lawn from scratch with grass seed is an affordable and efficient way to ensure a lush landscape. Begin by selecting grass seed types suited to your climate, whether cool-season or warm-season grasses. Clear your lawn area of all debris, then dig or rotovate the soil to at least 15cm depth, creating a fine, even surface. Sow seed at a rate of 35 – 50 grams per square metre. This ensures even coverage and improves germination. Aim to plant in spring or early autumn, when the soil is warm. Keeping the soil moist is key for successful seed germination. Be sure to protect your new lawn from birds and intense weather until the seedlings are well-established.
Overseeding helps rejuvenate and thicken existing lawns, making them lush and vibrant. Begin by mowing your lawn shorter than usual, allowing better seed-to-soil contact. Thin out the thatch with a rake, then aerate the soil to ease compaction. Aeration improves air and nutrient flow to grass roots. Spread the grass seed evenly at the rate recommended for overseeding, usually lower than starting a lawn from scratch. You can use a compost layer to boost growth, but this isn’t essential. Protect the seeds with straw or a light compost covering to ward off birds and prevent erosion. These practices enhance growth and improve the quality of your existing lawn.
Properly timing the first mow of a new lawn is crucial for its development. Wait roughly 21 days after seed germination before cutting, allowing grass blades to grow at least 3 inches tall. It’s vital to trim only the top third of the blades during this first mow, as cutting too low can weaken the plants. Keep mower blades sharp to avoid tearing the young grass seedlings. Avoid leaving clippings on the lawn for the initial cuts—collect them to prevent the new plants from being smothered. Follow these guidelines to support your lawn’s robust growth from the start.
Effective weed control sustains the health of new grass. Using a weed preventer while seeding can harm the seeding, so wait until the grass is mown four times before applying herbicides. Always follow label instructions for any herbicide application to ensure plant safety and effectiveness. These methods help maintain a weed-free and vibrant lawn, ensuring your grass stays healthy and green.
The types of grass seed we offer is Turfworld’s Emerald Grass Seed, ideal for establishing a lush lawn. One 1kg bag covers about 40 square metres, and a 20kg bag can cover roughly 800 square metres.
A beautiful lawn and a happy dog don’t have to be mutually exclusive — but anyone with pets knows it can sometimes feel that way. From worn paths to yellow patches, dogs can be tough on grass. The good news? With the right approach, you can keep your lawn healthy while still letting your pets enjoy it.
Here are some practical lawn care tips every pet owner should know.

Dog urine contains high levels of nitrogen. In small amounts, nitrogen feeds grass — but concentrated patches can burn it, causing yellow or brown spots.
Encouraging your dog to use different areas of the garden helps spread the impact. Where possible, lightly watering affected areas shortly after use can dilute the concentration and reduce damage.
Tip: Female dogs often cause more visible spotting simply due to how urine is deposited — it’s normal and manageable.

Not all grass is created equal, especially for gardens with dogs.
Hard-wearing turf blends are designed to recover faster from wear and tear, making them ideal for active pets. These grasses develop stronger roots and better tolerance to traffic, helping the lawn bounce back after playtime. TurfWorld’s Emerald Turf is a fantastic option with it’s hard wearing blend of ryegrass and fescues reducing the impact of paw-induced damage.
Tip: Avoid ornamental or fine lawn grasses — they struggle under regular paw traffic.

Short grass may look tidy, but it’s far less resilient.
Keeping your lawn slightly longer helps cushion paw traffic, protects roots, and improves recovery from damage. Longer blades also shade the soil, helping retain moisture and reducing stress during warmer weather.
Rule of thumb: Never remove more than one third of the grass height in a single cut.

Bare patches caused by running routes or frequent play are easier to fix when caught early.
Lightly rake worn areas, add a thin layer of topsoil, and overseed where necessary. Acting quickly prevents soil compaction and stops weeds from taking hold.
Tip: Rotate play areas or place toys in different spots to avoid repeated wear in one location.

Many lawn treatments aren’t pet-friendly, especially weed killers and feeds applied incorrectly.
Always check product labels and keep pets off treated areas for the recommended time. Better still, focus on natural lawn care practices such as aeration, correct mowing, and soil improvement — all of which support a healthier lawn without added risk.
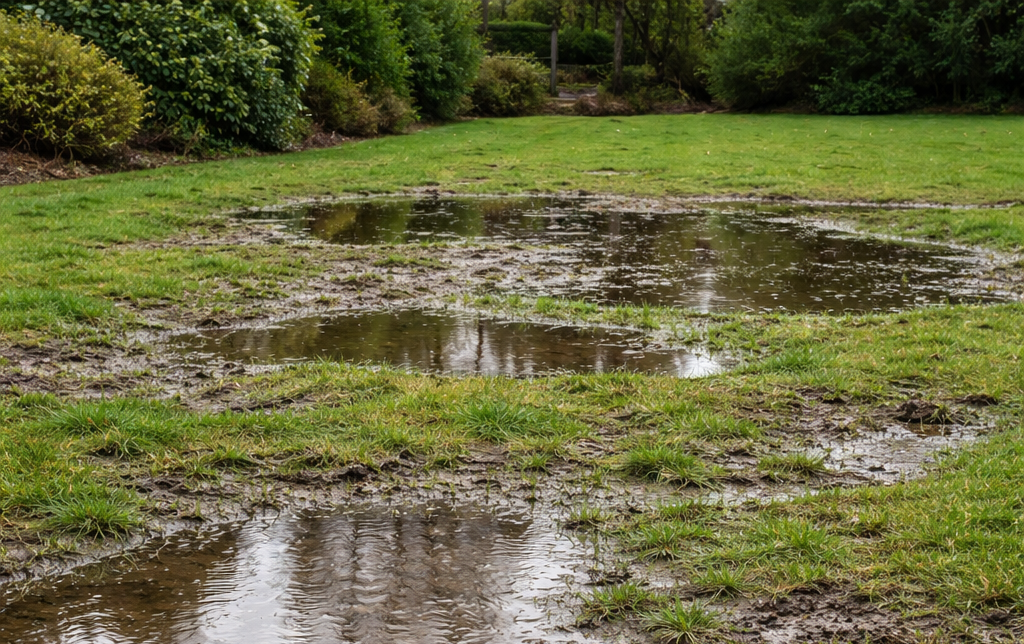
Dogs and muddy paws often go hand in hand.
Poor drainage leads to waterlogged soil, which quickly turns to mud under foot (or paw). Aerating compacted areas and improving soil structure with quality topsoil can dramatically reduce muddy patches and lawn damage.
A pet-friendly lawn doesn’t need to be perfect, it needs to be practical. By choosing the right grass, maintaining healthy soil, and accepting a little wear and tear, you can enjoy a lawn that works for both you and your dog.
At TurfWorld, this advice isn’t just theoretical. Our team are avid dog owners, with several energetic Labradors regularly putting our own lawns to the test. That hands-on experience gives us a genuine understanding of the challenges pet owners face and how to create lawns that stand up to real life, muddy paws and all.
Healthy grass, happy pets, and far less frustration.
New turf (also called sod) is essentially living grass that has been cut with a thin layer of soil and transplanted to your garden. Unlike established lawns, its root system hasn’t yet grown into the soil below, so it’s very delicate in the first few weeks.
📅 First 10–14 Days — Very Limited Foot Traffic
Turf is establishing initial shallow roots into the soil.
Avoid walking on it as much as possible.
If you must access an area (e.g., to water), try to evenly distribute your weight by stepping on a board or wide plank rather than directly on the grass.
📅 2–3 Weeks — Light Walking Only
Roots are beginning to knit into the soil.
You can walk on it lightly — gentle foot traffic like crossing the lawn — but don’t drag feet, turn sharply, or let pets run repeatedly over the same patch.
📅 3–4 Weeks — Moderate Use Possible
Most lawns in good conditions can handle normal, everyday walking.
You may also be able to do your first very light mow if the turf has put on enough growth (cut at a high setting).
📅 4–6 Weeks — Full Use and Play
The turf should now have a well-established root system.
It’s generally safe for family use, furniture, and playful pets. Heavy activities (like football or wheelbarrows) should still be avoided until this stage.
Walking too soon can:
Damage fragile roots before they’ve grown into the soil.
Compact the soil, making it harder for roots to penetrate deeply.
Lead to uneven patches, bare spots or depressions where footprints press the grass down.
Delay proper establishment and make the lawn more prone to weeds or stress.
✔ Use walking boards if you need to cross the lawn before 2–3 weeks — they spread your weight.
✔ Water properly: daily in dry weather at first, then gradually reduce as roots develop.
✔ Wait for the tug test: you can test rooting by gently lifting a corner of the turf — if it resists, it’s starting to take root.
✔ Delay heavy play and mowing: protect the young lawn until it’s strong enough.
When most people think about creating a new lawn, they picture warm spring days or long, sunny summer evenings. It’s a common belief that turf can only be laid when the weather is mild — but this is one of the biggest misconceptions in UK gardening. In reality, winter is not only a suitable time to lay turf… it’s often one of the best times of the entire year.
Throughout the winter months, the soil across much of the UK remains warm enough to support strong and steady root development, even when the air temperature feels cold. Combine this with higher natural rainfall, reduced evaporation, and minimal heat stress, and you get ideal conditions for new turf to settle in comfortably.
For homeowners, landscapers, and property developers working to tight schedules, winter presents a golden opportunity: less competition for supplies, fewer weeds, less watering, and a fully established, lush lawn ready by early spring. While others wait for the “right season,” you can give your garden or project a head start — transforming bare or tired ground into a fresh green space with far less effort than you might expect.
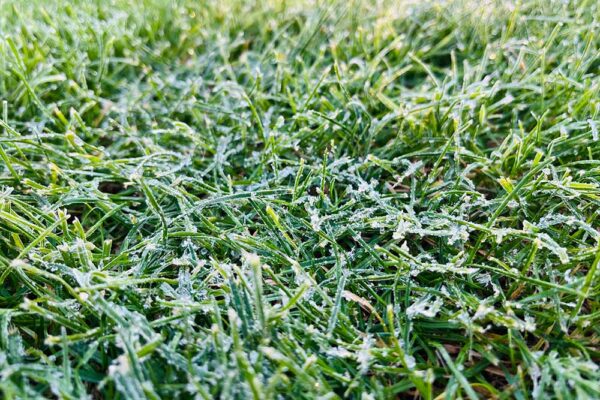
Winter turfing is one of the UK’s most underrated landscaping secrets. And once you understand why it works so well, you’ll never feel the need to wait until spring again.
Most people assume turf stops growing in winter, but this isn’t true — especially in the UK climate. While grass growth above the surface slows down in cold weather, what’s happening beneath the soil is far more important. Winter provides a unique combination of soil conditions that actually encourage stronger root development and reduce stress on newly laid turf.
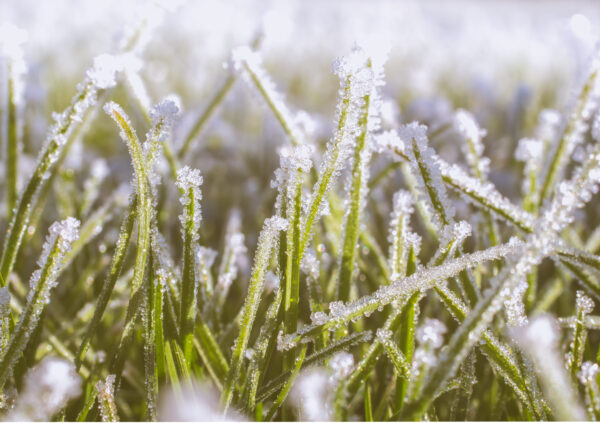
Soil stays warmer than you think!
Even during frosty mornings, the soil beneath the surface remains noticeably warmer than the air. In much of the UK, soil temperatures rarely drop below 5°C, and this is the key threshold required for grass roots to continue growing.
Grass roots don’t rely on warm air, they rely on warm ground.
This means even though the grass above the soil level may look like it has not grown or is dormant, the root system still grows on the hunt for nutrients.
Newly laid turf can still
• Develop new roots
• Bind itself to the soil
• Establish a strong sub-surface structure ready for spring.
This allows the grass to establish in time for the warmer weather ensuring your lawn is well-rooted in spring and ready to flourish.
Less Competition from Weeds
During the cooler months, we see a lot less activity from weed species. Most common lawn weeds including, dandelions, clover, plantin & chickweed are far less agressive and slower to germinate in colder conditions.
Giving your turf the competitive advantage to establish stronger and stunt weed growth. This has the added benefit of reducing the need for herbicides, physical weed removal and leads to turf edges knitting together almost seemlessly.
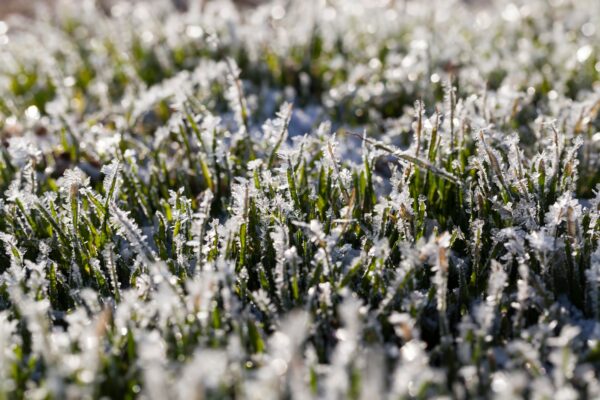
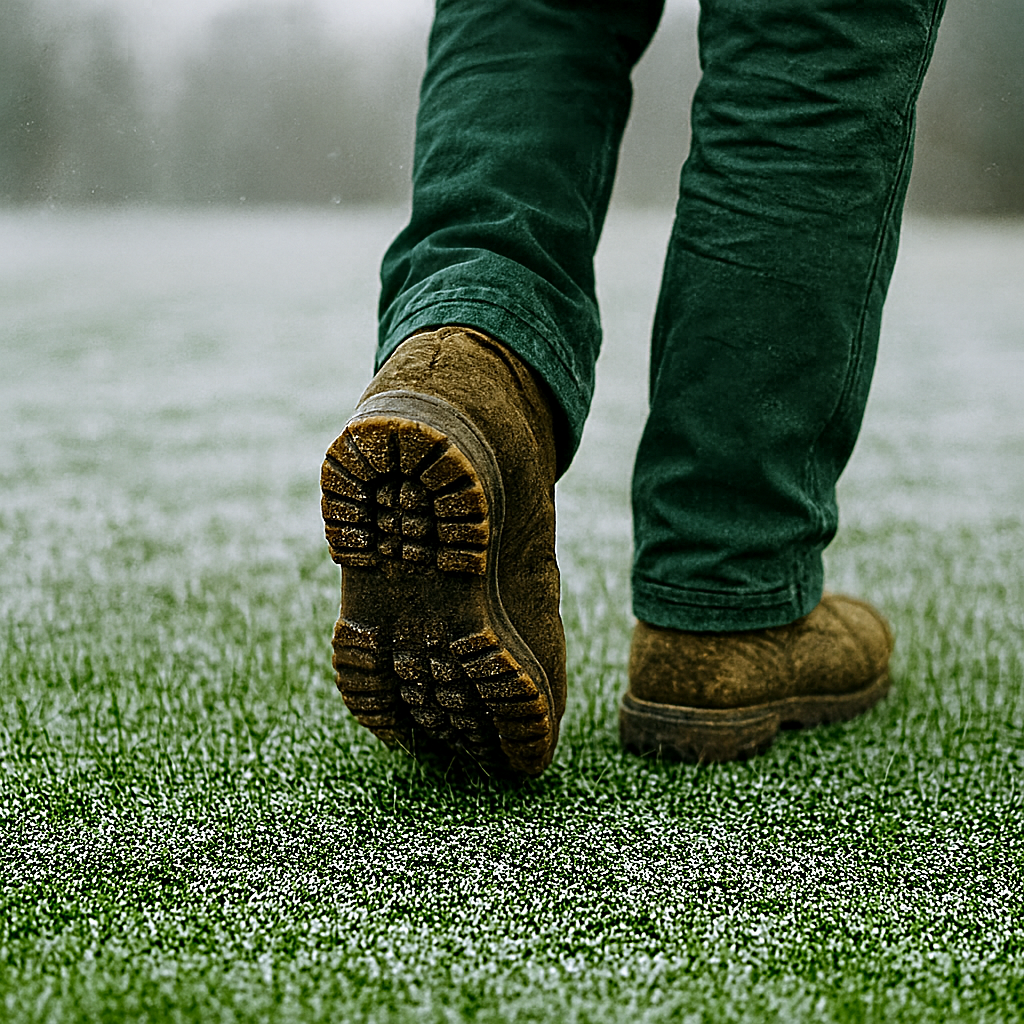
Lower foot traffic allows turf to settle naturally.
Garden usage naturally declines during winter. People spend less time outdoors, pets roam less, and there is less footfall overall. This lack of disturbance allows the turf to settle and root with minimal disruption.
During summer, it’s easy to accidentally damage freshly installed turf by walking on it too soon. Winter solves this problem naturally.
Winter Turfing, Professionally Approved.
Commercial landscapers and turf suppliers often work year-round, and winter is one of their busiest seasons. Housing developments, sports pitches, and commercial grounds are routinely turfed in cold weather because professionals understand the biological advantages.
By laying turf in winter, you’re adopting the same efficient, science-backed approach the landscaping industry uses on major projects.
There are many advantages for laying turf in winter. For some landscapers it’s preferred as the aftercare requirements are greatly reduced. Here’s a few areas where laying turf in winter really benefits!
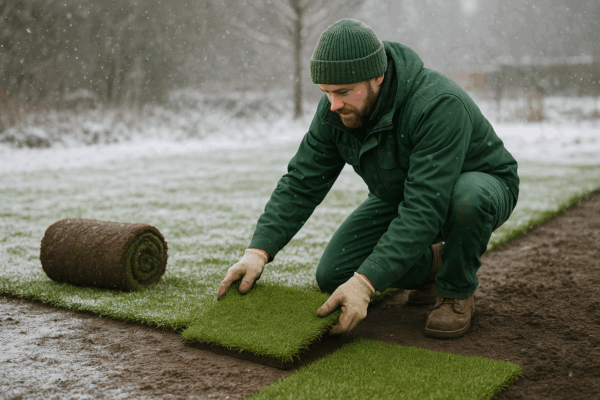
Your new turf won’t need the constant watering required in summer. Natural rainfall supports steady root growth.
Less mowing and minimal aftercare — winter growth is slower, making it easier for busy homeowners and landscapers.
Weeds are less active in winter, giving your new lawn time to knit together without strong competition.
Don’t wait until spring for a garden refresh — winter turfing gives you a ready-made lawn when you need it most.
For landscapers, builders and developers, winter turfing allows projects to stay on schedule without waiting for warmer weather.
While winter is an excellent time to lay turf, there are a few practical considerations to keep in mind. None of these are dealbreakers, they simply help ensure you get the best possible results.

You shouldn’t lay turf directly onto frozen ground, as the soil structure becomes solid and prevents proper root contact. The good news? In the UK, prolonged frozen ground is rare.
If you wake up to a frosty morning:
Wait until late morning or early afternoon, the ground usually thaws.
If snow is present, simply wait for it to melt.
A short cold snap won’t harm turf already laid; it will just pause rooting until temperatures rise again.
Once the soil softens, you can continue laying turf safely.
Excessively boggy areas can be a problem in any season, not just winter. If your garden is holding water after heavy rain, it’s worth addressing this before laying turf.
Options include:
Rotavating in fresh screened topsoil
Improving drainage with sand/topsoil blends
Levelling out depressions where water collects
A firm-but-moist soil base is ideal — soggy ground can hinder root oxygenation.
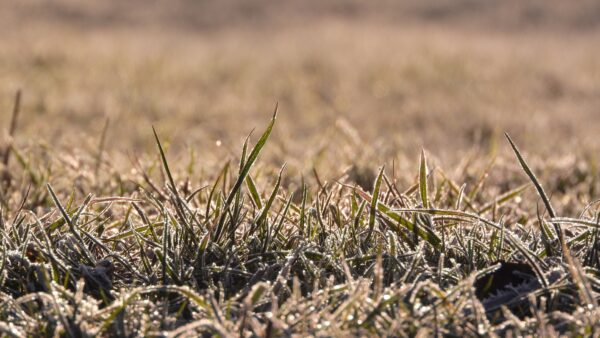
Turf will root in winter, but not at the same speed you’d see in spring. This isn’t a flaw — it simply means the lawn needs to be treated gently for a little longer.
Expect:
A longer “settling in” period
Slower growth above the surface
Mowing to be rare or unnecessary
By early spring, the lawn typically knits together fully and begins thriving.
Because the lawn is in its delicate establishment phase, it’s best to minimise foot traffic.
In winter this is naturally easier because:
Gardens are used less
Pets spend less time on the lawn
Children don’t play in the garden as much
This low usage helps the turf root cleanly and evenly.
Good preparation is the key to a long-lasting, healthy lawn — and winter is no exception. Although the cooler weather works in your favour, taking a little time to get the groundwork right will ensure your turf establishes quickly and evenly.

Looking after newly laid turf in winter is surprisingly simple. Thanks to cooler temperatures and natural rainfall, your new lawn usually requires very little intervention. The most important thing is to avoid walking on the turf while it’s establishing, especially during frosty spells when the grass is more delicate. Aside from that, winter does most of the hard work for you and you can find more detailed seasonal advice on our dedicated winter lawn-care page.

Freshly laid winter turf needs minimal maintenance: keep off the grass where possible and let the weather provide the moisture. As soon as spring arrives, root growth accelerates and your lawn will thicken beautifully.
We do not recommend laying turf on frozen ground. Your turf roots will not establish and they will be starved of any nutrients your soil has to offer.
In winter, it’s best to avoid walking on newly laid turf for 3–6 weeks, depending on soil temperature and moisture levels. Turf will still root during winter, but the process is slower than in spring or summer. A good rule of thumb is to wait until the turf feels firmly anchored when you gently lift a corner — if it resists, the roots have taken hold and light foot traffic is fine.
For most winter installations, by early spring your lawn will be fully rooted and ready for normal use.
We do not recommend laying turf on frozen ground. Your turf roots will not establish and they will be starved of any nutrients your soil has to offer.
It’s best to keep pets off newly laid turf during winter while the roots are establishing. Cold weather slows down the knitting-in process, so paw traffic can create dents, shift slabs, or damage delicate new shoots. As a general guide, try to keep pets off the lawn for 3–6 weeks, or until the turf feels firmly rooted when you gently test a corner.
Once the turf has anchored and the ground is no longer soft or muddy, light pet use is absolutely fine. By early spring, your lawn will be strong enough for normal play and activity.
Winter is often overlooked as a turf-laying season, but the science and practical benefits make it one of the most effective times of year to create a new lawn. Cooler temperatures, steady ground warmth, and reliable natural moisture all work together to support root development with far less effort than in the warmer months. While weed growth slows and garden usage drops, your new turf gets the quiet, stable conditions it needs to settle in and establish strong foundations.
The result? By the time spring arrives — when most people are only just starting to think about improving their garden — your lawn is already rooted, green, and ready to enjoy. Winter turfing saves time, reduces maintenance, keeps projects on schedule, and offers excellent results for both homeowners and professionals. Once you understand the genuine advantages, it’s easy to see why winter may not just be a good time to lay turf… it might actually be the best time of all.
After proudly serving our customers for over 20 years, we at Turfworld are excited to unveil a fresh new look! Our family-run business has built a reputation for quality and reliability. While our trusty turf roll logo has served us well, it’s time to embrace a modern image that reflects the high-quality, professional service you’ve come to expect from us.
At Turfworld, we’re passionate about producing premium turf that meets the highest standards of quality. Whether you’re laying a lawn for a family garden or a professional project, you can trust that every roll we deliver will exceed your expectations. Our reliable and unmatched delivery service spans the entire UK, making it easier than ever to transform your outdoor spaces.
The rebrand also extends to our sister company, TW Aggregates, which now features a matching look to reflect our shared commitment to excellence. From decorative aggregates and sub base materials to fence posts and gravel boards, TW Aggregates offers an extensive range of landscaping essentials. Products are available in bulk bags or loose loads, and our dedicated fleet of rigid, artic, and tipper lorries ensures efficient delivery to your doorstep.
Together, Turfworld and TW Aggregates are here to meet all your garden and landscaping needs. With our refreshed branding, we’re looking to the future while continuing to provide the same trusted quality and service that’s been at the heart of our businesses for over two decades.
Welcome to a comprehensive guide on “Winter Lawn Care.”
In this post, you will discover essential tips and practices to ensure your turf remains healthy and vibrant throughout the winter season.
From assessing your lawn’s unique needs to understanding the significance of various winter care practices, this guide will equip you with the knowledge and strategies needed to provide the best possible care for your lawn during the colder months.
Before you start any winter lawn care routine, it’s crucial to assess your lawn’s unique needs. Factors like grass type, soil quality, and climate play a role in determining your approach.
An important factor is your soil quality. Conduct a soil test to determine its pH and nutrient levels. Adjusting the pH and adding the right nutrients in the fall can promote a healthy lawn during the winter.
Climate plays a significant role in your lawn’s winter needs. Colder regions will require more protective measures, while warmer climates may need less intensive care.
Caring for your lawn during the winter not only maintains its appearance but also provides several benefits:
Mowing your lawn just before winter is essential. Trim the grass to the ideal height for your grass type. Avoid cutting it too short, as longer grass offers better protection against the cold.
As winter approaches, gradually lower your mowing height over a few weeks to help your lawn acclimate to the change in season. However, never cut more than one-third of the grass blade at once, as this can stress the grass and lead to damage.
Longer grass during winter acts as a natural insulator, protecting the roots and preventing weed growth. Shorter grass can expose the soil to harsh winter conditions, potentially leading to damage
Raking up leaves and debris is the first step in preparing your lawn for winter.
A clean lawn is essential for good winter care because leaves and debris can trap moisture, leading to disease and mold growth. Regularly remove fallen leaves to keep your lawn tidy.
Aerating the soil is a fundamental part of fall preparations. This process involves creating small holes in the ground to improve air circulation, water absorption, and nutrient penetration.
Aeration helps prevent soil compaction, which is vital for a healthy winter lawn.
Regular aeration allows the roots to breathe and encourages robust growth. For most lawns, aeration every 1-3 years is sufficient, but if your soil is compacted, consider aerating every year.

As winter settles in, it’s time to adapt your lawn care practices to the changing needs of your grass. One essential adjustment during the winter season is to put your lawnmower away and stop mowing your lawn.
While regular mowing is a staple of lawn maintenance during the growing season, it’s not the best approach when the colder months arrive.
Here’s why you should skip the mowing during winter and how it benefits your lawn.
Choosing the right fertiliser for your winter lawn is crucial. Look for a winter-specific formula with a lower nitrogen content.
Nitrogen encourages rapid growth, which is counterproductive during the dormant winter season.
Phosphorus and potassium are the primary nutrients to focus on in winter fertilisers.
Phosphorus helps with root development and energy transfer, while potassium improves the grass’s overall hardiness, making it more resilient to cold stress.
Apply the fertiliser in late fall, usually around November, after the grass has stopped growing. This timing allows the nutrients to be absorbed by the roots and stored for the winter months.
Preventing winter weeds is vital for maintaining a healthy lawn. Apply a pre-emergent herbicide in the fall to stop weed seeds from germinating.
Common winter weeds include annual bluegrass and chickweed, which can quickly take over a lawn if left unattended.
Timing is essential when using pre-emergent herbicides. Apply them a few weeks before the first expected frost to ensure that the herbicide forms a protective barrier to stop weed growth.
Maintain weed control throughout the winter with regular inspections. If you notice any weeds, manually remove them or spot-treat with a post-emergent herbicide designed for winter weeds.
Consider overseeding your lawn in late fall to ensure thick, lush grass throughout the winter. Overseeding involves spreading grass seed over your existing lawn to fill in any thin or bare areas.
This practice is particularly beneficial for cool-season grasses, which may experience thinning during the winter months.
Select a high-quality grass seed blend that matches your existing lawn type. Ensure proper seed-to-soil contact by raking the soil lightly and spreading the seed evenly.
Water the overseeded areas regularly to keep the soil consistently moist until the new grass establishes itself.
Overseeding can help your lawn maintain a green and healthy appearance throughout the winter, even in cooler regions.
One of the most effective ways to protect your lawn against the cold is mulching. Apply a layer of organic mulch, such as shredded leaves or straw, over your lawn’s surface.
This mulch acts as an insulator, maintaining stable soil temperatures and preventing extreme cold from reaching the grass roots.
Mulching also helps retain moisture and reduces the risk of soil erosion. Make sure to apply mulch at a depth of about 2-3 inches for optimal protection.
In addition to mulching, you can use specialised lawn blankets to safeguard your lawn from harsh winter conditions.
These blankets are made of lightweight, breathable materials that allow sunlight, air, and moisture to penetrate while keeping your grass protected from frost and extreme cold.
Lawn blankets are particularly useful in regions with severe winters, as they create a microclimate that shields the grass. Secure them in place with landscape pins, ensuring they cover the entire lawn.
When winter brings snow and ice, it’s essential to take proactive steps to protect your lawn. Shovelling snow is an important task, as allowing it to linger can lead to compaction and potential damage to the grass underneath.
Use a snow blower or a snow shovel to clear snow promptly. Avoid using metal shovels or heavy equipment, as they can harm the grass and soil.
Be gentle when removing snow to prevent excessive pressure on the turf.
De-icing salts are commonly used to melt ice on walkways and driveways. Be cautious when using these near your lawn, as the runoff can damage the grass. Consider using alternative products or techniques to minimise harm to your lawn.
Making regular inspections of your lawn during the winter months is crucial. Even in dormancy, your grass can face challenges like disease, pests, and other issues that need attention.
Look for signs of diseases, such as snow mold or rust, which can manifest in the form of discolored or matted grass.
If you notice any problems, consult with a local horticultural extension office or a lawn care professional for advice on addressing the issue.
Pests like voles and rodents can also cause damage during the winter. Inspect for small tunnels or burrows in your lawn and take appropriate action to deter these pests.

As winter yields to spring, it’s time to prepare your lawn for its growing season. The transition period is a critical time for your lawn’s health.
Remove any protective coverings, such as mulch or lawn blankets, as temperatures begin to rise. Rake away any excess mulch to allow the grass to breathe and access sunlight.
Perform a thorough clean-up of any debris or leaves that may have accumulated over the winter. This spring cleaning ensures that your lawn can start growing unhindered.
While winter lawn care is crucial, there are some common mistakes you should avoid:
It’s advisable to mow your lawn just before winter to maintain the ideal grass height.
Regular inspections every few weeks are essential to catch issues early.
Choose a winter-specific fertiliser with lower nitrogen content.
Overseeding can help maintain a thick and healthy lawn during winter.
Compacted snow can damage the grass, so it’s essential to remove it in a timely manner.
In conclusion, “Winter Lawn Care” is a crucial aspect of year-round lawn maintenance that ensures your grass remains resilient and stunning even in the face of winter’s challenges.
By following the tips and practices outlined in this guide, you can protect your lawn, promote its winter hardiness, and set the stage for a lush, healthy yard in the upcoming spring.
Remember that a little extra care during the winter can make all the difference, and your efforts will be rewarded with a lawn that stands out in any season.
When it comes to gardening, the choice between topsoil vs compost is a pivotal decision that can greatly impact the success of your green endeavours.
As a devoted gardening enthusiast, I’ve explored the unique attributes and applications of these two essential components.
In this comprehensive guide, we will delve into the distinctions between topsoil and compost, their respective uses, and why one may be the preferred choice over the other in various gardening scenarios.
In this article, you will gain insights into the world of “Topsoil vs Compost” and learn when and how to utilise these valuable resources to nurture your garden.
Whether you’re levelling uneven terrain, establishing a vibrant lawn, or growing a bountiful vegetable garden, understanding the differences and applications of topsoil and compost is the key to thriving, beautiful plants.
Topsoil is the uppermost layer of soil, typically found in the first few inches to a foot of the Earth’s surface. It’s rich in organic matter and is teeming with a variety of essential nutrients, making it a prime choice for gardeners.
Topsoil is typically extracted from the upper layer of the ground and then screened to remove debris and stones, resulting in a fine, workable soil. This makes it ideal for levelling, filling in holes or depressions, and improving the quality of your garden beds.
Topsoil’s composition consists of a balanced mix of sand, silt, and clay, giving it a loamy texture that’s perfect for most gardening applications.
This blend of particle sizes provides good drainage and aeration while retaining moisture and nutrients, making it an excellent choice for many plants.
Whether you’re starting a new garden bed, patching up bare spots in your lawn, or establishing raised beds and containers, topsoil is often the preferred choice due to its consistency and versatility.
When you’re working with topsoil, it’s essential to consider its pH level, which can vary depending on its source.
A neutral pH of around 6 to 7 is generally suitable for a wide range of plants, but it’s always a good idea to test the pH and amend it if necessary to meet your specific plant requirements.
Additionally, mixing topsoil with compost can enhance its nutrient content and organic matter, offering your plants an even better growing environment. Topsoil is the go-to choice when you need a solid, foundational soil for your gardening projects.
Compost, often referred to as “black gold” by gardeners, is a nutrient-rich organic material created through the decomposition of organic matter.
This process involves the breakdown of things like kitchen scraps, yard waste, and plant debris by microorganisms, resulting in a dark, crumbly, and humus-rich substance.
Compost is a powerhouse of nutrients, including essential elements like nitrogen, phosphorus, and potassium, along with a host of micronutrients that promote plant health and growth.
One of the most significant advantages of compost is its ability to improve soil structure and fertility. When incorporated into your garden soil, compost helps create a porous, well-aerated environment that retains moisture and allows plant roots to access nutrients and oxygen.
It also enhances the soil’s ability to retain water, which can be a game-changer in regions with erratic rainfall or for drought-prone plants. This ability to hold moisture is especially beneficial in container gardening and raised beds, where regular watering might be more challenging.
Compost’s role in weed suppression is another noteworthy benefit. When used as mulch, it forms a protective layer that inhibits weed growth, reducing the need for labour-intensive weeding.
Additionally, the microorganisms in compost contribute to the overall health of the soil by outcompeting harmful pathogens that can cause plant diseases.
Compost not only nourishes your plants but also helps create a more balanced and resilient ecosystem within your garden.
This environmentally friendly practice also promotes recycling. Instead of sending organic waste to landfills, you can turn it into compost, reducing the overall volume of waste and contributing to a more sustainable garden.
Moreover, using compost in your garden is a fantastic way to reduce the need for chemical fertilisers, thus making your gardening efforts more eco-friendly.
Compost is a remarkable resource for any gardener looking to create a healthy, thriving garden while minimising environmental impact.

Now that we’ve delved into the individual characteristics of topsoil and compost, it’s time to examine the key differences between the two.
These distinctions will help you decide when and where to use each one effectively in your garden.
Topsoil is characterised by its loamy texture, which is the result of a balanced mix of sand, silt, and clay.
This combination offers excellent drainage while retaining moisture and nutrients. Its structure allows for good aeration, making it a versatile choice for various gardening purposes.
Compost, on the other hand, has a crumbly and loose structure. It’s a lightweight, organic material that’s rich in humus. While compost also provides good aeration, it excels at retaining moisture due to its high organic matter content.
Compost is ideal for improving soil structure and water-holding capacity.
The difference in texture and structure means that topsoil is often used for levelling uneven surfaces, filling holes, and providing a solid foundation for plants.
Compost, on the other hand, is particularly valuable for enhancing soil structure and fertility, making it an excellent choice for amending garden beds and enriching the soil.
While topsoil contains essential nutrients, its nutrient content can vary depending on its source. It’s generally not as nutrient-rich as compost.
However, it provides a solid foundation for plants and can be enriched by blending it with compost or other organic matter.
Compost is teeming with nutrients. It’s a valuable source of organic matter, nitrogen, phosphorus, potassium, and micronutrients that are readily available to plants. Using compost can significantly boost soil fertility, promoting healthy growth and robust plants.
The difference in nutrient content means that topsoil may be the preferred choice when you need a neutral and stable base for your garden, while compost is invaluable for enhancing the nutritional profile of your soil.
In some cases, a combination of both may be the best approach to achieve optimal soil quality for your plants.
The pH level of topsoil can vary depending on its source and geographic location. It typically falls within the neutral range, around 6 to 7 on the pH scale, which is suitable for a wide range of plants.
However, it’s essential to test the pH of the topsoil you’re working with and amend it if necessary to meet the specific requirements of your plants.
Compost tends to have a slightly acidic to neutral pH, making it suitable for many plants. However, it’s not a significant factor in deciding whether to use compost since you can easily adjust the pH of your garden soil separately.
The difference in pH levels means that topsoil may require more attention to ensure it meets your plants’ specific pH requirements, while compost’s pH is usually in a range that suits most plants.
Understanding these differences helps you make informed decisions about whether to use topsoil or compost in your garden. It’s often the combination of these factors that determines the best choice for your gardening needs.

Understanding when to use topsoil is crucial, as it serves as the foundation for various gardening projects.
Topsoil is the go-to solution when your garden has uneven surfaces, holes, or depressions. Whether due to natural settling, erosion, or other factors, these imperfections can hinder the healthy growth of your plants.
Topsoil, with its consistency and texture, provides an ideal medium for levelling and filling these uneven areas. It ensures that your garden has a smooth and stable surface, preventing water from pooling in low spots and promoting even plant growth.
In this application, you would spread a layer of topsoil over the depressed areas, then level and compact it as needed. This not only addresses the visual aspect but also improves the root environment for your plants.
It’s a practical way to rectify any unsightly and problematic irregularities in your garden.
When it comes to establishing a new lawn or rejuvenating an existing one, topsoil is your trusted companion. A lush and healthy lawn requires a level and well-prepared soil base to allow grass seeds to take root and grow successfully.
Topsoil’s fine texture and balanced composition create an ideal substrate for this purpose.
To use topsoil for lawn establishment, you’d typically spread a layer of it over the area you want to seed or lay sod on. Afterward, you’d rake and level the topsoil to create a smooth surface.
This provides the perfect conditions for grass seeds to germinate and establish healthy roots. Topsoil not only helps with initial growth but also aids in long-term lawn health by providing a fertile and stable foundation.
For gardeners who prefer raised beds or container gardening, topsoil is an excellent choice.
Raised beds often require substantial amounts of soil, and topsoil’s composition ensures proper drainage and moisture retention, two key factors for successful raised bed gardening.
Containers, whether large pots or smaller planters, benefit from the use of topsoil as well, especially when paired with regular compost amendments.
Topsoil used in raised beds can be further enriched by incorporating compost or other organic matter.
This blend offers an optimal environment for your plants, giving them the stability they need while still enjoying the benefits of enhanced nutrient content and water retention provided by the compost.
Topsoil’s versatility is evident in these applications, where it serves as the groundwork for plant health and growth, whether in a lawn or within confined spaces like raised beds and containers.

Compost is a gardener’s best friend when it comes to enhancing soil quality and promoting plant growth. Let’s explore specific scenarios where compost takes the spotlight.
Compost’s ability to enrich the soil is its hallmark feature. Whether you’re working with garden beds, vegetable patches, or flower borders, incorporating compost significantly boosts soil fertility and structure.
The rich organic matter in compost enhances microbial activity, promoting nutrient cycling and creating a robust, living soil ecosystem.
To enrich your garden soil with compost, spread a layer of it over the surface and work it into the top few inches of soil. This process not only adds essential nutrients but also improves soil structure, making it looser and more crumbly.
Compost helps sandy soils retain more moisture and clay soils drain better, ultimately creating an optimal environment for plant roots.
Compost is also a valuable tool for mulching, which offers several benefits. When you apply a layer of compost around the base of your plants, it acts as a protective barrier that retains soil moisture, regulates soil temperature, and reduces weed growth.
This natural mulch helps your garden maintain a consistent moisture level, especially during hot summer months or dry spells.
The suppression of weeds is an added advantage of compost mulch. By blocking sunlight and providing a physical barrier, compost makes it challenging for weed seeds to germinate and establish.
This means less time spent weeding and more time enjoying your garden.
Composting is a sustainable practice that recycles organic matter from your kitchen and garden waste. Instead of sending organic materials to landfills, you can turn them into nutrient-rich compost.
This not only reduces waste but also supports environmental sustainability.
Creating your compost at home is a cost-effective way to recycle organic matter. There are various methods for composting, including traditional compost bins and worm composting (vermicomposting).
These methods allow you to transform kitchen scraps, leaves, grass clippings, and other organic materials into compost that you can use to improve your garden’s soil health.
Compost’s role in recycling organic matter has broader implications for sustainability, as it reduces the demand for chemical fertilisers and helps create a closed-loop system in your garden.
These scenarios highlight the versatility and environmental benefits of using compost in your garden. Whether you’re looking to enrich soil, suppress weeds, or contribute to sustainable practices, compost plays a pivotal role in promoting a thriving garden ecosystem.

In many gardening situations, a combination of both topsoil and compost can provide the best of both worlds.
The process of creating a custom soil mix allows you to tailor the soil to the specific needs of your plants and garden projects.
Creating your custom garden soil mix involves blending topsoil and compost in varying proportions based on your requirements.
This custom mix can provide the advantages of both topsoil and compost, resulting in a fertile, well-draining, and moisture-retaining soil that’s perfect for many different plants.
The typical ratio for a garden soil mix is approximately one part topsoil to one part compost. This balance maintains the desirable texture and structure of topsoil while infusing the soil with the nutrient-rich and moisture-retentive properties of compost.
However, the specific ratio can vary depending on the plant’s needs, your local climate, and other factors.
To create your garden soil mix, spread both the topsoil and compost over your garden bed or container and use a rake or tiller to incorporate the materials thoroughly.
The goal is to achieve an even distribution, ensuring that the resulting mix supports plant growth and health.
The combination of topsoil and compost offers a range of benefits:
When creating your garden soil mix, consider the specific requirements of your plants. Some plants prefer a well-drained soil, while others thrive in moisture-retentive conditions.
Understanding the needs of your garden will help you adjust the proportions of topsoil and compost accordingly.
Additionally, always test your garden soil’s pH and amend it as needed to match the requirements of your plants.
The pH adjustment can be performed either by adding specific amendments or by blending topsoil with naturally acidic or alkaline compost to achieve the desired pH range.
Remember that the perfect blend is not a one-size-fits-all solution but a customisable approach to tailor your soil to the unique needs of your garden.
Topsoil vs Compost Frequently Asked Questions
Absolutely! Mixing topsoil and compost can provide a balanced and nutrient-rich environment for your plants.
Compost is generally beneficial for most plants, but it’s especially advantageous for vegetables, flowers, and herbs.
Assess your garden’s current soil quality and the specific needs of the plants you want to grow. Topsoil is great for levelling and filling, while compost improves soil structure and nutrient content.
Certainly! Home composting is an eco-friendly way to recycle kitchen and garden waste. There are numerous resources and guides available to help you get started.
While topsoil and compost are common choices, other options like peat moss, perlite, and vermiculite can also be beneficial for certain gardening purposes.
In the dynamic realm of gardening, the choice between “Topsoil vs Compost” isn’t a matter of one being superior to the other. It’s about knowing when to wield the right tool for the job.
Topsoil, with its stable foundation, is excellent for levelling, filling, and providing a consistent surface for your plants. Compost, on the other hand, enriches the soil, fosters healthy growth, and champions sustainable practices.
In your journey as a gardener, the versatility of both topsoil and compost will be your allies, allowing you to cater to the unique needs of your garden. Your intuition and experience as a gardener will guide you towards the best choice for your green oasis.
Whether it’s topsoil, compost, or a harmonious blend of both, your garden will flourish under your dedicated care.
So, with the knowledge of “Topsoil vs Compost” in your toolkit, go forth and create a garden that flourishes and thrives. Happy gardening!
Mushrooms on lawn causing you frustration and compromising the beauty of your outdoor space? You’re not alone.
Many homeowners grapple with this issue. In this detailed guide on how to get rid of mushrooms on your lawn, we’ll explore effective strategies to tackle this problem head-on.
From identifying the types of mushrooms to understanding the reasons behind their appearance, we’ll leave no stone unturned.
You’ll learn about natural removal methods, chemical control options, and proactive measures to maintain a lush, mushroom-free lawn.
Whether you’re a gardening enthusiast or a homeowner seeking solutions, this guide is your roadmap to a picture-perfect lawn without the intrusion of those unwanted fungi.
Let’s embark on this journey to reclaim your lawn’s pristine allure. Discover the insights and techniques you need to create a mushroom-free haven right in your own garden.

Before we delve into the removal process, it’s essential to identify the types of mushrooms in your lawn.
Not all mushrooms are harmful, and some can even be beneficial. Let’s discuss common varieties and how to differentiate them.
When it comes to lawn mushrooms, there are three primary categories you should be aware of:
1. Saprophytic Mushrooms: These mushrooms feed on decaying organic matter in your soil. While they may not directly harm your lawn, they can be unsightly. Common examples include the classic white button mushroom and the ink cap.
2. Mycorrhizal Mushrooms: These mushrooms form beneficial relationships with certain trees and shrubs. They can actually enhance your lawn’s health by aiding in nutrient absorption. Examples include the beautiful fly agaric and the chanterelle.
3. Parasitic Mushrooms: Parasitic mushrooms, like the lawn blister fungus, can be detrimental to your grass. They directly attack living plants and should be dealt with promptly.
To accurately identify these mushrooms, consider consulting with a local horticultural expert or using field guides specific to your region.
Understanding the root causes of mushroom growth is crucial to effective removal.
Several factors contribute to their presence, and addressing these factors is key to keeping your lawn mushroom-free.
1. Moisture Levels: Mushrooms thrive in moist environments. Lawns that are overwatered or have poor drainage are more susceptible to mushroom growth. To combat this, ensure you’re watering your lawn correctly and addressing drainage issues.
2. Soil Composition: Certain soil types are more conducive to mushroom growth. Mushrooms love rich, organic soils. If your lawn soil is too rich in organic matter, consider amending it with sand or other materials to reduce fungal habitat.
3. Organic Matter: Mushrooms feed on decaying organic matter, such as thatch and dead tree roots. Regular dethatching and removal of organic debris can reduce mushroom growth opportunities.
Proper watering techniques are paramount to preventing mushroom growth. Many homeowners inadvertently create the ideal environment for mushrooms by watering too frequently or at the wrong times.
To prevent overwatering, consider these tips:
By adjusting your watering habits, you can significantly reduce the risk of mushroom growth in your lawn.
Inadequate drainage is a common contributor to mushroom problems. When your lawn retains excess water, it creates an ideal habitat for fungi to flourish.
Here’s how to improve lawn drainage:
Proper drainage not only prevents mushrooms but also contributes to a healthier lawn overall.
Mushrooms thrive on decaying organic matter, so reducing their food source can be highly effective in preventing their growth.
Here’s how to reduce organic matter:

Sometimes, the best way to deal with mushrooms is to get your hands dirty. Manual removal involves physically plucking the mushrooms from your lawn. While it may seem time-consuming, it can be an effective method, especially for small infestations.
To manually remove mushrooms:
Nature has its own way of dealing with mushroom growth. Some creatures, such as slugs, snails, and certain insects, feed on mushrooms. By encouraging these natural predators in your lawn, you can help control mushroom populations.
To promote natural predators:
For more severe mushroom infestations, you may consider using fungicides as a last resort. Fungicides are chemical compounds formulated to control fungal growth. However, it’s essential to use them responsibly and selectively, as they can have environmental consequences.
If you’ve tried various methods and the mushroom problem persists or worsens, it may be time to seek professional assistance. Landscaping and lawn care experts have the knowledge and tools to tackle persistent mushroom issues effectively.
When considering professional help:

Prevention and maintenance go hand in hand. Once you’ve rid your lawn of mushrooms, it’s crucial to maintain healthy practices to prevent their return.
Consistent monitoring and quick action are essential in keeping mushrooms at bay. Make it a routine to inspect your lawn for any signs of fungal growth. Remember that prevention is often more straightforward than cure.
Not all mushrooms are harmful. Some are actually beneficial to your lawn’s health. It’s essential to identify the types before deciding to remove them. Refer to the “Identifying Lawn Mushroom Types” section for more details.
The frequency of watering depends on various factors like climate and soil type. Generally, aim for deep, infrequent watering rather than frequent shallow watering to discourage mushrooms. For detailed guidance, see the “Adjusting Lawn Watering Practices” section.
While vinegar is a popular DIY remedy, it’s essential to use it cautiously, as it can affect your lawn’s pH balance. It’s better to explore other natural removal methods first. For alternatives, see the “Natural Removal Methods” section.
Fall and spring are ideal seasons for addressing mushroom issues. The moderate temperatures and moisture levels make these times conducive for lawn care. For more information, see the “Maintaining a Mushroom-Free Lawn” section.
It’s crucial to follow the manufacturer’s instructions and keep pets and children off treated areas until they are deemed safe. Consider safer alternatives if you have concerns about chemical use around your loved ones. For detailed guidance, refer to the “Fungicides” section.
In closing, our exploration of mushrooms on lawn and the effective methods to address them has equipped you with the expertise needed to transform your outdoor space.
By understanding the various types of mushrooms, deciphering the factors leading to their appearance, and implementing proven removal techniques, you now possess the tools to create the immaculate, mushroom-free lawn you’ve envisioned.
Maintaining a beautiful lawn extends beyond aesthetics; it’s about cultivating an inviting outdoor retreat for yourself and your loved ones.
With the strategies outlined in this guide, you are fully prepared to restore your lawn’s natural allure.
Now, take action with confidence, bid farewell to unwanted mushrooms, and embrace the journey towards a captivating, mushroom-free lawn.
Your vision of a pristine outdoor space is not only attainable but also well within your grasp. Enjoy the rewards of a garden that’s free from mushrooms, where beauty and tranquility reign supreme.
Welcome to the fascinating world of lawn thatch—an often overlooked yet crucial aspect of maintaining a beautiful and vibrant lawn.
Together, we’ll uncover the mysteries of lawn thatch, explore the reasons behind its presence, and equip you with effective methods to conquer it.
Prepare to discover the secrets to achieving a lush and healthy lawn that will be the envy of your neighbourhood.

Lawn thatch is a complex mixture of organic matter that accumulates on the surface of your lawn. It consists of living and dead grass shoots, stems, and roots, along with other organic debris.
Over time, these materials build up, forming a layer that lies between the soil and the green grass blades.
Thatch is not inherently harmful; it’s a natural part of the lawn ecosystem. However, problems arise when thatch becomes too thick or compacted.
This can impede the flow of water, air, and nutrients to the grass roots, leading to a range of issues.
It’s crucial to differentiate between thatch and ordinary lawn debris.
While debris can be easily removed, thatch requires more specialised attention.
In the following sections, we’ll delve deeper into why thatch can be problematic for your lawn and how to identify it.
Thatch can become problematic when it reaches a certain thickness because it limits the movement of essential nutrients to the grass roots. This impediment can result in malnourished grass, leading to poor growth and overall lawn health.
As the thatch layer becomes compacted, it essentially acts as a barrier, preventing fertilisers and nutrients from penetrating the soil and reaching the root zone where they are needed most.
This nutrient deficiency can manifest as pale, unhealthy grass that struggles to thrive.
Excessive thatch can also interfere with proper water drainage. When rainfall or irrigation water cannot penetrate the thatch layer efficiently, it often accumulates on the surface, leading to puddles and runoff.
This not only wastes water but can also create uneven moisture distribution across the lawn.
Some areas may become waterlogged, leading to root rot and other moisture-related problems, while others may remain parched and susceptible to drought stress.
Thatch provides an ideal environment for pests and diseases to thrive. The moisture-rich layer creates a microclimate conducive to the development of fungi, molds, and harmful insects.
This can lead to infestations and diseases that harm your grass. In particular, fungi like brown patch and dollar spot thrive in the sheltered, humid conditions that thatch can create.
Furthermore, the presence of pests and diseases in the thatch layer can disrupt the health of your lawn, making it more vulnerable to stress factors such as extreme weather conditions. Healthy, well-maintained lawns are better equipped to resist these challenges.
Understanding why thatch is problematic is the first step in effective lawn care. In the next section, we will explore how to identify thatch in your lawn.
To determine if your lawn has a thatch issue, you can perform a straightforward test known as the “thatch test.” Here’s how it works:
When performing this test, it’s important to do it in multiple spots across your lawn to get an accurate assessment of the thatch layer’s thickness. If the tool consistently encounters resistance, it’s a sign that your thatch layer may need attention.
Another method to identify thatch is through visual inspection. Follow these steps:
Visual inspection can provide a clearer indication of the thatch’s thickness and density. Thicker thatch layers are more likely to cause problems and may require removal or management.
Once you’ve identified thatch in your lawn, the next steps involve addressing it. In the upcoming sections, we’ll explore strategies to prevent thatch build-up and methods for removing it.

Maintaining the right mowing practices can significantly reduce the likelihood of thatch build-up.
One common mistake is cutting the grass too short, a practice known as “scalping.” Scalping can stress the grass and encourage the development of thatch. Instead, aim to follow the one-third rule: never remove more than one-third of the grass blade’s height in a single mowing session.
Taller grass shades the soil, reducing evaporation and the accumulation of debris, which can help prevent thatch formation.
Aeration is a crucial practice for preventing thatch build-up. It involves perforating the soil with holes to improve air circulation, water infiltration, and nutrient absorption.
When soil is compacted, it promotes thatch development. Aerate your lawn by using a lawn aerator or aerating shoes, ensuring the holes are evenly spaced across the lawn. This process reduces compaction, encourages root growth, and disrupts thatch formation.
Selecting the appropriate grass type for your region and soil conditions can make a significant difference in thatch prevention. Some grasses are inherently less prone to thatch build-up than others.
Research and choose grass varieties suited to your area to minimise thatch concerns.
By adopting these preventive measures, you can reduce the likelihood of thatch build-up in your lawn and ensure its long-term health.
In the following section, we will explore various methods for removing thatch should it become problematic.
Dethatching rakes are invaluable tools for removing thatch manually. These specialised rakes have sharp tines designed to penetrate the thatch layer and lift it to the surface. When using a dethatching rake, follow these steps:
Dethatching can be physically demanding, especially for larger lawns, but it’s an effective method for tackling moderate thatch issues.
Some lawnmowers come equipped with dethatching attachments, such as vertical blades or tines that penetrate the thatch layer while you mow. This can save time and effort, as it combines dethatching with regular lawn maintenance.
When using a dethatching mower attachment, make sure to set it to the appropriate depth to avoid damaging the grass.
For small areas with minimal thatch build-up, manual removal can be a practical option. Use a garden rake or a specialised thatch rake to gently lift and remove the thatch layer.
Take care not to damage the grass beneath as you work. Manual removal is best suited for spot treatments or smaller sections of your lawn.
The method you choose for removing thatch should align with the severity of the issue and the size of your lawn.
In the next section, we’ll explore the advantages of professional thatch removal and the steps involved.
In some cases, thatch build-up may be extensive, or you may prefer to leave the task to experts. If you notice signs of severe thatch, such as a spongy lawn surface, poor water drainage, or consistent problems despite your efforts, it may be time to consider professional thatch removal.
Additionally, if you have a large lawn, professional services can save you significant time and effort.
Professional thatch removal typically involves the use of specialised equipment that efficiently removes thatch without harming your grass. Here’s a general overview of the process:
Professional thatch removal is efficient and effective, and it ensures that the thatch issue is properly addressed. Once thatch is removed, it’s important to follow up with lawn renovation to promote healthy growth, which we’ll explore in the next section.
After removing thatch, your lawn may have areas where grass has been thinned out. To promote a full and healthy lawn, consider overseeding.
Overseeding involves spreading grass seeds evenly across your lawn, filling in gaps left by the removal of thatch. It’s a crucial step in rejuvenating your lawn and encouraging denser grass growth.
Before overseeding, ensure that the soil is well-prepared. This may involve raking the soil lightly and providing adequate moisture to help the new grass seedlings establish themselves. Choose a grass seed variety that matches your existing lawn for a seamless blend.
Following thatch removal and overseeding, it’s essential to fertilise your lawn to provide essential nutrients for recovery and growth. Fertilisers with balanced N-P-K (nitrogen, phosphorus, and potassium) ratios are ideal for most lawn types.
Consult with a local garden centre or lawn care expert to determine the right type and timing of fertiliser for your specific grass variety.
Proper watering is critical after thatch removal, overseeding, and fertilisation. Keep the soil consistently moist but not waterlogged to support healthy growth.
Frequent, shallow watering can encourage shallow root development, so opt for deep, infrequent watering sessions. Continue to mow your lawn regularly, adhering to the one-third rule, to promote even growth and discourage thatch accumulation.
Now that we’ve covered post-thatch-removal care, let’s delve into strategies for preventing thatch build-up in the first place.

A consistent lawn care routine is one of the most effective ways to prevent thatch build-up. This routine should include proper mowing, watering, and fertilisation.
Following the one-third rule for mowing and ensuring your lawn receives the right amount of water and nutrients will help maintain a healthy balance in your lawn.
Additionally, avoid over-fertilisation with high-nitrogen fertilisers, as excessive nitrogen can contribute to thatch formation. Consider slow-release fertilisers to provide a steady nutrient supply to your grass without the risk of overfeeding.
Periodically testing your soil is a proactive approach to thatch prevention. Soil tests can reveal imbalances in pH levels and nutrient content. Adjusting the soil’s pH as needed can discourage thatch development.
Most grasses thrive in slightly acidic soils with a pH range of 6 to 7, so consider adding lime to raise pH or sulphur to lower it based on the test results.
If your soil is too acidic (below pH 6), it may promote thatch formation. Adding lime to the soil can help raise the pH level, making it more favourable for grass growth and less conducive to thatch build-up. Conversely, if your soil is too alkaline (above pH 7), consider adding sulphur to lower the pH.
By maintaining proper soil pH, you create an environment that discourages excessive thatch accumulation.
In the next section, we’ll explore the benefits of having a thatch-free lawn, which can serve as motivation to implement these prevention strategies.
A lawn free of thatch not only looks more appealing but also feels better underfoot. Thatch-free lawns have a lush and uniform appearance, with grass that appears healthier and greener.
The absence of a thatch layer creates a smooth and even surface that enhances the overall aesthetics of your outdoor space.
A thatch-free lawn is a healthier lawn. Without the hindrance of excessive thatch, your grass can access vital nutrients, water, and air more effectively.
This improved nutrient absorption leads to robust and vibrant grass, making your lawn more resilient to environmental stressors such as drought, disease, and pests.
Maintaining a thatch-free lawn can translate to lower long-term maintenance costs. Since your grass is healthier and better nourished, it requires fewer inputs like fertilisers, pesticides, and water.
This not only saves you money but also reduces your environmental footprint by minimising the use of chemicals and water resources.
Now that you understand the advantages of a thatch-free lawn, let’s debunk some common myths associated with thatch.
Contrary to this belief, thatch can be detrimental to your lawn’s health and appearance when it becomes excessive.
While a thin layer of thatch can have some benefits, a thick layer impedes nutrient and water flow, leading to an unhealthy lawn.
While dethatching may temporarily stress your grass, it ultimately leads to a healthier lawn by allowing it to absorb nutrients and water more efficiently. The benefits of removing thatch far outweigh the short-term stress your grass may experience.
By dispelling these myths and understanding the importance of proper thatch management, you can make informed decisions to ensure your lawn’s long-term health and beauty.
While chemical thatch removers are available, they are not typically recommended as a first resort. These products can be harsh on your lawn and the environment.
Mechanical methods, like dethatching rakes or specialised equipment, are generally preferred for thatch removal. Chemical treatments should be used cautiously and strictly according to the manufacturer’s instructions.
The frequency of dethatching depends on the severity of thatch build-up and your specific grass type. In general, dethatching is typically done every 2-3 years or when you observe thatch to be more than half an inch thick.
Cool-season grasses may require more frequent dethatching compared to warm-season varieties.
Yes, you can take several natural steps to reduce thatch build-up. These include maintaining a proper lawn care routine, aerating the soil, and avoiding over-fertilisation with high-nitrogen fertilisers.
These practices promote healthy grass growth and discourage excessive thatch accumulation.
While it’s possible to compost thatch, it decomposes slowly due to its dense nature. It’s generally more practical to use removed thatch as mulch in your garden or landscape beds. If you choose to compost it, you may need to shred it and mix it with other compostable materials to aid decomposition.
When done correctly, dethatching should not harm your grass. While it may temporarily stress the grass, it ultimately promotes healthier growth by improving nutrient and water absorption. Be sure to follow best practices, such as proper timing and technique, to minimise any potential stress.
Understanding and managing lawn thatch is essential for maintaining a lush and thriving lawn.
By following the tips, methods, and information provided in this comprehensive guide, you’re well-equipped to tackle thatch issues, prevent future build-up, and enjoy the benefits of a beautiful, healthy lawn.
Remember that lawn care is an ongoing process, and consistent maintenance is key to long-term success.